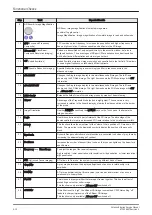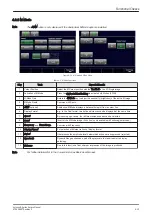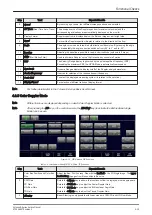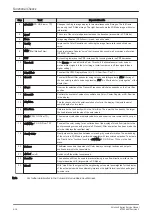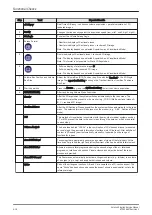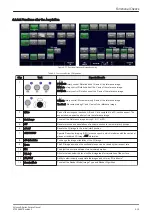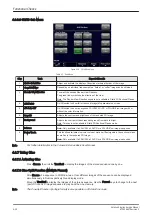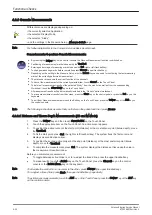
4.3.8.4 Measurements in Spectral Doppler Mode
Note
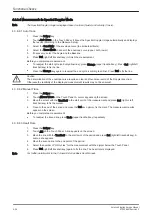
The Spectral Doppler image is displayed based on time (X-axis) and velocity (Y-axis).
4.3.8.4.1 Auto Trace
1.
Press the Caliper key.
2.
Touch
Auto Trace
on the Touch Panel. It traces the Spectral Doppler image automatically and displays
the results (according to the Measure Setup).
3.
Select the Sensitivity of the envelope curve (to eliminate artifacts).
4.
Select the Trace Mode channel of the envelope curve (upper, both, lower).
5.
If necessary, select the Angle and the Baseline.
6.
Press Set (right/left trackball key) to finish the measurement.
Before you complete a measurement:
•
To readjust the start cycle (vertical yellow line), press Change (upper trackball key). Press Set (right/left
trackball key) to fix the line.
•
Press the Change key again to readjust the end cycle (vertical green line). Press Set to fix the line.
Caution
The determination of the envelope curve requires a clear and low-noise record of the Doppler spectrum.
Otherwise the reliability of the displayed measurement results may not be ensured!
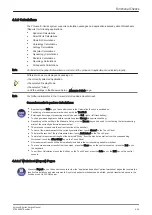
4.3.8.4.2 Manual Trace
1.
Press the Caliper key.
2.
Touch
Manual Trace
on the Touch Panel. A cursor appears on the screen.
3.
Move the cursor with the Trackball to the start point of the measurement and press Set (right or left
trackball key) to fix the marker.
4.
Trace to the end of the period and press the Set key again to fix the mark. The measurement results
appear on the screen.
Before you complete a measurement:
•
To readjust the traced line, press Undo (upper trackball key) repeatedly.
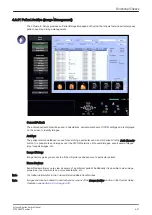
4.3.8.4.3 Heart Rate
1.
Press the Caliper key.
2.
Touch
HR
on the Touch Panel. A line appears on the screen.
3.
Move the line with the Trackball to the start point of the period and press Set (right/left trackball key). A
second line appears.
4.
Move the second line to the end point of the period.
5.
Select the number of “HR cycles” for the measurement with the digipot below the Touch Panel.
6.
Press Set (right/left trackball key) again to fix the line. The heart rate is displayed.
Note
For further details refer to the Voluson E-Series Basic User Manual.
Functional Checks
4-24
Voluson E-Series Service Manual
KTD106657 Revision 2
Содержание H48681XB
Страница 11: ...Introduction Voluson E Series Service Manual KTD106657 Revision 2 1 3 ...
Страница 12: ...Introduction 1 4 Voluson E Series Service Manual KTD106657 Revision 2 ...
Страница 13: ...Introduction Voluson E Series Service Manual KTD106657 Revision 2 1 5 ...
Страница 14: ...Introduction 1 6 Voluson E Series Service Manual KTD106657 Revision 2 ...
Страница 15: ...Introduction Voluson E Series Service Manual KTD106657 Revision 2 1 7 ...
Страница 16: ...Introduction 1 8 Voluson E Series Service Manual KTD106657 Revision 2 ...
Страница 17: ...Introduction Voluson E Series Service Manual KTD106657 Revision 2 1 9 ...
Страница 36: ...This page was intentionally left blank Introduction 1 28 Voluson E Series Service Manual KTD106657 Revision 2 ...
Страница 172: ...This page was intentionally left blank Functional Checks 4 46 Voluson E Series Service Manual KTD106657 Revision 2 ...
Страница 226: ...This page was intentionally left blank Service Adjustments 6 8 Voluson E Series Service Manual KTD106657 Revision 2 ...
Страница 288: ...This page was intentionally left blank Replacement Procedures 8 30 Voluson E Series Service Manual KTD106657 Revision 2 ...
Страница 364: ...This page was intentionally left blank Care and Maintenance 10 24 Voluson E Series Service Manual KTD106657 Revision 2 ...
Страница 365: ......
Страница 366: ...GE Healthcare Austria GmbH Co OG Tiefenbach 15 4871 Zipf Austria www gehealthcare com ...

