186
* The miniSD memory card is optional for use in this terminal.
→
p.353
Camera
<
P
hot
o m
ode
>
d
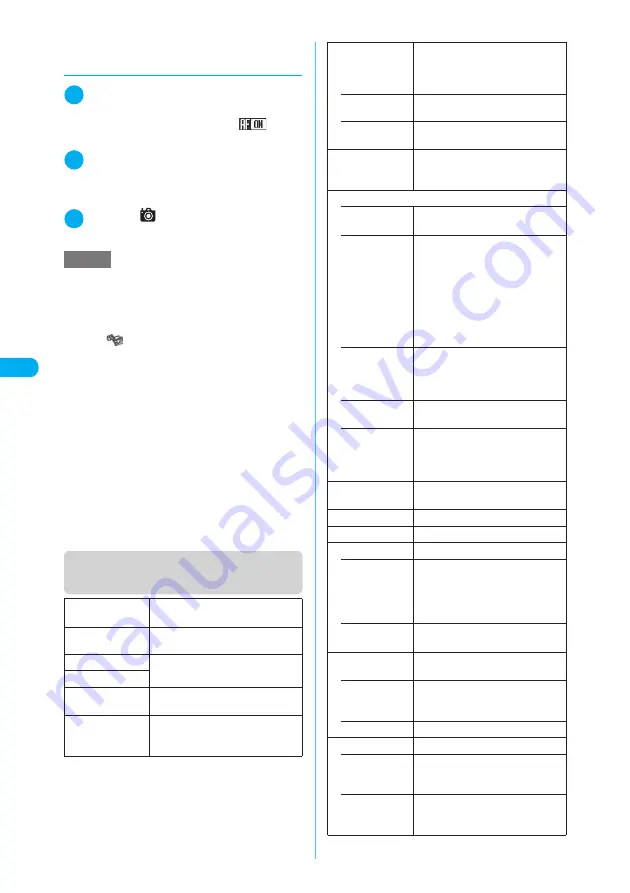
Shooting still images with AF
lock
1
Photo mode screen (p.185)
X
Press
f
to set the auto focus to “ON”
Confirm that the auto focus icon is “
”.
→
p.182
2
Point the camera at an object
X
g
Pressing
g
again resets the focus lock. Complet-
ing the focus lock turns the focus frame into green
and sounds the AF lock tone.
3
d
or
s
(
)
The image is shot.
Function menu (Photo mode
screen/Continuous mode screen)
NOTE
e
It may take some time to lock focus. If the focus lock
is failed, the AF lock tone does not sound and the
focus frame turns into dotted red.
e
Following the steps below also displays the Photo
mode screen:
a
i
X
(LifeKit)
X
“Camera”
X
“Photo mode”
e
Some images may go grainy, depending on the sizes.
When you set the “Display size” to “Fit in display” and
shoot an image in QCIF (176 × 144) or in SubQCIF
(128 × 96), the image may look grainy.
e
Do not remove the miniSD memory card while saving
an image to the miniSD memory card. Doing so may
cause a FOMA terminal and miniSD memory card to
malfunction.
e
If the battery is low, you may be unable to save the
shots.
e
Turning off a FOMA terminal or removing the battery
pack during the file saving process may save incom-
plete files.
e
The incoming call lamp flashes in green while data is
being saved to the miniSD memory card.
Front camera/
Rear camera
Switches between front camera and
rear camera.
CHG camera-
mode
Changes the camera mode.
Select size
Performs the settings as you do with
the shooting menu (p.183).
Storage setting
AFchange
Turns on/off the auto focus on the
rear camera.
Light
Turns on/off the light. The light
cannot be turned on/off when using
the front camera.
LifeKit
Select finder
*2
Sets whether the preview of the
image shot with a FOMA terminal
open will be shown on the display or
image display.
• Front
(default)
Shows the preview on the display.
• Rear
Shows the preview on the image
display.
Interval/Number
*1
Sets the shooting interval and the
number of shots you want to take on
the continuous mode.
→
p.190
Image quality
• Photo mode
“Selecting the mode suitable for
shooting”
→
p.194
• Brightness
X
Use
v
to adjust the brightness
X
d
Selects the brightness among 5
levels from “
−
2 to
±
0 to
+
2”.
The brightness is automatically
specified if you do not press any
keys for two seconds.
“
±
0” is the default setting when the
camera launches.
• White bal-
ance
“Setting the white balance”
→
p.193
The white balance cannot be
specified unless Photo mode is
“OFF”.
• Color mode
set
“Setting the effects on the
photographed images”
→
p.194
• Image tuning
“Avoiding the flicker on the
photographed images”
→
p.194
Cannot be changed when using the
front camera.
Shutter sound
Sets the shutter sound. “Sound 1” is
selected at the time of purchase.
Auto timer
Sets the auto timer.
→
p.198
Select frame
*2
Sets a frame for the image.
→
p.191
Auto save set
Turns on/off the auto save set.
• ON
Does not display the image
checking screen when you shoot an
image. The image is automatically
saved to the destination folder
specified in “Select to save”.
• OFF
(default)
Displays the image checking screen
when you shoot an image.
Select to save
Specifies the folder where the shot
is saved.
• Phone
(default)
X
Select a folder to save the image
The Camera folder under My picture
is selected at the time of purchase.
• miniSD
X
Select a folder to save the image
File restriction
Sets the file restrictions.
• File unre-
stricted
(default)
Allows the image to be sent or
forwarded from the FOMA terminal
that has received it.
• File restricted
Does not allow the image to be sent
or forwarded from the FOMA
terminal that has received it.


