Identifying the Location of Paper Jams
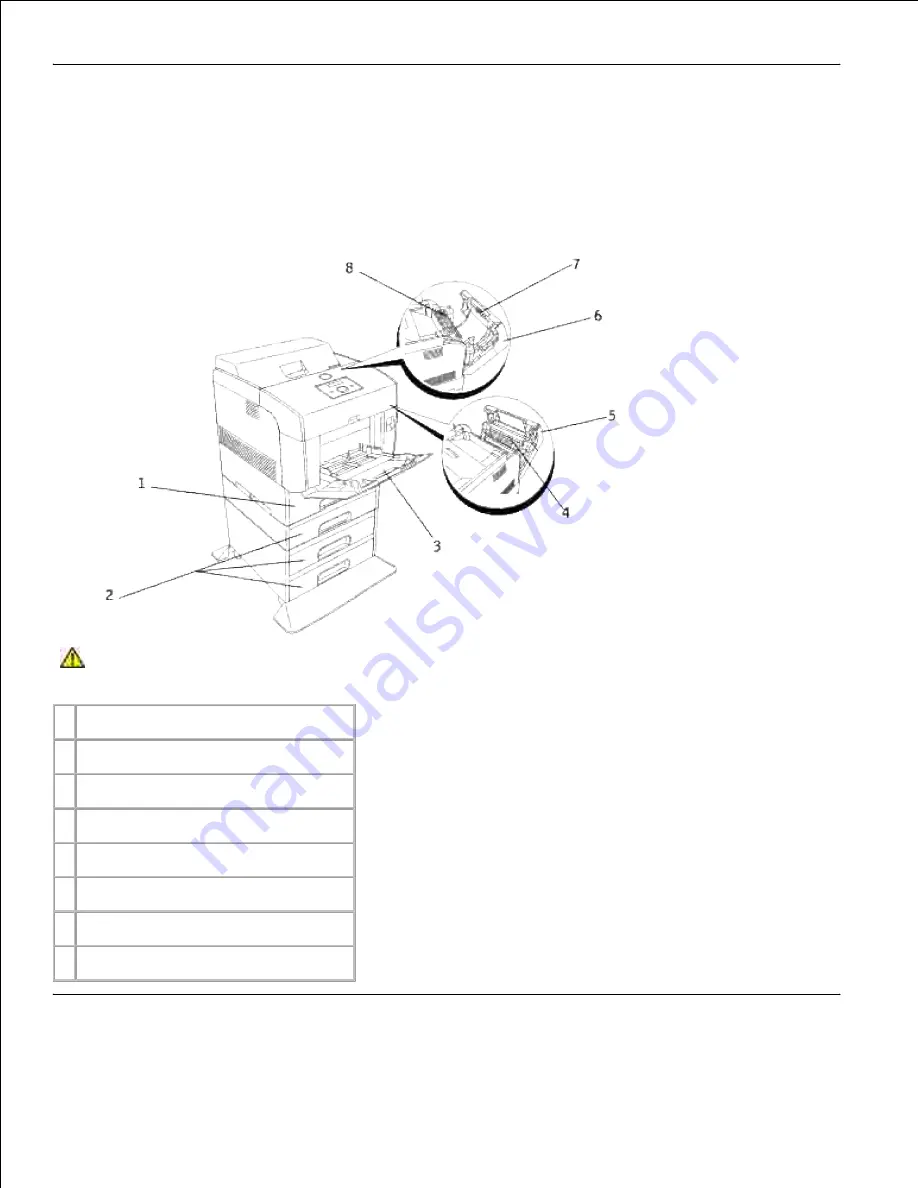
The following illustration shows where paper jams may occur along the print media path.
CAUTION:
Do not attempt to clear any jams using tools or instruments. This may
permanently damage the printer.
1 Standard tray
2 Optional tray modules
3 Multipurpose feeder
4 Between the imaging drum and fuser
5 Front cover
6 Outer Front Cover
7 Duplexer
8 Fuser
Содержание 5110cn - Color Laser Printer
Страница 4: ......
Страница 57: ......
Страница 62: ......
Страница 94: ...Ensure that the memory card is securely inserted in place 7 Insert the controller card into the printer 8 9 ...
Страница 109: ......
Страница 129: ...Transparency 36mm or 25 sheets Label 36mm Envelope 36mm ...
Страница 179: ...systems Software Update The firmware and or driver updates can be downloaded from www dell com printers ...
Страница 211: ...5 Close the front cover 6 Insert the tray into the printer and push until it stops 7 ...
Страница 223: ...Insert the trays into the printer Push the trays in until they stop 6 ...
Страница 282: ...Close the top cover 4 Close the front cover 5 How to install the Toner Cartridge 1 ...
Страница 286: ...To lock the transfer roller into the printer push down the tabs until you hear a click 3 Close the front cover 4 ...
Страница 293: ...Close the front cover 8 Turn on the printer 9 ...
Страница 339: ...Reattach the paper tray cover to the back of the printer 9 ...
Страница 343: ...Connection Cable certification 1 Parallel IEEE 1284 2 USB USB2 0 3 10 100Base Tx Ethernet CAT 5E 4 Wireless port ...


