Faxing
Xerox
®
WorkCentre
®
6655 Color Multifunction Printer 143
User Guide
Sending an Embedded Fax
1.
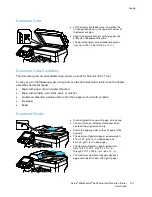
Load the original document in the document feeder or on the document glass.
2.
Press the
Services Home
button, then touch
Fax
.
3.
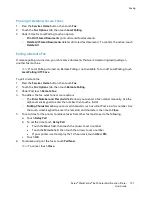
To address the fax, touch one or more options:
−
The
Enter Number and Press Add
field allows you to enter a fax number manually. Use the
alphanumeric keypad to enter the number, then touch
Add
.
−
Dialing Characters
allows you to insert characters such as a dial pause in a fax number. Use
the touch screen keypad to enter the numerals and characters, then touch
Add
. Add more
numbers, or touch
Close
.
Note:
One or more dialing pauses can be required between the access number for an outside line
and the fax number. When inserted, the dial pauses appear as commas in the fax number.
−
Favorites
allows you to access selected favorite individual or group contacts from the address
book.
−
Address Book
allows you to select fax numbers from your Address Book. Touch the
Down
arrow, then select
Individual
or
Group
from the drop-down menu. Touch the
Up
or
Down
arrows to scroll through the list, touch the desired contact, then select
Add to Recipients
from
the drop-down menu. Select and add more contacts, or touch
Close
.
4.
To include a cover sheet:
a.
Touch
Cover Sheet
>
On
.
b.
Touch the
To
field, use the touch screen keyboard to type the name of the recipient, then touch
Save
.
c.
Touch the
From
field, use the touch screen keyboard to type the name of the sender, then
touch
Save
.
d.
To add a comment, do one of the following:
•
Touch an existing comment, then touch
Save
.
•
Touch an
<Available>
comment, touch
Edit
, use the touch screen keyboard to type the
text, then touch
Save
.
Notes:
•
To delete an existing comment, touch the comment, then touch
Clear
. Touch
Clear
to confirm the
action.
•
To edit an existing comment, touch the comment, then touch
Edit
. Use the touch screen keyboard
to change the comment, then touch
Save
.
5.
Touch
2-sided Scanning
and select an option.

