Removal and Replacement
6-57
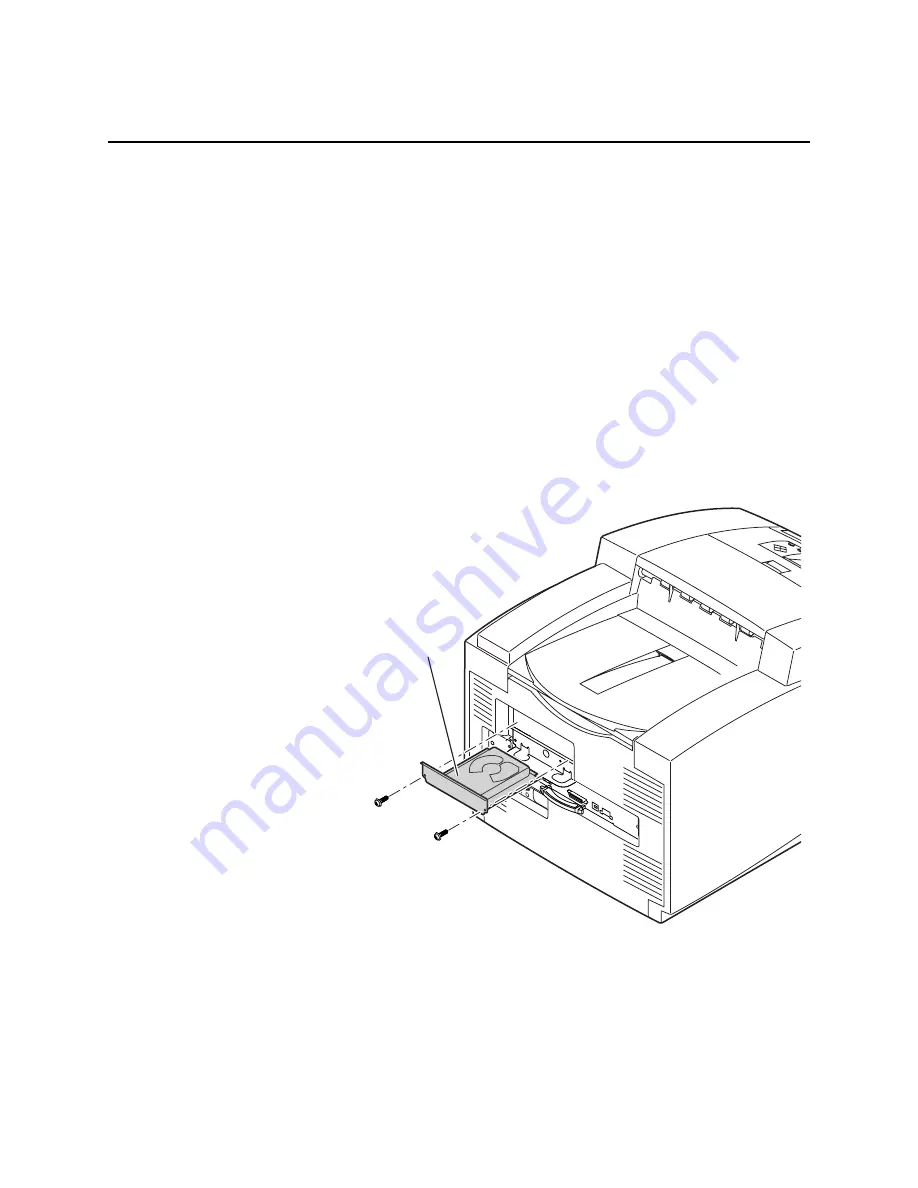
Installing the Internal Hard Drive
1. Power down the printer. Leave the power cord plugged in to
provide a ground path for static discharges.
2. Remove the network card or the network card slot cover plate,
whichever is in place.
3. Loosen the two securing screws holding the internal hard drive
or cover plate and remove it.
4. Slide in the replacement internal hard drive and tighten the
two screws.
5. Reinstall the network card or the network card slot cover plate,
whichever was removed earlier.
6. Turn on the printer and print the configuration page; it lists
information regarding the internal hard drive.
840-4-40
Internal
hard
drive
Figure 6-38. Installing Internal Hard Drive
Summary of Contents for Nuvera 100
Page 1: ...General Information 1 1 Chapter...
Page 24: ...1 24 ii LINX Solid Inkjet 100 Service Manual 1239 35b Figure 1 13 Repacking the Printer...
Page 27: ...General Information 1 27...
Page 28: ...1 28 ii LINX Solid Inkjet 100 Service Manual...
Page 79: ...Error Codes and Messages 2 1 Chapter...
Page 101: ...Troubleshooting 3 1 Chapter...
Page 145: ...Adjustments 4 1 Chapter...
Page 180: ...4 36 ii LINX Solid Inkjet 100 Service Manual...
Page 181: ...Cleaning and Maintenance 5 1 Chapter...
Page 190: ...5 10 iiLINX Solid Inkjet 100 Service Manual...
Page 191: ...Removal and Replacement 6 1 Chapter...
Page 249: ...Printer Networking 7 1 Chapter 7...
Page 280: ...7 32 ii LINX Solid Inkjet 100 Printer Service Manual...
Page 281: ...Material Number Listings A 1 Appendix...
Page 285: ...Material Number Listings A 5 7 5 6 8 1 2 4 0388 21 3 Figure A 1 Cabinet parts...
Page 289: ...Material Number Listings A 9 0388 16 2 1 5 11 10 9 12 6 4 3 7 13 8 Figure A 3 Paper Path Parts...
Page 291: ...Material Number Listings A 11 0388 14 7 4 3 5 6 2 1 Figure A 4 Motor and Fan Parts...
Page 295: ...Material Number Listings A 15 4 5 3 2 1 0388 23 Figure A 6 Solenoid and Clutch Parts...
Page 304: ...A 24 ii LINX Solid Inkjet 100 Service Manual...


