Rostock MAX v2 Assembly Guide
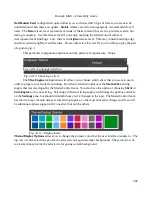
The last bit about speed settings I want to cover is the first layer speed. You'll see that it's
really
slow. The reason for this is that while hot plastic loves to stick to hot plastic, hot plastic doesn't like
sticking to other things as much. By going slowly on the first layer, you're giving the material time to
get a good grip on the surface of the bed. This is known as “part adhesion”. When a part comes
unstuck from the bed during a print, it's ruined. This isn't so bad when you're five minutes into a print,
but you'll be ready to flip a table when it happens 18 hours into a 19 hour print.
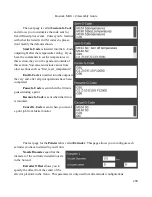
The
Skirt and Raft
page covers settings that control how the hot end is primed at the beginning
of a print job as well as features that help the part stick to the bed.
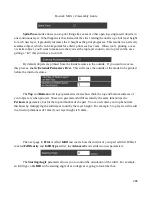
The first section covers the
Skirt
feature.
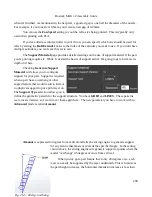
A skirt in this context is basically a series of
single-layer loops printed around the perimeter of
the part. This acts as a method to “prime” the hot
end with material before the actual part begins to
print.
Loops
defines how many times you want to
go around the print. This is tied to the
Minimum Extrusion Length
parameter. If the number of loops
you specify are not enough to meet that minimum length, additional loops will be added automatically.
The
Distance from Object
parameter dictates how far away the loop stands off from the part
outline. If you set the distance to zero, the skirt will become a “brim”. It will result in the loops being
printed connected to the first layer of your print. This can give small parts a first layer that has a larger
surface area to improve part adhesion. Since the brim is only a single layer thick, it's usually pretty
easy to remove after the print job has completed.
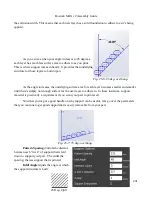
I mentioned earlier that hot plastic really
loves sticking to hot plastic, but not so much to
other things. If a brim isn't doing the job for you,
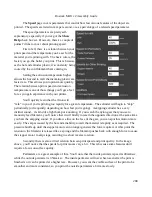
you can try a
Raft
.
When in
Intermediate
mode, the
Raft
setting was grouped with
Support Material
and
was simply an on/off thing. In
Advanced
mode,
you've got a lot more control over how the raft is
laid down.
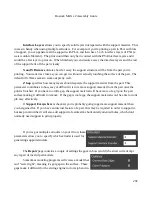
Expand Distance
is the distance you'd like the raft to exceed the base area of the part you're
printing. You may want to adjust this parameter if the part you're printing is larger than the bottom
contact point on the bed. A larger raft will help to support the part more effectively.
Air Gap
defines how much space you want between the top surface of the raft and the bottom
surface of your part. This gap helps make it easier (or even possible!) to remove the raft from your part
289
Summary of Contents for Rostock MAX v2
Page 25: ...Rostock MAX v2 Assembly Guide Melamine Parts Sheet 1 25 ...
Page 26: ...Rostock MAX v2 Assembly Guide Melamine Parts Sheet 2 Melamine Parts Sheet 3 26 ...
Page 27: ...Rostock MAX v2 Assembly Guide Melamine Parts Sheet 4 27 ...
Page 171: ...Rostock MAX v2 Assembly Guide 171 Fig 14 8 Spool holder support installed ...

