Rostock MAX v2 Assembly Guide
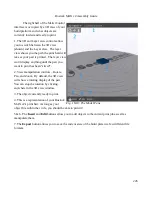
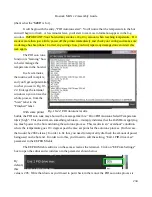
controls (outlined in blue, above) will allow you to manually move the effector platform around the
operating area. The X axis buttons will move the effector platform to the left (X-) and right (X+). The
Y axis buttons will move the Y axis toward the front of the machine (Y-) and toward the back of the
machine (Y+). The Z axis buttons will raise (Z+) and lower (Z-) the effector platform.
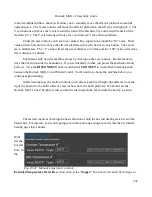
Under the axis controls you'll see four values with a square box around the “10” value. These
values dictate how much to move the effector platform with each click of an axis button. The values
are in millimeters. The “.1” value will set the travel distance to 0.1mm and the “100” value will set the
travel distance to 100mm.
Experiment with how the machine moves by clicking on the axis controls. Be careful not to
drive the hot end outside the boundaries. If you accidentally do that, just power the machine off and
back on. Click the
DISCONNECT
button and then hit
CONNECT
to re-establish communication
between the Rostock MAX v2 and MatterControl. You'll need to re-home the machine before you
continue experimenting.
While learning how the motion controls work, please keep the Z height (the distance from the
tip of the hot end to the build surface) a few inches above the build platform. We haven't set the
Rostock MAX's true Z height yet and you don't want to smash the hot end into the bed by accident.
The last test involves checking the basic function of both the hot end heating resistors and the
heated bed. For this test, you're only going to turn them on long enough to verify that they're indeed
heating up as they should.
We'll
test the
hot end
first. In
the
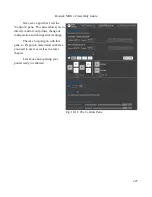
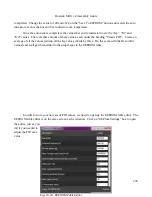
Extruder Temperature Override
section, click in the “
Target:
” box (where it reads 0.0) and type in
232
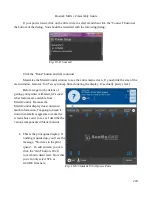
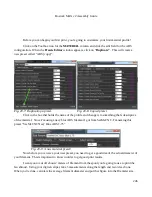
Fig. 19-21: Manual temperature controls.
Summary of Contents for Rostock MAX v2
Page 25: ...Rostock MAX v2 Assembly Guide Melamine Parts Sheet 1 25 ...
Page 26: ...Rostock MAX v2 Assembly Guide Melamine Parts Sheet 2 Melamine Parts Sheet 3 26 ...
Page 27: ...Rostock MAX v2 Assembly Guide Melamine Parts Sheet 4 27 ...
Page 171: ...Rostock MAX v2 Assembly Guide 171 Fig 14 8 Spool holder support installed ...


