69
Set the needed media type
Illustration
[20]
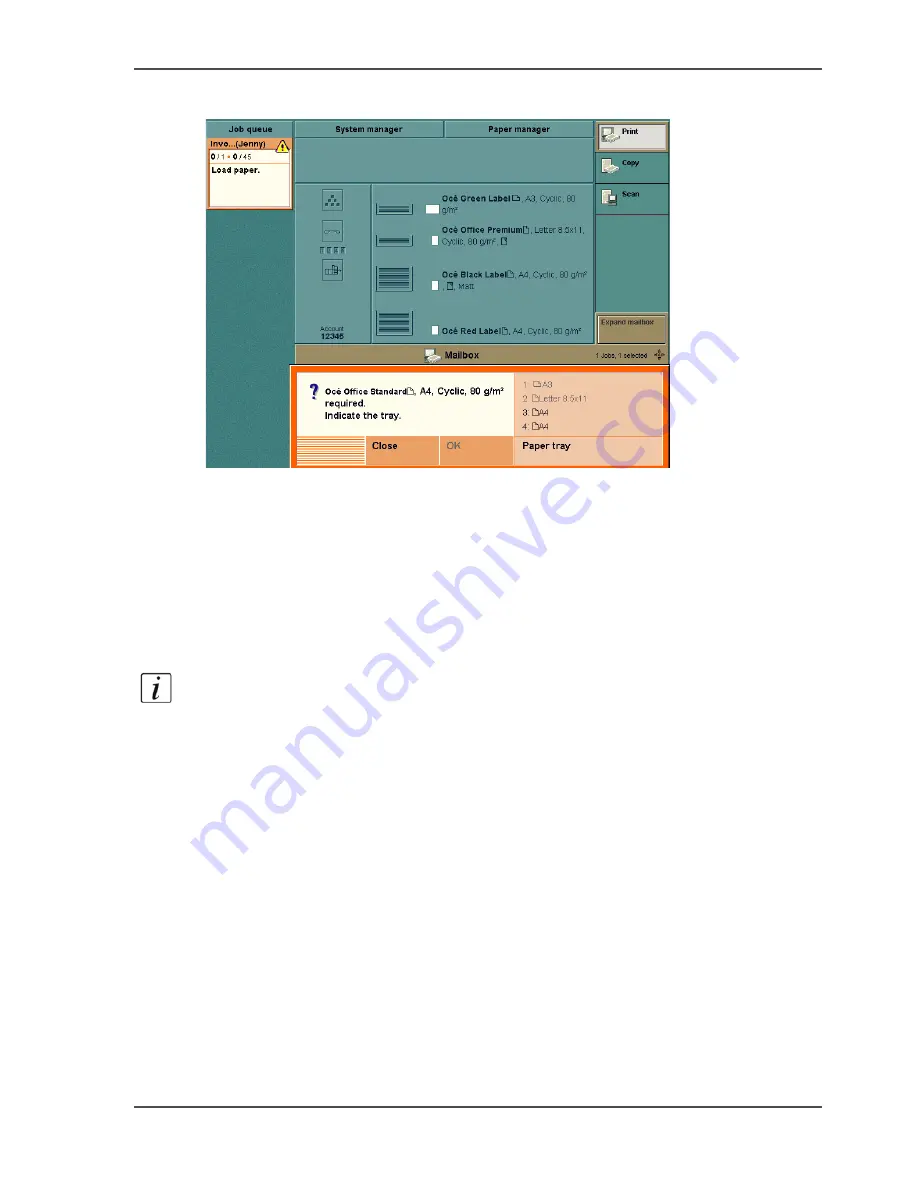
[20] Dialogue box that appears when the required media type is not available
Use the dialogue box to define the required media type
1.
When the above dialogue box appears, you must load the required paper into one of
the paper trays.
2.
Press the function key 'Paper tray' to select the paper tray where you put the paper.
3.
Press the function key 'OK' to continue.
The job starts to print.
Note:
When you press the function key 'Close', you must define the required paper
type in the 'Paper manager'.
Summary of Contents for VarioPrint 2100
Page 1: ...Oc VarioPrint 2100 2110 Oc User manual User manual...
Page 12: ...12 Contents...
Page 13: ...13 Chapter 1 Introduction...
Page 21: ...21 Chapter 2 Power...
Page 26: ...26 Chapter 2 Power Restart the system...
Page 27: ...27 Chapter 3 Get to know the Oc VarioPrint 2100 2110...
Page 37: ...37 The main screen The sections of the main screen 14 14 The sections of the main screen...
Page 95: ...95 Chapter 4 Adapt the system...
Page 103: ...103 Chapter 5 The print function...
Page 109: ...109 Interactive printing Illustration 42 42 Interactive print job...
Page 143: ...143 Chapter 6 The copy function...
Page 179: ...179 Chapter 7 The scan function optional...
Page 215: ...215 Chapter 8 The accounting function...
Page 238: ...238 Chapter 8 The accounting function Make a copy or print with the copy card...
Page 256: ...256 Chapter 9 Security Job name suppression...
Page 257: ...257 Chapter 10 Add the supplies...
Page 280: ...280 Chapter 10 Add the supplies Replace the stapler cartridge 6 optional stacker stapler...
Page 281: ...281 Chapter 11 Error handling...
Page 289: ...289 Appendix A Overview and tables...
Page 297: ...297 Appendix B Miscellaneous...


