


3. Follow the instructions that come with the drive to set any jumpers or switches.
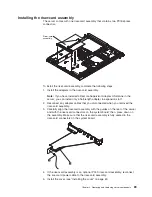
4. Attach the drive-retention clip that you removed in “Removing a CD or CD/DVD
combination drive” on page 73 to the side of the drive.
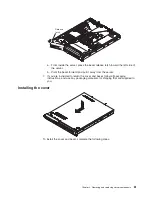
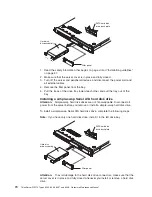
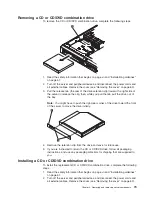
5. Slide the drive into the CD/DVD drive bay until the drive clicks into place.
6. Replace the cover (see “Installing the cover” on page 61).
7. Slide the server into the rack.
8. Connect the cables and power cords.
9. Turn on all attached devices and the server.
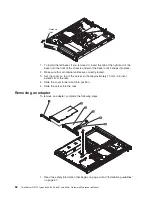
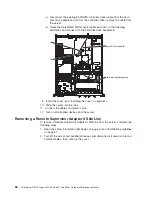
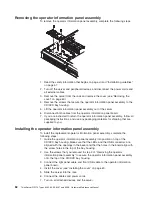
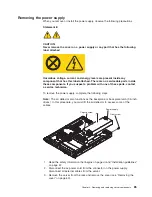
Removing a memory module (DIMM)
To remove a DIMM, complete the following steps.
DIMM
Retaining
clip
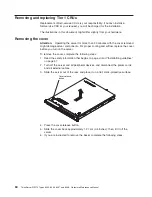
1. Read the safety information that begins on page vii and “Installation guidelines”
on page 57.
2. Turn off the server and peripheral devices, and disconnect the power cord and
all external cables.
3. Remove the cover (see “Removing the cover” on page 60).
Attention:
To ensure proper cooling and airflow, do not operate the server for
more than 30 minutes with the cover removed.
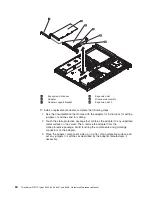
4. Open the retaining clip on each end of the DIMM connector and remove the
DIMM from the connector.
5. If you are instructed to return the DIMM, follow all packaging instructions, and
use any packaging materials for shipping that are supplied to you.
74
ThinkServer RS110 Types 6435, 6436, 6437 and 6438: Hardware Maintenance Manual
Summary of Contents for ThinkServer RS110
Page 1: ...ThinkServer RS110 Types 6435 6436 6437 and 6438 Hardware Maintenance Manual ...
Page 2: ......
Page 3: ...ThinkServer RS110 Types 6435 6436 6437 and 6438 Hardware Maintenance Manual ...
Page 8: ...vi ThinkServer RS110 Types 6435 6436 6437 and 6438 Hardware Maintenance Manual ...
Page 18: ...xvi ThinkServer RS110 Types 6435 6436 6437 and 6438 Hardware Maintenance Manual ...
Page 74: ...56 ThinkServer RS110 Types 6435 6436 6437 and 6438 Hardware Maintenance Manual ...
Page 238: ...220 ThinkServer RS110 Types 6435 6436 6437 and 6438 Hardware Maintenance Manual ...
Page 251: ......
Page 252: ...Part Number 46U0856 Printed in USA 1P P N 46U0856 ...


