To make the booklet copying:
1
Place a single document face down on the document glass.
For details about loading a document, see "Loading an Original Document".
2
Press
Copy
Layout
Booklet
from the home screen.
3
Press the appropriate option.
•
Off
: Disables this feature.
•
1 Sided Original
: Copies from one side of the original to one page of a booklet.
•
2 Sided Original Book
: Copies each side of an original to one page of a booklet.
•
2 Sided Original Calendar
: Copies each side of an original to one page of a
booklet. The second side of each original is rotated 180 degrees so the text will be
upright in the booklet.
4
Press
Start
( ) from the screen.
NOTE:
You can cancel the copy job at any time. Press (
) on screen, and
the copying will stop.
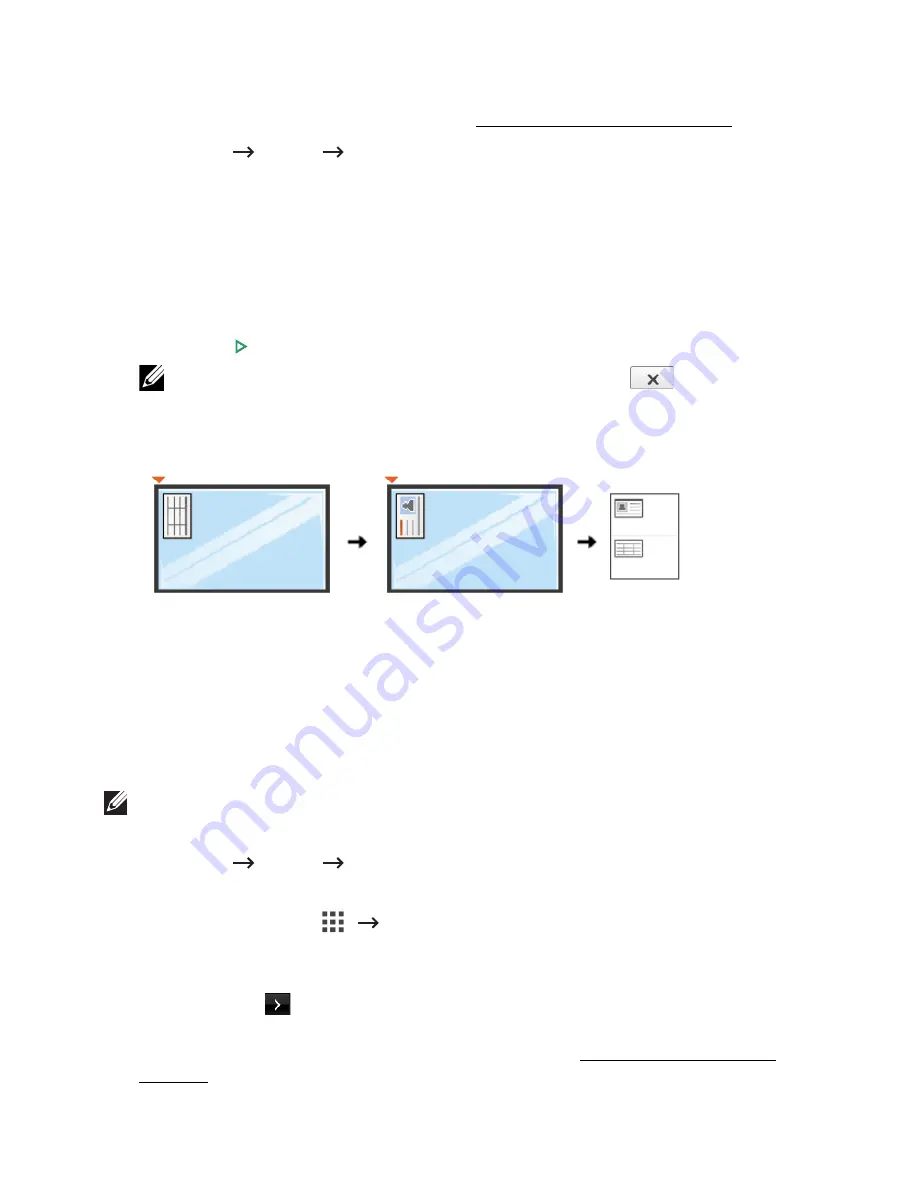
ID Copying
When you copy using this feature, the printer prints one side on the upper half of the paper
and the other side on the lower half without reducing the original. This feature is helpful for
copying a small-sized document, such as a name card.
If the original document is larger than the printable area, some portions may not be printed.
This special copy mode can be applied when you load a document using only the
document glass. If a document is detected in the DADF, the ID copying feature does not
work.
NOTE:
You cannot adjust the copy size using the
Zoom
menu for ID copying.
To make the ID copying:
1
Press
Copy
Layout
ID
from the home screen.
OR
Press
All Applicatons
(
)
ID
from the home screen.
2
Place the front side of an original facing down on the document glass where arrows
indicate as shown, and close the scanner lid.
3
Press the
Next
(
) button.
4
If necessary, customize the copy settings including number of copies, darkness,
original type, and original size by pressing
Options
. See "Using Copy and Setting
Options".
- 191
Summary of Contents for B2375dfw
Page 1: ...Dell B2375dfw Mono MFP Dell B2375dnf Mono MFP User s Guide ...
Page 215: ...3 Select Setup in New Printer area 4 Select Ethernet 214 ...
Page 225: ...4 Click New Printer 5 Choose Wireless 224 ...
Page 226: ...6 The software searches for printers 7 Set your printer name and click Next 225 ...
Page 229: ...4 Select New Printer 5 Choose Wireless 228 ...
Page 268: ...Mac Installing Software for Mac Printing Scanning Wireless network setup 267 ...
Page 348: ...Installing Accessories Installing Printer Accessories Installing an Optional Tray 2 347 ...
Page 350: ...3 Grasp the control board cover and open it 4 Connect the cable as below 349 ...
Page 351: ...5 Close the control board cover 6 Combine machine and optional tray 2 as below 350 ...
Page 359: ...USB memory managing 51 W watermarks printing 175 358 ...


