UNITIZED TRANSAXLE
Unitized Transaxle Removal
2000 FE290 Gasoline Vehicle Maintenance and Service Supplement Page 16-9
16
3.11. Cut away the wire ties securing the engine kill switch wire at the lower right front of the engine
(below the exhaust header), the wire harness at the governor cable bracket, and the wire harness
to the motor mount beneath the muffler.
4. Disconnect the brake cables.
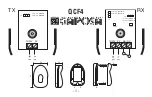
4.1. Remove cotter pins (1), brake cable clevis pins (2), and E-clips (3) (Figure 16-19, Page 16-10).
4.2. Remove the cable from the cable support bracket (Figure 16-19, Page 16-10).
5. Remove only the
lower shock mounting hardware from both rear shocks (Figure 16-20, Page 16-10).
6. Position a floor jack under the vehicle frame crossmember or trailer hitch mount as shown (Figure 16-21,
Page 16-10).
7. Raise vehicle just enough to relieve tension from leaf springs, then remove the bolts securing the leaf
springs to the shackles (Figure 16-22, Page 16-11).
8. Remove the bolts securing the leaf springs to their front mounts (Figure 16-23, Page 16-11).
9. Continue raising vehicle until frame or trailer hitch is higher than the top of the unitized transmission
(enough to allow transaxle and engine to be rolled under and out of vehicle) (Figure 16-26, Page 16-12).
10. Position jack stands, adjusted to support the vehicle at this height, under the frame cross-member
between the leaf spring mounts and side stringers, just forward of each rear wheel. Lower the floor jack
to allow the jack stands to support the vehicle (Figure 16-27, Page 16-12).
Figure 16-14 Engine Ground Wire
Figure 16-15 Shifter Cable
Figure 16-16 Generator Wires
Figure 16-17 Oil Level Sensor Jumper Wire
Club Car
Remove engine ground
retaining nut.
Pull spring release
back to remove shifter
cable from lever.
Loosen nuts.
TOP VIEW
F2
DF
F2
Remove yellow wire.
Remove
white wire.
Remove ground
wire at A2 terminal.
Mark wires for proper reconnection.
STARTER
GENERATOR
YELLOW
OIL SENDING
UNIT JUMPER
WIRE