Chapter 12
12-4
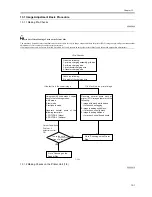
12.3 Scheduled Servicing Basic Procedure
12.3.1 Scheduled Servicing Basic Procedure
0009-5839
- As a rule, provide scheduled servicing every 250,000 prints.
- Check with the Service Book before setting out for a scheduled service visit, and take parts for which replacement is expected.
- If the power plug is left connected for a long time in a place subject to dust, humidity, or oil smoke, a fire hazard is a possibility (i.e., the dust collecting
around the plug can absorb moisture, resulting in insulating failure). Be sure to disconnect the power plug on a periodical basis, and wipe off the dust
and dirt collecting around it.
<Work Procedure>
1) Report to the person in charge, and check the general condition.
2) Record the counter reading, and check the faulty prints.
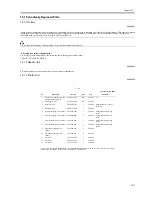
3) Make the following checks, and clean/adjust the items that are indicated:
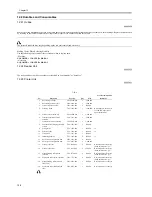
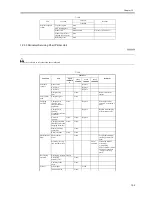
T-12-3
4) Check the waste toner case.
If half full or more, dispose of the waste toner in a vinyl bag or the like for collection; or, replace the waste toner case.
- If you need to dispose of the waste toner, be sure to do so in strict accordance with the regulations imposed by the local authorities.
- Do not dispose of waste toner in a fire. Doing so may cause an explosion.
5) Clean the copyboard glass and the reading glass.
6) Make test copies.
7) Make sample copies.
8) Check the operation of the leakage breaker.
With the power switch at ON, push the test switch of the leakage breaker to see that it operates normally (i.e., the breaker switch shifts to the OFF side
to cut off the power).
If the leakage beaker fails to operate normally, replace it, and run a check once again.
<Resetting the Breaker>
When you have made the check, turn off the main power switch, and turn on the breaker switch, and then turn the main power switch back on.
9) Put the sample copies in order, and clean up the area around the machine.
10) Record the final counter reading.
11) Fill out the Service Book, and report to the person in change. Be sure to update the history of checks on the leakage breaker in the Service Book.
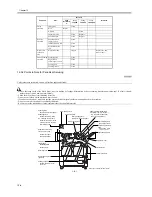
12.3.2 Periodical Servicing Chart Reader Unit
0009-5956
Do not use solvents or oils other than those indicated.
Items
Test copy
against image density standard
for soiling of back of paper
for clarity of characters
for margin
for fixing
misplaced registration, soiled back of
paper
for margin standards (single-sided
print)
leading edge: 4.0+1.5/-1.0mm
left edge: 2.5+/- 1.5mm
(double-sided print)
leading edge: 4.0+1.5/-1.0mm
left edge: 2.5+/- 2.0mm
Summary of Contents for iR5570 Series
Page 1: ...Mar 29 2005 Service Manual iR6570 5570 Series ...
Page 2: ......
Page 6: ......
Page 26: ...Contents ...
Page 27: ...Chapter 1 Introduction ...
Page 28: ......
Page 30: ......
Page 55: ...Chapter 2 Installation ...
Page 56: ......
Page 58: ...Contents 2 9 3 Mounting the Cassette Heater 2 34 ...
Page 98: ......
Page 99: ...Chapter 3 Basic Operation ...
Page 100: ......
Page 102: ......
Page 110: ......
Page 111: ...Chapter 4 Main Controller ...
Page 112: ......
Page 114: ......
Page 135: ...Chapter 5 Original Exposure System ...
Page 136: ......
Page 181: ...Chapter 6 Laser Exposure ...
Page 182: ......
Page 184: ......
Page 192: ......
Page 193: ...Chapter 7 Image Formation ...
Page 194: ......
Page 198: ......
Page 259: ...Chapter 8 Pickup Feeding System ...
Page 260: ......
Page 350: ......
Page 351: ...Chapter 9 Fixing System ...
Page 352: ......
Page 401: ...Chapter 10 External and Controls ...
Page 402: ......
Page 406: ......
Page 448: ......
Page 449: ...Chapter 11 MEAP ...
Page 450: ......
Page 452: ......
Page 455: ...Chapter 12 Maintenance and Inspection ...
Page 456: ......
Page 458: ......
Page 468: ......
Page 469: ...Chapter 13 Standards and Adjustments ...
Page 470: ......
Page 505: ...Chapter 14 Correcting Faulty Images ...
Page 506: ......
Page 508: ......
Page 537: ...Chapter 15 Self Diagnosis ...
Page 538: ......
Page 540: ......
Page 565: ...Chapter 16 Service Mode ...
Page 566: ......
Page 568: ......
Page 633: ...Chapter 17 Upgrading ...
Page 634: ......
Page 636: ......
Page 641: ...Chapter 17 17 5 F 17 4 HDD Boot ROM Flash ROM System Software ...
Page 646: ...Chapter 17 17 10 F 17 11 8 Click START F 17 12 ...
Page 675: ...Chapter 17 17 39 F 17 59 2 Select the data to download F 17 60 3 Click Start ...
Page 677: ...Chapter 18 Service Tools ...
Page 678: ......
Page 680: ......
Page 683: ...Mar 29 2005 ...
Page 684: ......

