56 ARTEMIS
Digital Broadcast Production Console
Connection Information
GPIO in Apollo and Artemis systems
is a Hydra2 option. GPIO cards
provide logic inputs and outputs that
can be assigned to various functions
on the control surface; allowing
console functions to trigger external
devices such as fader starts for
playback devices and for external
devices to trigger console functions,
for example auto-fades controlled by
a video switcher.
If GPIO is required, please discuss this
with your sales person or Calrec project
engineer. Optional GPIO cards can be
fitted in modular Hydra2 I/O frames, or
any fixed format Hydra2 box with a height
of 2U or greater. Multiple boxes can be
fitted with GPIO cards to make up the
required quantity. The physical location
of I/O boxes within the installation should
be considered when choosing which to fit
with GPIO cards.
A fixed format I/O box fitted with a GPIO
card has two D25 connectors on the rear,
female for inputs, male for outputs. GPIO
cards for modular frames have a single
D50 connector on the front for both inputs
and outputs. Two versions of modular card
are available, one with 8 changeover relay
outputs and one with 16 normally open
relay closures.
GPinputs
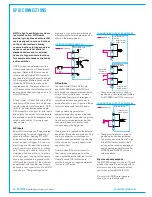
Each GPIO card type has 8 opto-isolated
inputs allowing for remote triggering of
console functions. Applying DC or AC
voltage across the positive and negative
pins of an input will trigger it. A common
way to trigger a GP input is by providing
a dry closure from a relay with no voltage
on it. If using a dry closure, it should not
simply be wired across the +/- terminals
of the opto input - one half of the closure
should be connected to a ground on the
GPIO card, the other half of the closure to
an opto input, and the other input should
be linked in the connector hood to a GPIO
card +5V pin. This prevents potential
GPIO CONNECTIONS
problems in connecting power between
different manufacturers' hardware and is
shown in the example below.
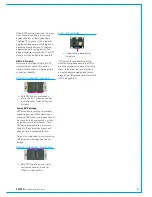
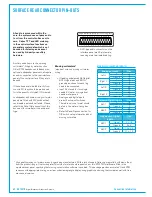
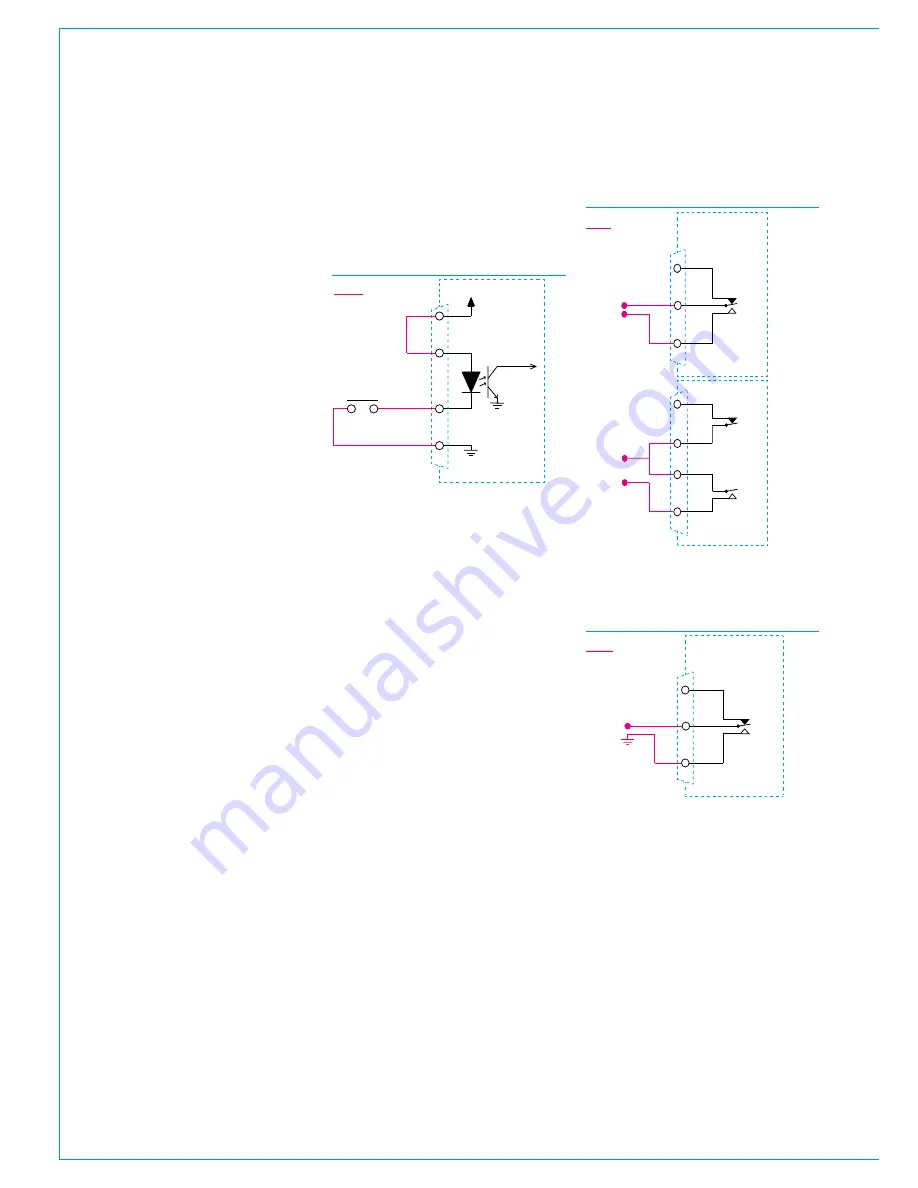
GP INPUT WIRING EXAMPLE
0V
+IN
-IN
+5V
Trigger
GP Input
External
Closure
Calrec GPIO card
+5V
(Dry)
External wiring
GPoutputs
The fixed format I/O box GPIO card,
and the WY5858 modular GPIO card
both have 8 changeover relays each with
access to the normally open, normally
closed and either common relay pins or
normally open/closed negative pins to
provide flexibility in use. If required, these
contacts can be used to switch audio.
If being used to trigger external
equipment expecting a ground, the relay
common should be connected to a ground
from the external equipment and either
the normally open or normally closed
contact used as the trigger line.
If a dry closure is required by the external
equipment, this can be achieved by wiring
one leg to either the normally open or
normally closed contact and the other leg
to the common or normally open/closed
negative contact.
Normally open (NO) contacts short to
the common or negative pin when the
relay is activated by the selected function.
Normally closed (NC) contacts are
shorted to common or negative when the
function is NOT active.
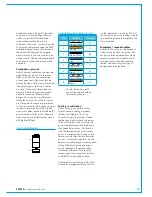
CHANGEOVER OUTPUT EXAMPLE #1
changeover relay
(shown inactive)
Calrec Fixed Format
GPIO card
External wiring
Com
NO
NC
changeover relay
(shown inactive)
Calrec modular
GPIO WY5858
NO-
NO+
NC+
NC-
Connect NC-
and NO- to
make common
CHANGEOVER OUTPUT EXAMPLE #2
Dryclosureonlyoutputs
The WY5859 version of modular I/O card
provides the same 8 inputs along with 16
dry closure only relay connections that
short when activated (NO+ & NO-).
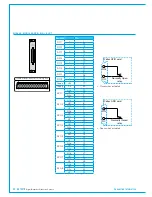
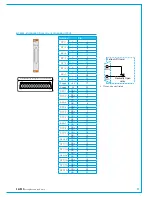
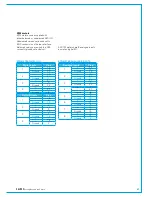
Pin-outs for all GPIO card types are
shown the on following pages:
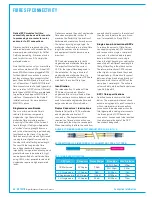
• Changeover relay shown wired to
provide a dry closure when activated.
For WY5859 treat NO- as common.
changeover relay
(shown inactive)
Calrec GPIO card
External wiring
Com
NO
NM
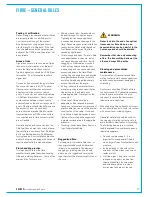
• Changeover relay shown wired to
provide a ground when activated.
The ground can come from a 0V pin
in the GPIO card connector itself
as long as the receiving equipment
has the same ground reference. For
WY5858 and WY5859 common
setup see above.
Summary of Contents for Artemis
Page 5: ...calrec com Putting Sound in the Picture ARTEMIS INFORMATION...
Page 9: ...calrec com Putting Sound in the Picture ARTEMIS CONTROL SURFACE...
Page 26: ...26 ARTEMIS Digital Broadcast Production Console...
Page 27: ...calrec com Putting Sound in the Picture ARTEMIS PROCESSING CORE BEAM SHINE...
Page 33: ...calrec com Putting Sound in the Picture ARTEMIS PROCESSING CORE LIGHT...
Page 40: ...40 ARTEMIS Digital Broadcast Production Console...
Page 41: ...calrec com Putting Sound in the Picture ARTEMIS CONNECTION INFORMATION...
Page 66: ...66 ARTEMIS Digital Broadcast Production Console...
Page 67: ...calrec com Putting Sound in the Picture ARTEMIS EXTERNAL CONTROL...
Page 80: ...80 ARTEMIS Digital Broadcast Production Console...
Page 81: ...calrec com Putting Sound in the Picture ARTEMIS SETUP CONFIGURATION...
Page 100: ...100 ARTEMIS Digital Broadcast Production Console...
Page 101: ...calrec com Putting Sound in the Picture ARTEMIS PANEL OPTIONS...
Page 110: ...110 ARTEMIS Digital Broadcast Production Console...
Page 111: ...calrec com Putting Sound in the Picture ARTEMIS OBSOLETE PANELS...
Page 114: ...114 ARTEMIS Digital Broadcast Production Console...
Page 115: ...calrec com Putting Sound in the Picture ARTEMIS SPECIFICATIONS...


