78 ARTEMIS
Digital Broadcast Production Console
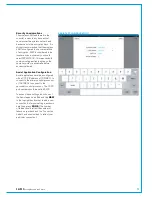
External Control
Repeat to add the secondary Calrec card
as another host. Click
Apply
to save the
changes.
Select the
Serial>Serial Port
page.
Select port 1 and click
Edit
to view the
details for the serial port. At the top of the
page, below the port label, click
Change
to select the
TCP sockets profile
, click
Apply
and then
Return to Serial 1
.
Select the
Hardware
tab and enter serial
port settings that match that of the 3rd
party controller. Common settings are;
Serial Interface: EIA-232, Speed:
115200, Data Bits: 8, Parity: Odd,
Stop Bits: 1, Flow Control: None
.
Click
Apply
.
If a backup controller serial connection
is being used, repeat the above for serial
port 2.
Select the
General
tab for serial port
1. Check
Connect To
, and select the
primary Calrec card from the
Host
drop-
down list (as was previously defined from
the Network>Advanced page). Enter a
TCP Port
number to match the protocol
being setup (61000 for SW-P-08, 62000
for EMBER. The CSCP port is selectable,
as defined by Calrec StudioSetup, the
default value being 49200).
Select
Initiate Connection
Automatically
, and check
Send Name
On Connect
.
If Ethernet cable and port redundancy
is required from a single serial port
controller, check
Connect To Multiple
Hosts
, then click
Define Additional
Hosts
. Click
Add
and select the Calrec
secondary card from the Host list, and
enter the TCP port number required
for the protocol being used. Click
OK
.
Ensure that
Define primary and backup
Once completed, click Reboot IOLAN
or cycle the power to the unit for the
configuration changes to take.
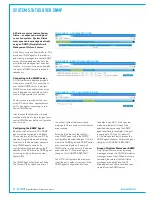
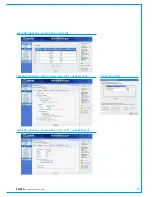
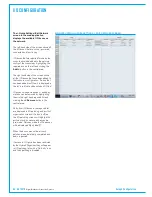
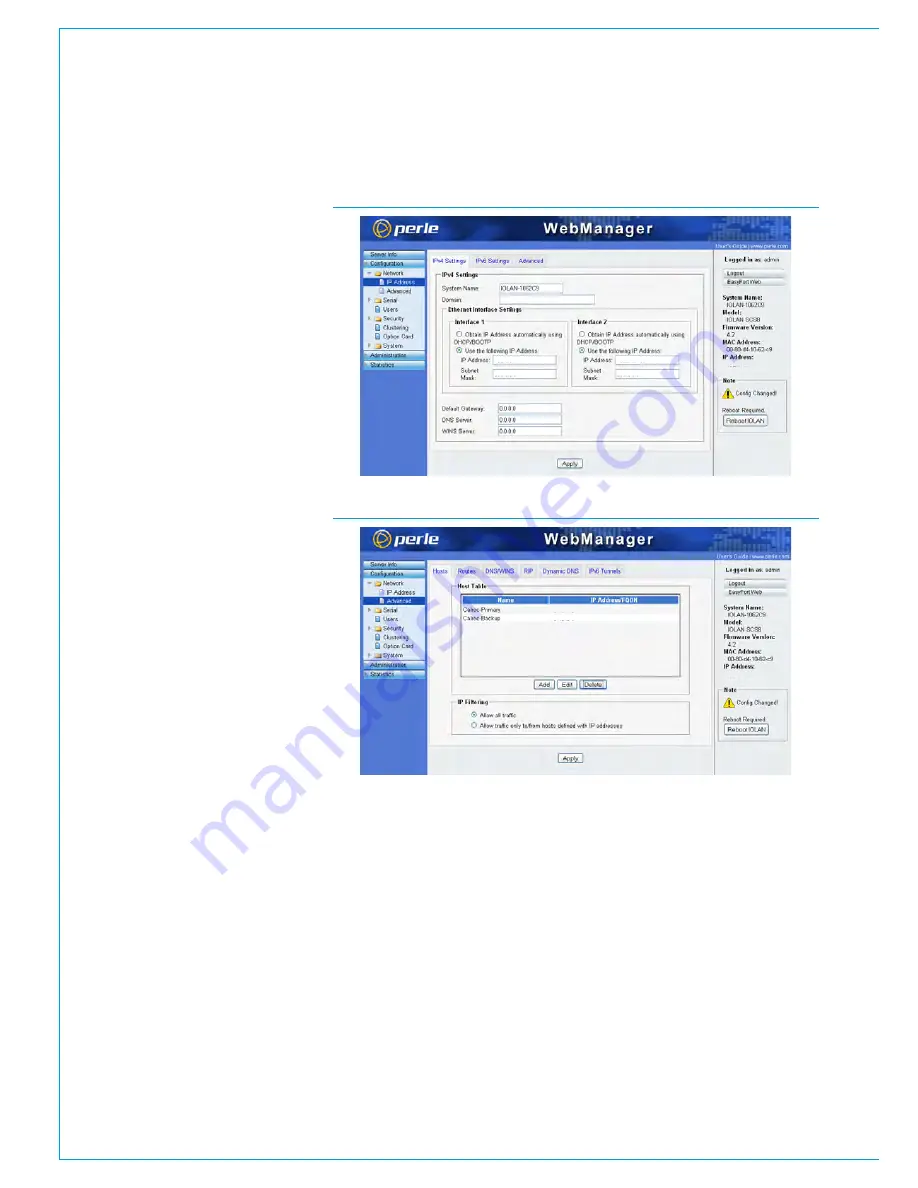
PERLE WEB MANAGER - NETWORK>IP ADDRESS PAGE
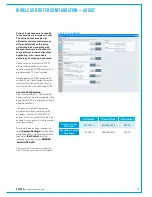
PERLE WEB MANAGER - NETWORK>ADVANCED PAGE
hosts to connect to
is
NOT
selected,
and then
Apply
.
If there is a backup 3rd party controller
serial connection, do not select serial port
1 to connect to multiple hosts. Instead,
Configure serial port 2 to connect to the
Calrec secondary card.
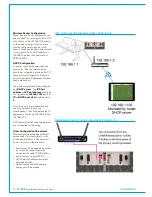
192.168.1.10
192.168.2.10
192.168.1.10
255.255.0.0
255.255.0.0
192.168.1.0
192.168.2.0
192.168.1.10
Summary of Contents for Artemis
Page 5: ...calrec com Putting Sound in the Picture ARTEMIS INFORMATION...
Page 9: ...calrec com Putting Sound in the Picture ARTEMIS CONTROL SURFACE...
Page 26: ...26 ARTEMIS Digital Broadcast Production Console...
Page 27: ...calrec com Putting Sound in the Picture ARTEMIS PROCESSING CORE BEAM SHINE...
Page 33: ...calrec com Putting Sound in the Picture ARTEMIS PROCESSING CORE LIGHT...
Page 40: ...40 ARTEMIS Digital Broadcast Production Console...
Page 41: ...calrec com Putting Sound in the Picture ARTEMIS CONNECTION INFORMATION...
Page 66: ...66 ARTEMIS Digital Broadcast Production Console...
Page 67: ...calrec com Putting Sound in the Picture ARTEMIS EXTERNAL CONTROL...
Page 80: ...80 ARTEMIS Digital Broadcast Production Console...
Page 81: ...calrec com Putting Sound in the Picture ARTEMIS SETUP CONFIGURATION...
Page 100: ...100 ARTEMIS Digital Broadcast Production Console...
Page 101: ...calrec com Putting Sound in the Picture ARTEMIS PANEL OPTIONS...
Page 110: ...110 ARTEMIS Digital Broadcast Production Console...
Page 111: ...calrec com Putting Sound in the Picture ARTEMIS OBSOLETE PANELS...
Page 114: ...114 ARTEMIS Digital Broadcast Production Console...
Page 115: ...calrec com Putting Sound in the Picture ARTEMIS SPECIFICATIONS...


