CALREC
Putting Sound in the Picture
49
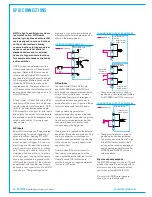
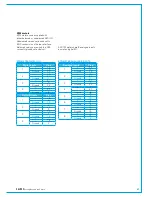
To change the sync sources selected,
click on the desired source on the left, the
desired destination on the right and then
click 'Patch'.
The video inputs can be fed with analogue
or digital video in NTSC, PAL or a variety
of HD / tri-level formats. The correct
video format for each video input being
used needs to be specified from the Sync
page.
SYNCHRONISATION
Artemis processing cores have 4
BNC's to allow connection of external
sync. If no external sync is connected
and selected, the console will free-
run on its own synchronisation clock,
generated by the active router card.
General rules of good practise require
that all equipment connected to the audio
console's digital inputs and outputs are
all locked to the same referenced sync
source as the console to ensure clean
audio.
In systems with multiple Calrec
processing cores; i.e. where
more than one Apollo, Artemis or
standalone cores are connected
together, it is of paramount
importance that all connected
processing cores are locked to the
same referenced sync source.
One or more cores receiving a
sync signal that is not locked from
the same clock reference as other
cores can cause interruptions to
both audio and data carried by the
routers. This can lead to false error
warnings and IO boxes going offline.
Therefore it is essential to consider
a robust sync distribution design for
the facility and to ensure all points in
the chain are correctly configured to
lock to the appropriate input and no
elements such as sync regenerators
are changing the reference source or
free-running.
It is also recommended that backup sync
sources and paths are considered to
maintain full functionality in the event of
the loss of any part of the facilities' sync
distribution system.
External sync sources can be fed to
the BNC connectors at the top of the
processing core. Two inputs are available
for video formats, as well as an input for
TTL Wordclock and an input for AES3
digital audio reference.
Syncsourceselection
The sync sources to be used have to be
selected from the Console PC's Main
Application,
>System Settings>Sync
page, or by the Hydra2 Organiser.
The main application must be in technician
mode (enter username and password on
the Tech page) to change sync settings.
Only one sync source is active and locked
to at any given time. Multiple sources
can be selected by priority to determine
the next choice to use in the event of the
active source failing.
The Sync page shows the available
sources on the left and the selected
sources on the right. The last of the
'selectable' sources is actually fixed as
Internal to ensure that console will run on
its own clock when no external sync is
present.
On boot up or reset, the console attempts
to lock to the first sync source in the
selection list. If it cannot lock to the first
choice, it will move down the list in order
until a source can be locked to.
The source currently locked to is displayed
on the screen. Any sync failures to the
local core will be reported by System
Status. If a failed sync input becomes
good, the console will NOT automatically
re-lock to it as any changeover in sync
could affect audio. S witching back to the
primary sync choice is done manually by
clicking 'Reset to 1st' on the sync page, or
automatically after the next boot / reset.
Summary of Contents for Artemis
Page 5: ...calrec com Putting Sound in the Picture ARTEMIS INFORMATION...
Page 9: ...calrec com Putting Sound in the Picture ARTEMIS CONTROL SURFACE...
Page 26: ...26 ARTEMIS Digital Broadcast Production Console...
Page 27: ...calrec com Putting Sound in the Picture ARTEMIS PROCESSING CORE BEAM SHINE...
Page 33: ...calrec com Putting Sound in the Picture ARTEMIS PROCESSING CORE LIGHT...
Page 40: ...40 ARTEMIS Digital Broadcast Production Console...
Page 41: ...calrec com Putting Sound in the Picture ARTEMIS CONNECTION INFORMATION...
Page 66: ...66 ARTEMIS Digital Broadcast Production Console...
Page 67: ...calrec com Putting Sound in the Picture ARTEMIS EXTERNAL CONTROL...
Page 80: ...80 ARTEMIS Digital Broadcast Production Console...
Page 81: ...calrec com Putting Sound in the Picture ARTEMIS SETUP CONFIGURATION...
Page 100: ...100 ARTEMIS Digital Broadcast Production Console...
Page 101: ...calrec com Putting Sound in the Picture ARTEMIS PANEL OPTIONS...
Page 110: ...110 ARTEMIS Digital Broadcast Production Console...
Page 111: ...calrec com Putting Sound in the Picture ARTEMIS OBSOLETE PANELS...
Page 114: ...114 ARTEMIS Digital Broadcast Production Console...
Page 115: ...calrec com Putting Sound in the Picture ARTEMIS SPECIFICATIONS...

