Inspecting with the Area Inspection Item
142
FQ2 User’s Manual
Reflect in Total Judgement
You can specify whether to reflect the judgement results of an inspection item in the overall judgement. (The
default is to reflect them.)
[Inspect]
−
[Inspection]
−
[Add item.]
−
[Area]
−
[Details] Tab Page
−
[Output parameter]
Unstable Area Results
The Desired Color Cannot Be Detected
Add a specific color or enlarge the color range.
Extraction Is Automatically Performed for an Undesired Color When Teaching
Manually set the color for which to measure the area.
[Inspect]
−
[Inspection]
−
[Area]
−
[Modify]
−
[Settings] Tab Page
−
[Teach]
• Sensors with Color Cameras Only
Item
Parameter
Setting
Description
Judgement Parameter
Area
Range: 0.00000 to 999,999,999.9999
Default: Upper limit: 999,999,999.9999,
Lower limit: 0.0000
Set the upper and lower limits for an OK
judgement. The set range is the differ-
ence between the reference area and
the measured areas.
Gravity X
Range:
−
999,999,999.9999 to
999,999,999.9999
Default: Upper limit: 999,999,999.9999,
Lower limit:
−
999,999,999.9999
Set the upper and lower limits of the
range of gravity X that is to be judged
as OK.
Gravity Y
Range:
−
999,999,999.9999 to
999,999,999.9999
Default: Upper limit: 999,999,999.9999,
Lower limit:
−
999,999,999.9999
Set the upper and lower limits of the
range of the gravity Y that is to be
judged as OK.
• You can change the output form for each measurement value to one of the following settings.
Press
[
]
−
[Result type] on the right of the display.
Absolute value (default): The measured coordinates are output.
Relative value: The difference from the reference position is output as coordinates.
Ratio: The percentage of the reference value is output. (This applies to the area only.)
1
Press [
]
−
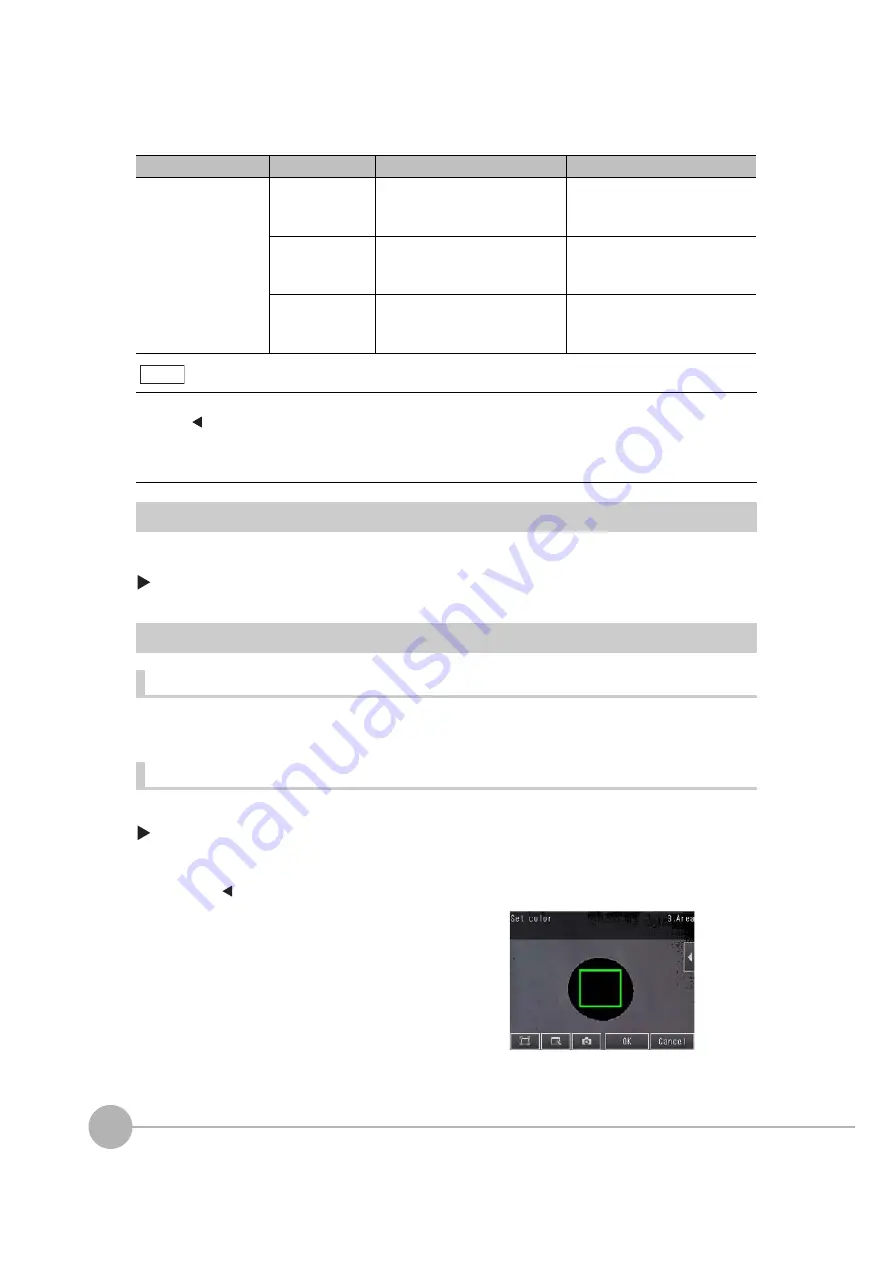
[Set color] on the right of the display.
2
Drag around the color for which you want to measure
the area.
Areas with that color will be automatically detected.
Continuous measurements will be performed for the im-
ages that are displayed.
Only the extracted color will appear on the display.
3
Press [OK].
4
Press [TEACH].
5
Press [Back] to end teaching.
Note
Содержание FQ2 Series
Страница 1: ...User s Manual Smart Camera FQ2 Cat No Z326 E1 01A ...
Страница 58: ...Setting Up Ethernet 56 FQ2 User s Manual MEMO ...
Страница 90: ...Adjusting the Images That Were Taken 88 FQ2 User s Manual MEMO ...
Страница 190: ...Adjusting Judgement Parameters during Operation 188 FQ2 User s Manual MEMO ...
Страница 234: ...Functions Related to the System 232 FQ2 User s Manual MEMO ...
Страница 392: ...Controlling Operation and Outputting Data with FINS TCP No protocol Commands 390 FQ2 User s Manual MEMO ...
Страница 398: ...Controlling Operation and Outputting Data with RS 232C No protocol Communications 396 FQ2 User s Manual ...
Страница 399: ...11 Troubleshooting Troubleshooting 11 1 Error Histories 398 11 2 Error Messages 400 11 3 Basic Troubleshooting 401 ...
Страница 404: ...Basic Troubleshooting 402 FQ2 User s Manual MEMO ...
Страница 513: ...Index FQ2 User s Manual 511 Index 12 ...
Страница 515: ......


