


73
OPERATING PROCEDURES
:
Blocking
2
2
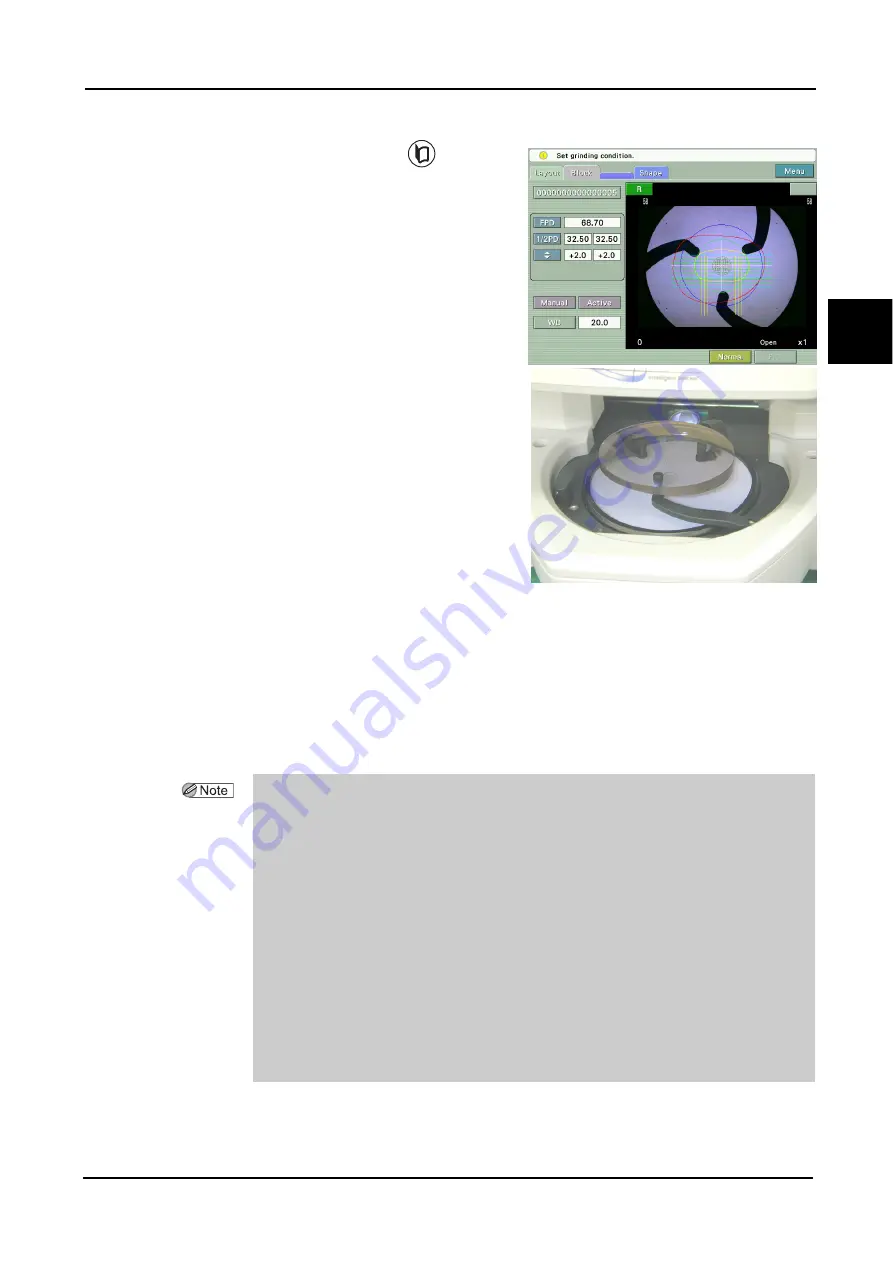
Press the screen switch button
to switch
to the Blocking screen.
Or press the Block tab to switch to the Block-
ing screen.
3
Place the lens on the lens table with convex
side up.
While watching the lens projected on the
screen, position the center of the lens at an
approximate center of the lens table.
When the optical center mark, segment mark,
or eye point mark for far vision is detected,
the mark changes from red blinking to solid
white. (The optical center mark displays in
red until it is moved inside the blocking area.)
When the mark in red is blinking, the lens can
not be blocked.
For bifocal lenses, place the lens with its segment forward (toward the operator).
For progressive power lenses, place the lens so that its horizontal reference line (or mark-
ings of the laser marks) is roughly horizontal.
On the screen, the lens outline, segment shape, and printed eye point for far vision for the
progressive power lenses are displayed.
Place the lens so that the cup holder mark is in the lens chuck pin area.
• The operator can judge if the lens outline is sufficient for the shape on the LCD touch
screen on condition that the data for the lens layout is entered.
Unless the lens shape is displayed within the outline, replace the lens with a larger one.
When the lens size is insufficient for processing for frame changing (if a part of the lens shape
overlaps lens outline), change the lens layout data so that the shape is moved inside the outline.
This operation, however, does not follow the prescription.
• When the SPH and/or CYL values on the layout screen in Single: ALM mode become red, it
indicates that the optical center and cylinder axis values may be unstable because the lens
power is low.
For a lens whose SPH and/or CYL values are displayed in red, it is recommended to block the
lens after marking it with a lensmeter.
• Place bifocal lenses on the lens table with its segment forward (toward the operator),
keeping the angle of decentering within ±5°.
If the angle of decentering exceeds ±5°, the segment mark changes to red and blocking becomes
prohibited.
Содержание ICE-1000
Страница 1: ...INTELLIGENT BLOCKER Model ICE 1000 OPERATOR S MANUAL...
Страница 8: ...VI...
Страница 114: ...104 SPECIFICATIONS AND ACCESSORIES Standard Configuration 5 3 2 Optional accessories Barcode scanner RS 232C cable...
Страница 116: ...106 INDEX...


