background image

3-6-10

1AF

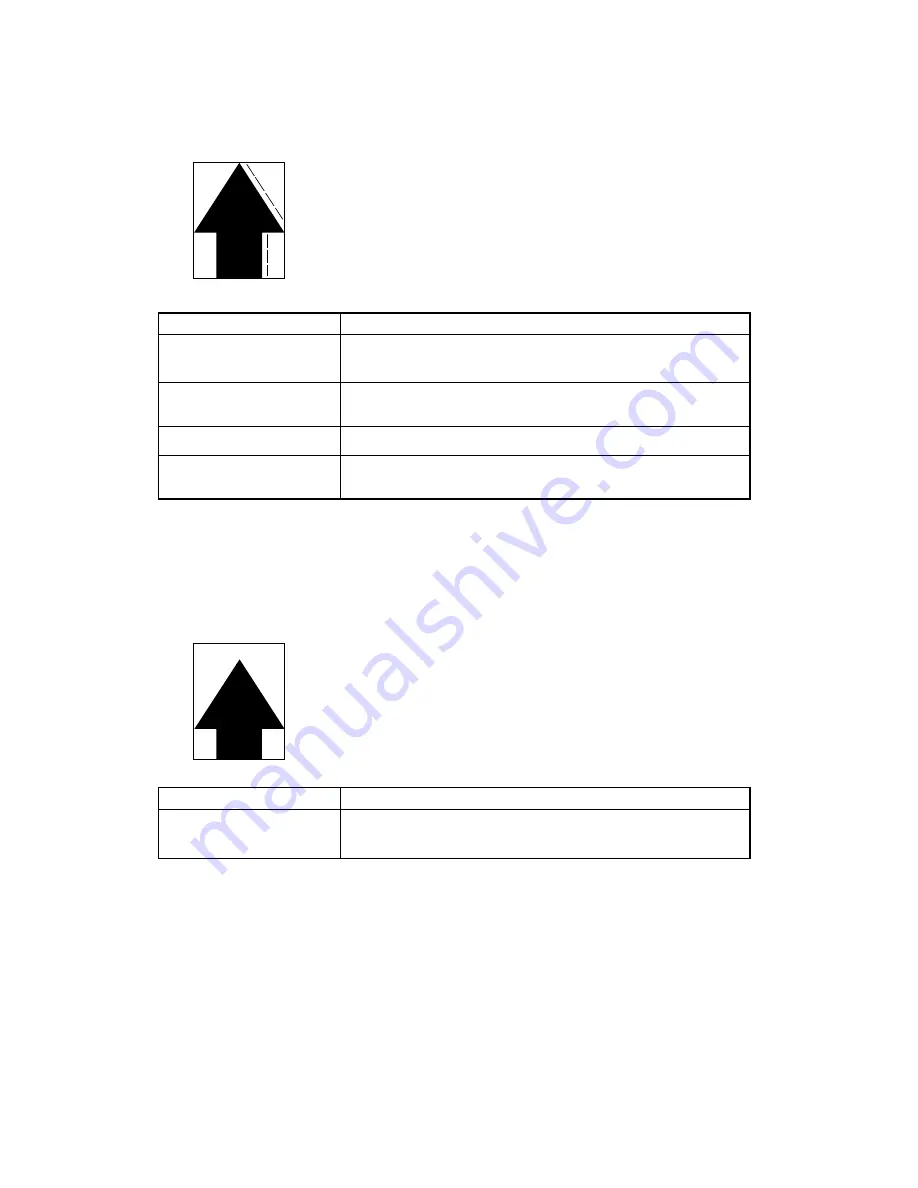
(10) Image is blurred.

Causes

1. Scanner moving erratically.
2. Foreign matter on the scanner rail.
3. Deformed press roller.
4. Drive system problem.

1. Scanner moving 

erratically.

2. Foreign matter on the 

scanner rail.

3. Deformed press roller.

4. Drive system problem.

Adjust the tension of the scanner wire (see page 3-3-23).

Check visually and remove, if any.

Check visually and replace (see page 3-3-62).

Check the gears and belts. Grease the gears or readjust 
the belt tension if necessary.

Causes

Check procedures/corrective measures

(11) The leading edge of 

the image is con-
sistently misaligned 
with the original.

Causes

1. Misadjusted leading edge registration.

1. Misadjusted leading 

edge registration.

Readjust the leading edge registration timing (see page 3-
3-12).

Causes

Check procedures/corrective measures

Содержание DC-1560

Страница 1: ...DC 1560 2050 KME S M SERVICE MANUAL Published in Oct 99 841AF110 DC 1560 2050 DC 1560 2050...

Страница 2: ...sion if battery is incorrectly replaced Replace only with the same or equivalent type recommended by the manufacturer Dispose of used batteries according to the manufacturer s instructions CAUTION Dou...

Страница 3: ...SERVICE MANUAL DC 1560 2050...

Страница 4: ...sonnel to ensure the safety of their customers their machines as well as themselves during maintenance activities Service personnel are advised to read this booklet carefully to familiarize themselves...

Страница 5: ...result from insufficient attention to or incorrect compliance with warning messages using this symbol CAUTION Bodily injury or damage to property may result from insufficient attention to or incorrec...

Страница 6: ...the earth wire to an object not approved for the purpose may cause explosion or electric shock Never connect the ground cable to any of the following gas pipes lightning rods ground cables for telepho...

Страница 7: ...2 Precautions for Maintenance WARNING Always remove the power plug from the wall outlet before starting machine disassembly Always follow the procedures for maintenance described in the service manual...

Страница 8: ...rom chains and belts Handle the fixing section with care to avoid burns as it can be extremely hot Check that the fixing unit thermistor heat and press rollers are clean Dirt on them can cause abnorma...

Страница 9: ...only a small amount of solvent at a time being careful not to spill Wipe spills off completely Ventilate the room well while using grease or solvents Allow applied solvents to evaporate completely bef...

Страница 10: ...osite PCB 2 3 1 2 3 2 Main PCB 2 3 3 2 3 3 Operation unit PCB 2 3 8 III SET UP AND ADJUSTMENT SECTION 3 1 Installation 3 1 1 Unpacking and installation 3 1 1 3 1 2 Setting initial copy modes 3 1 16 3...

Страница 11: ...PCB terminal voltages 3 6 19 3 6 4 Electrical problems 3 6 30 3 6 5 Mechanical problems 3 6 38 3 7 Appendixes Timing chart No 1 3 7 1 Timing chart No 2 3 7 2 Timing chart No 3 3 7 3 Composite PCB 1 3...

Страница 12: ...1 1 5 1AF CONTENTS 1 1 Specifications 1 1 1 Specifications DC 2050 1 1 1 1 1 2 Specifications DC 1560 1 1 3...

Страница 13: ...1 1 7 1AF CONTENTS 1 2 Handling Precautions 1 2 1 Drum 1 2 1 1 2 2 Developer and toner 1 2 1...

Страница 14: ...al exposure and photo modes 1 3 18 Exposure control for auto exposure mode 1 3 19 Light intensity correction for enlargement and reduction modes 1 3 20 Light intensity correction by the user setting 1...

Страница 15: ...1 1 11 1AF CONTENTS 2 1 Electrical Parts Layout 2 1 1 Electrical parts layout 2 1 1...

Страница 16: ...1 1 13 1AF CONTENTS 2 2 Detection of Paper Misfeed 2 2 1 Paper misfeed detection 2 2 1 2 2 2 Paper misfeed detection conditions 2 2 2...

Страница 17: ...omposite PCB 2 3 1 2 3 2 Main PCB 2 3 3 1 Fixing unit abnormally high temperature shorted thermistor detection circuit 2 3 4 2 Toner feed motor drive circuit 2 3 5 3 Scanner motor drive circuit 2 3 6...

Страница 18: ...1 Unpacking and installation 3 1 1 1 Installation environment 3 1 1 2 Installation procedure 3 1 2 3 1 2 Setting initial copy modes 3 1 16 3 1 3 Installing the key counter option 3 1 17 3 1 4 Install...

Страница 19: ...1 1 19 1AF CONTENTS 3 2 Simulation 3 2 1 Simulations 3 2 1 1 Running a simulation 3 2 1 2 Simulation list 3 2 3 3 Contents of simulations 3 2 6...

Страница 20: ...xposure section 3 3 20 1 Detaching and refitting the halogen lamp 3 3 20 2 Detaching and refitting the optical section thermostat 3 3 21 3 Adjusting the positions of the light adjusters 3 3 22 4 Detac...

Страница 21: ...8 Cleaning section 3 3 54 1 Detaching and refitting the cleaning blade 3 3 54 2 Detaching and refitting the drum separation claws 3 3 56 3 3 9 Fixing and eject section 3 3 57 1 Replacing the fixing h...

Страница 22: ...1 1 25 1AF CONTENTS 3 4 PCB Initial Settings 3 4 1 Replacing the main PCB 3 4 1 3 4 2 Adjustment free variable resistors VR 3 4 4...

Страница 23: ...1 1 27 1AF CONTENTS 3 5 Self Diagnostics 3 5 1 Self diagnostic function 3 5 1 1 Self diagnostic display 3 5 1...

Страница 24: ...n copies 3 6 13 16 Image is partly missing 3 6 13 17 Fixing is poor 3 6 14 18 Image is out of focus 3 6 14 19 Image is not square longitudinally 3 6 14 20 Image is not square laterally 3 6 15 21 Image...

Страница 25: ...cleaning lamp does not light 3 6 33 15 The fixing heater does not turn on C61 C63 3 6 33 16 The fixing heater does not turn off fixing unit thermostat 1 or 2 triggered C64 3 6 34 17 Main charging doe...

Страница 26: ...chart No 1 3 7 1 Timing chart No 2 3 7 2 Timing chart No 3 3 7 3 Composite PCB 1 3 3 7 4 Composite PCB 2 3 3 7 5 Composite PCB 3 3 3 7 6 Operation unit PCB 3 7 7 Main PCB 3 7 8 General connection dia...

Страница 27: ...DC 1560 2050 KME S M I Theory and Construction Section THEORY AND CONSTRUCTION SECTION I...

Страница 28: ...1 1 5 1AF CONTENTS 1 1 Specifications 1 1 1 Specifications DC 2050 1 1 1 1 1 2 Specifications DC 1560 1 1 3...

Страница 29: ...4 11 81 2 20 copies min A3 11 17 12 copies min B4 257 364 mm 81 2 14 13 copies min First copy time 4 9 s or less A4 11 81 2 100 magnification manual exposure Warm up time 45 s or less room temperature...

Страница 30: ...vals of 30 s 4 Auto start 5 Auto shutoff 15 120 min in intervals of 15 min 6 Auto preheat energy saving 5 45 min in intervals of 5 min 7 Auto exposure 8 Photo mode 9 Manual magnification selection 10...

Страница 31: ...1 2 15 copies min A3 11 17 10 copies min B4 257 364 mm 81 2 14 11 copies min First copy time 4 9 s or less A4 11 81 2 100 magnification manual exposure Warm up time 45 s or less room temperature 20 C...

Страница 32: ...Auto clear 30 270 s in intervals of 30 s 4 Auto start 5 Auto shutoff 6 Auto preheat energy saving 7 Auto exposure 8 Photo mode 9 Manual magnification selection 10 Auto magnification selection by origi...

Страница 33: ...1 1 7 1AF CONTENTS 1 2 Handling Precautions 1 2 1 Drum 1 2 1 1 2 2 Developer and toner 1 2 1...

Страница 34: ...rupt changes in temperature and humidity Avoid exposure to any substance which is harmful to or may affect the quality of the drum Do not touch the drum surface with any object Should it be touched by...

Страница 35: ...al exposure and photo modes 1 3 18 Exposure control for auto exposure mode 1 3 19 Light intensity correction for enlargement and reduction modes 1 3 20 Light intensity correction by the user setting 1...

Страница 36: ...indicator 3 Original holder 4 Main switch 5 Bypass table 6 Auxiliary table 7 Insertion guides 8 Paper drawer 9 Toner cartridge 10 Paper conveying section lever 11 Image formation unit 12 Front cover 1...

Страница 37: ...play 18 Recall key 19 Zoomcopyindicator 20 Papersourceindicators 21 Checkpapersize directionindicator 22 Maintenanceindicator 23 Addtonerindicator 24 ADFjamindicator 25 Paperselectkey 26 Papersizeindi...

Страница 38: ...ion page 1 3 6 2 Main charging section page 1 3 10 3 Exposure section page 1 3 15 4 Developing section page 1 3 21 5 Transfer and separation section page 1 3 31 6 Cleaning section page 1 3 34 7 Charge...

Страница 39: ...r 32 machine front 19 Developing gear 23 20 Developing gear 30 21 Paper feed drive belt 22 Tension pulley 15 23 Pulley 32 24 Gear 18 25 Idle gear 38 26 Bypass gear 38 27 Gear 30 18 28 Gear 25 29 Idle...

Страница 40: ...ecycle gear 19 3 Magnet roller gear 17 4 Developing idle gear 19 Figure 1 3 5 Drive system image formation unit 5 Left spiral gear machine rear 6 Developing gear 28 machine front 7 Developing gear 31...

Страница 41: ...ttom plate 7 Drawer spring 8 Paper feed pulleys A and B 9 Upper registration roller 0 Lower registration roller Registration stopper Upper pre transfer roller Lower pre transfer roller Registration gu...

Страница 42: ...m the paper drawer or the bypass table to the upper and lower registration rollers at which point secondary paper feed takes place and the paper travels to the transfer section in sync with the exposu...

Страница 43: ...he upper and lower registration rollers and its leading edge stops at the registration stopper to create slack in the paper before registration B The leading edge of the paper turns the registration s...

Страница 44: ...urnsonfor250ms which raises the bypass lift and rotates the bypass lower pulley to perform primary paper feed The paper is then fed by the upper and lower registration rollers until the leading edge s...

Страница 45: ...main charging section consists of the drum and main charger The drum is electrically charged uniformly by means of a grid to form a latent image on the surface Main charger Tungsten wire Main charger...

Страница 46: ...ain charger grid 6 Grid tension plate 7 Main charger front lid 8 Main charger rear lid 9 Charger spring 0 Charger terminal Charger wire retainer pin Film CN1 21 CN1 27 CN1 24 CN1 20 24 V DC MC REM ALA...

Страница 47: ...start All on 300 ms 50 ms Timing chart 1 3 3 Main charging A 300 ms after the print key is pressed all the blank lamps BL turn on B 50 ms after the all blank lamps BL have turned on main charging sta...

Страница 48: ...ing the grid control voltage GRID CONT output from the main PCB MPCB to the high voltage transformer PCB HVTPCB Table 1 3 1 Surface potential correction value vs absolute humidity Absolute humidity g...

Страница 49: ...ty g m 3 Relative humidity C F Temperature C F Correction value V Temperature C F Correction value V Temperature C F Correction value V 0 32 1 33 8 2 35 6 3 37 4 4 39 2 5 41 6 42 8 7 44 6 8 46 4 9 48...

Страница 50: ...irror 4 5 Mirror 5 6 Mirror 6 7 Halogen lamp HL 8 Optical section thermostat TH3 9 Lens 0 Light source unit 1 Light source unit 2 Main reflector Auxiliary reflector Scanner motor SM Optical section fa...

Страница 51: ...nning speeds of the two light source units and the positions of the lens and mirrors 4 and 5 are changed altering the distance between the original and the drum At any magnification ratio light source...

Страница 52: ...e scanner to the home position At the same time the halogen lamp HL turns off D 10 pulses after the home position switch HPSW has been turned on the scanner motor SM turns off and the scanner stops At...

Страница 53: ...the light intensity is reduced since the intensity at such high exposure levels cannot be increased by simply increasing the halogen lamp control voltage The amount of exposure for the high settings...

Страница 54: ...and at the intensity for manual mode Exp 7 1 when the read in value is the NPTC level set in mode 3 In auto exposure mode the drum potential is decreased by 170 V from the normal level and the halogen...

Страница 55: ...copying are linked by a straight line through the value for 100 magnification and the light intensity is corrected for individual magnification ratios according to the gradients Light intensity correc...

Страница 56: ...ng roller where a magnetic brush is formed doctor blade and the developing spirals that agitate the developer In the toner hopper new toner from the toner cartridge is mixed with residual toner recove...

Страница 57: ...ft developing spiral Right developing spiral Developing assembly Toner feed motor Toner hopper Toner level sensor Hopper paddle B Hopper paddle A Hopper spiral Cleaning spiral Cleaning assembly Figure...

Страница 58: ...he magnet roller and the position of the doctor blade A developing bias voltage generated by the high voltage transformer PCB HVTPCB is applied to the developing roller to provide image contrast Figur...

Страница 59: ...o of toner to carrier decreases increasing the toner sensor output voltage When the ratio drops below the specified value the increase in toner sensor output voltage triggers toner replenishing When t...

Страница 60: ...eedmotor off level the intermittent feed operation is stopped C When the toner in the toner hopper runs low and even though the toner intermittent feed operation is continued the toner sensor output v...

Страница 61: ...y end level within the additional forced feed operation time the copier retums to the ready state and intermittent feed operations 3 minutes max are carried out until the toner sensor output voltage d...

Страница 62: ...rive time correction value Correction based on the absolute humidity When high absolute humidity is detected the toner sensor control voltage TNS CONT is decreased The external temperature and relativ...

Страница 63: ...detected by the humidity sensing element into a voltage and sends it to the main PCB MPCB The main PCB computes the absolute humidity based on this HUMSENS signal and the temperature ETTH signal dete...

Страница 64: ...oltage TNS CONT is decreased as the developing unit drive time thetotaltimethedrivemotor DM hasbeenon increasesfromexecutionofsimulation 60 0 0 19 0 29 0 50 Drive time h 0 0 5 4 2 15 40 60 100 Drive t...

Страница 65: ...ddle B vibrates up and down If the appropriate amount of toner is present in the toner hopper the paddle moves slowly resulting in a shorter on time of the toner level sensor TLDS Asthetonerinthehoppe...

Страница 66: ...r separate from the drum surface In the transfer charger a high voltage generated by the high voltage transformer PCB HVTPCB is applied across both ends of the tungsten wire for transfer charging The...

Страница 67: ...ear lid 5 Transfer charger shield 6 Separation guide 7 Tungsten wire for transfer 8 Tungsten wire for separation 9 Charger springs 0 Charger terminals Charger wire retainer pins Figure 1 3 31 Transfer...

Страница 68: ...istration solenoid RSOL turns on to start secondary paper feed B 220 ms after the trailing edge of the paper has turned the registration switch RSW off transfer charging ends C 200 ms after transfer c...

Страница 69: ...removes residual toner from the drum surface after transfer and the cleaning spiral that carries the residual toner back to the toner hopper The cleaning unit employs the blade cleaning method 1 Drum...

Страница 70: ...posure the required number of the 44 blank lamps on both sides are lit depending on the paper size and the magnification ratio removing charge from the sections of the copy where no image is to be for...

Страница 71: ...ing area D 1103 ms after the secondary paper feed has started and the registration solenoid RSOL has turned on all the blank lamps BL turn on E 1000 ms after the last sheet has been ejected turning th...

Страница 72: ...at roller 6 Press roller 7 Heat roller separation claws 8 Press roller separation claws 9 Separation claw springs 0 Fixing pressure springs Upper eject pulley Lower eject roller Fixing heater H Fixing...

Страница 73: ...pressure springs so that toner on the paper is melted and fused onto the paper When the fixing process is completed the paper is separated from the heat and press rollers by their separation claws and...

Страница 74: ...fixing unit thermistor FTH and is regulated by the fixing heater turning on and off If the fixing section becomes abnormally hot either the fixing unit thermistor detects it or fixing unit thermostat...

Страница 75: ...on to start stabilization drive control D When the fixing temperature reaches 170 C 338 F primary stabilization is achieved Copying is enabled if the time from the main switch MSW being turned on has...

Страница 76: ...ying to the 10th copy count 3 During copying 11th copy count and after Table 1 3 3 Fixing control temperature Fixing temperature control in preheat energy saving mode During preheat energy saving mode...

Страница 77: ...oller separation claws Press roller separation claws Press roller Heat roller Paper separation Paper is separated in the fixing section by the separation claws as shown in Figure 1 3 38 Figure 1 3 38...

Страница 78: ...DC 1560 2050 KME S M ELECTRICAL SECTION II II Electrical Section...

Страница 79: ...1 1 11 1AF CONTENTS 2 1 Electrical Parts Layout 2 1 1 Electrical parts layout 2 1 1...

Страница 80: ...ise filter generates 24 V and 5 V DC and controls the halogen lamp and fixing heater 3 High voltage transformer PCB HVTPCB Performs main charging generates developing bias and high voltage for transfe...

Страница 81: ...ypass paper width switch BYPPWSW Detects the width of paper on the bypass table 7 Bypass table extended detection switch BYPEDSW Detects when the bypass table is extended to use long paper 8 Registrat...

Страница 82: ...ty in the developing unit 16 Toner level sensor TLDS Detects the toner level in the toner hopper 17 Fixing unit thermistor FTH Detects the heat roller temperature 18 Drum thermistor DTH Detects the dr...

Страница 83: ...ction fan motor OPFM Cools the optical section 6 Internal cooling fan motor ICFM Cools the machine interior 7 Ozone exhaust fan motor OEFM Exhausts ozone 8 Paper feed solenoid PFSOL Primary paper feed...

Страница 84: ...g heater H Heats the heat roller 5 Fixing unit thermostat 1 TH1 Prevents overheating in the fixing section 6 Fixing unit thermostat 2 TH2 Prevents overheating in the fixing section 7 Optical section t...

Страница 85: ...1 1 13 1AF CONTENTS 2 2 Detection of Paper Misfeed 2 2 1 Paper misfeed detection 2 2 1 2 2 2 Paper misfeed detection conditions 2 2 2...

Страница 86: ...drawer open the front cover and operate the paper conveying section lever open the eject cover or open the eject cover and detach the fixing unit guide To reset the paper misfeed detection open and cl...

Страница 87: ...h RSW does not turn on within 2500 ms after the bypass solenoid BYPSOL has turned on during bypass paper feed BYPSOL 2500 ms On Off On Off RSW Timing chart 2 2 2 Paper jam in the registration section...

Страница 88: ...ot stop RSOL 1650 ms On Off On Off ESW Timing chart 2 2 4 Paper jam in the eject section J50 When the eject switch ESW is on when the main switch is turned on or when the front or eject cover is close...

Страница 89: ...omposite PCB 2 3 1 2 3 2 Main PCB 2 3 3 1 Fixing unit abnormally high temperature shorted thermistor detection circuit 2 3 4 2 Toner feed motor drive circuit 2 3 5 3 Scanner motor drive circuit 2 3 6...

Страница 90: ...nsists of choke coil L1 a resistor and capacitor These attenuate external noise and prevent noise generated by the composite PCB CPCB and other electrical components from escaping out of the copier vi...

Страница 91: ...rn the fixing heater H and halogen lamp HL on and off Control signal H REM from the main PCB turns photocoupler PC4 on when low This allows current to flow from transistor Q602 to photocoupler PT1 tur...

Страница 92: ...2 Main PCB block diagram The main PCB MPCB consists of the CPU IC11 EPROM IC9 NVRAM IC3 and I O IC6 as major components Based on the control programs in EPROM IC9 and the data in NVRAM IC3 the CPU IC...

Страница 93: ...rmally high level This hardware safety function backs up the software controlled shorted fixing unit thermistor abnormally high temperature detection feature self diagnostic code C64 As the fixing tem...

Страница 94: ...aveform across CN11 5 and CN11 6 Figure 2 3 4 Toner feed motor drive circuit The toner feed motor drive circuit generates a pseudo AC supply to run the toner feed motor TFM an AC motor Pulse signals o...

Страница 95: ...6 IC2 P G CN8 1 CN8 3 CN8 2 CN8 5 P G P GND OUT IN Vcc 11 5 8 10 12 8 9 10 11 SM 24 V DC Figure 2 3 5 Scanner motor drive circuit The scanner motor drive circuit controls the scanner motor SM a stepp...

Страница 96: ...swhenthepower isturnedon resetIC17emitsaresetsignaltotheCPU IC11 topreventIC11frombehaving erroneously Reset IC17 is equipped with a watchdog timer function to monitor the CPU IC11 I O IC6 emits a con...

Страница 97: ...esent Scan signals which go low in sequence are constantly output to the sink drivers for lines DEG 0 to DEG 7 so current flows through the LED for which the two signals are low simultaneously The sta...

Страница 98: ...DC 1560 2050 KME S M III Set Up and Adjustment Section III SET UP AND ADJUSTMENT SECTION...

Страница 99: ...1 Unpacking and installation 3 1 1 1 Installation environment 3 1 1 2 Installation procedure 3 1 2 3 1 2 Setting initial copy modes 3 1 16 3 1 3 Installing the key counter option 3 1 17 3 1 4 Install...

Страница 100: ...umidity abrupt ambient temperature changes and hot or cold air directly hitting the machine Avoid dust and vibration Choose a surface capable of supporting the weight of the machine Place the machine...

Страница 101: ...ng unit spacers Remove the pins Start Completion of machine installation Remove the tapes and spacers Load developer Unlock the cleaning blade Connect the power plug Exit simulation mode Adjust the le...

Страница 102: ...3 1 3 1AF Figure 3 1 2 Lens unit pins Light source unit 2 pin Light source unit 1 pins Bypass cover Table stopper Fixing unit spacers...

Страница 103: ...frame Top pads Unpack Figure 3 1 3 Unpacking Top plate Accessories case Plastic bag Instruction handbook Bypass cover case Air padded sheet Table stopper Upper part of the bypass cover Lower part of...

Страница 104: ...1 pins and the one light source unit 2 pin on the upper right cover and then remove these pins Light source unit 1 pins Light source unit 2 pin Figure 3 1 4 2 Remove the tapes holding the two lens un...

Страница 105: ...1AF Remove the fixing unit spacers 1 Open the eject cover and remove the two fixing unit spacers holding both ends of the press roller Fixing unit spacers Press roller Figure 3 1 6 2 Close the eject...

Страница 106: ...l holder 4 Remove the tapes holding the insertion guides of the bypass table 5 Remove the tape and right spacer Tape Tapes Right spacer Insertion guides Figure 3 1 7 6 Open the front cover and remove...

Страница 107: ...pin plug Tape Figure 3 1 9 9 Slide the image formation unit lever toward the left and holding the front part of the unit and the unit s handle pull the unit level out of the machine Do not touch the d...

Страница 108: ...t front guide Tape Figure 3 1 11 Load developer Caution Place the image formation unit on a level surface when loading developer 1 Slide the developing unit top lid toward the machine front off the im...

Страница 109: ...ping unit top lid to the image formation unit Unlock the cleaning blade 1 Push up the blade mount on the left of the image formation unit and slide the blade lever toward the machine front The cleanin...

Страница 110: ...print key After about 3 minutes the toner sensor control voltage is automatically set and the value appears on the copy quantity display Display example 198 Be sure to record the set value on the sim...

Страница 111: ...toner cartridge 1 Open the front cover 2 Shake the new toner cartridge up and down four or five times to agitate the toner Figure 3 1 15 3 Insert the toner cartridge into the developing unit along the...

Страница 112: ...l off the film Figure 3 1 17 5 Close the front cover Adjust the levelling bolts 1 Remove the tapes and turn the two levelling bolts below the right side of the machine until the machine is level Level...

Страница 113: ...ble stopper 1 Pull out the bypass table 2 Insert the table stopper under the bypass table Bypass table Table stopper Figure 3 1 19 Install the bypass cover 1 Fit the bypass cover to the bypass table B...

Страница 114: ...3 1 15 1AF Make test copies 1 Place paper in the paper drawer and make test copies Completion of machine installation...

Страница 115: ...5 min 86 Setting the auto shutoff time 30 min 89 Setting the maximum preset number of copies 100 copies 91 Setting operation under the toner empty condition No of copies that can be made Unlimited Cop...

Страница 116: ...over Key counter entrance Figure 3 1 21 3 Open the front cover and take the image formation unit out of the copier 4 Remove the upper and lower right covers front right cover and front inner cover 5 R...

Страница 117: ...upper and lower right covers front right cover front inner cover and left cover 10 Place the image formation unit back into the copier and close the front cover 11 Turn the main switch on and insert...

Страница 118: ...binding screws M3 5 P N B1303050 1 Only where required by regulations Procedure 1 Remove the power plug from the wall outlet 2 Remove the bypass rear right upper and right front covers 3 Remove the or...

Страница 119: ...indingscrews M3 5 M3 5 Dehumidifier Base center reinforcement Figure 3 1 25 9 Insert the 2 pin connector of the dehumidifier into the opening at the rear of the copier and refit the base center reinfo...

Страница 120: ...six wire retainers 13 Press the white 1 pin connector of the dehumidifier junction wire onto terminal T5 on the composite PCB 14 Press the blue 1 pin connector of the dehumidifier junction wire onto...

Страница 121: ...r right upper and right front covers 16 Attach the ON and OFF labels above the main switch Note These labels are necessary only where required by regulations ON label OFF label Main switch Figure 3 1...

Страница 122: ...1 1 19 1AF CONTENTS 3 2 Simulation 3 2 1 Simulations 3 2 1 1 Running a simulation 3 2 1 2 Simulation list 3 2 3 3 Contents of simulations 3 2 6...

Страница 123: ...wn on the copy quantity display The selected simulation number is shown on the copy quantity display Entering simulation mode Selecting a simulation Exiting simulation mode The simulation is run Press...

Страница 124: ...Mode 1 Mode 2 Mode 3 Mode 4 Mode 5 Mode 6 Paper select key selects a mode Paper size indicators indicate the selected mode Selecting a mode Use the paper select key to select a mode during simulation...

Страница 125: ...eeding a single original 2 Ejecting originals 09 Setting shipping defaults Paper feed 10 Turning the drive motor on conveying 11 Checking switch operation Paper size indicator Switch name A3 11 17 Reg...

Страница 126: ...osure amount for enlargement reduction mode Charging 31 Setting transfer voltage 32 Setting the drum potential Cleaning 42 Making a blank lamp test copy Fixing 46 Setting the fixing temperature 47 Set...

Страница 127: ...85 Setting the auto preheat time 15 min 86 Setting the auto shutoff time 30 min 88 Setting the paper size Folio 89 Setting the maximum preset number of copies 100 91 Setting operation under the toner...

Страница 128: ...numeric keys 7 Press the print key to start copying Copying contin ues until the set number of copies have been made or the stop clear key is pressed 8 Enter 10871087 with the numeric keys The copier...

Страница 129: ...to a position 752 pulses from its home position and light source unit 1 to a position 3552 pulses from its home position 4 Turn the main switch off 10 Turning the drive motor on 1 Enter 10 with the n...

Страница 130: ...he numeric keys 2 Press the print key The drive motor and developing bias turn on 3 Select the solenoid to be operated with the paper select key 4 Press the print key The selected solenoid turns on 5...

Страница 131: ...3 Select the maximum size of copy paper 4 Open the original holder 5 Press the print key A test copy is made with the two end blank lamps off Normal Copy example A Copy example B Figure 3 2 2 If the t...

Страница 132: ...umeric keys 2 Press the print key 3 Select the magnification ratio with the zoom up down keys 4 Select the original size with the original select key 5 Press the print key The lens and mirrors 4 5 mov...

Страница 133: ...reset key The lens and mirrors 4 5 cycle through the following magnification ratios 100 86 70 64 141 122 115 100 6 Press the stop clear key The lens and mirrors 4 5 stop 24 Setting the exposure amoun...

Страница 134: ...new setting is stored 5 Press the all clear reset key Operation check mode is entered and the following operation takes place under the new setting Timing chart 3 2 1 6 Press the all clear reset key T...

Страница 135: ...k mode is entered and the following operation takes place under the new setting Timing chart 3 2 2 7 Press the all clear reset key The operation stops 8 Press the stop clear key 200 ms 200 ms All clea...

Страница 136: ...copy mode is entered Test copy mode can be exited by pressing the all clear reset key 3 Open the original holder 4 Select the maximum size of copy paper 5 Press the print key The blank lamps light in...

Страница 137: ...mode 46 Setting the fixing temperature 1 Enter 46 with the numeric keys 2 Press the print key The current setting appears on the copy quantity display 3 Select a mode with the paper select key 4 Chan...

Страница 138: ...print key to make a test copy 7 Press the stop clear key 54 Adjusting the leading edge margin See page 3 3 14 55 Adjusting the side erasure 1 Enter 55 with the numeric keys 2 Press the print key The c...

Страница 139: ...volt age remains unchanged 4 Press the stop clear key 61 Forcing toner feed 1 Enter 61 with the numeric keys 2 Press the print key Aging starts and toner is replen ished until the toner sensor output...

Страница 140: ...a Sim No ADF operation without originals 0 05 Folio size 330 14 Auto exposure 22 Prescan exposure amount 190 NTC level 415 NPTC level 250 Exposure amount 24 Exp 1 160 Exp 4 175 Exp 7 195 Exp 7 1 185 P...

Страница 141: ...temp 182 Fixing preheat temperature 100 47 ADF leading edge registration timing 100 52 Leading edge margin 54 100 copy 75 Enlargement copy 100 Reduction copy 30 Side erasure 1 55 Trailing edge blank...

Страница 142: ...2 Run each simulation listed above and reenter their values on the simulation label Auto preheat time 15 85 Auto shutoff time 30 86 Paper size 0 88 Maximum preset No of copies 100 89 Operation under t...

Страница 143: ...for mode 1 0 for mode 2 0 for mode 3 In this example the maintenance cycle is 40 000 Setting all the modes to 0 cancels the maintenance cycle detection 5 Press the print key The new setting is stored...

Страница 144: ...mode Example 7 for mode 1 0 for mode 2 0 for mode 3 In this example the maintenance count is 70 000 5 Press the print key The new setting is stored Caution It is necessary to press the print key for...

Страница 145: ...e 5 Select modes 3 4 and 5 in order with the paper select key to check the maintenance count when the service call code was detected To clear the service call records 6 Press the all clear reset key A...

Страница 146: ...dual jam count 4 Select the jam code whose count should be cleared and set the value to 0 with zoom up down keys 5 Press the print key The count of the selected jam code is cleared To clear the all ja...

Страница 147: ...the print key The count of the selected code is cleared To clear all the service call counts 6 Press the all clear reset key All the service call counts are reset to 0 7 Press the stop clear key Code...

Страница 148: ...5 6 set the values to 0 with the zoom up down keys 5 Press the print key The count for the selected pa per source is cleared To clear all the paper feed counts 6 Press the all clear reset key All the...

Страница 149: ...e mode 1 Enter 81 with the numeric keys 2 Press the print key The current setting appears on the copy quantity display 3 Select the initial exposure mode with the zoom up down keys 4 Press the print k...

Страница 150: ...int key 5 Press the stop clear key 83 Selecting the exposure scale 1 Enter 83 with the numeric keys 2 Press the print key The current setting appears on the copy quantity display 3 Select the exposure...

Страница 151: ...stored 5 Press the stop clear key 85 Setting the auto preheat time 1 Enter 85 with the numeric keys 2 Press the print key The current setting appears on the copy quantity display 3 Change the setting...

Страница 152: ...e zoom up down keys Every press of the zoom up or down key changes the value by 15 Select 0 to cancel the auto shutoff function 4 Press the print key The new setting is stored 5 Press the stop clear k...

Страница 153: ...Enter 91 with the numeric keys 2 Press the print key The current setting appears on the copy quantity display 3 Select the mode to be changed with the paper se lect key 4 Change the setting with the...

Страница 154: ...key The current setting appears on the copy quantity display 3 Select the destination setting with the zoom up down keys 4 Press the print key 5 Press the stop clear key Caution Setting the destinatio...

Страница 155: ...xposure section 3 3 20 1 Detaching and refitting the halogen lamp 3 3 20 2 Detaching and refitting the optical section thermostat 3 3 21 3 Adjusting the positions of the light adjusters 3 3 22 4 Detac...

Страница 156: ...8 Cleaning section 3 3 54 1 Detaching and refitting the cleaning blade 3 3 54 2 Detaching and refitting the drum separation claws 3 3 56 3 3 9 Fixing and eject section 3 3 57 1 Replacing the fixing h...

Страница 157: ...titute wire for thermostats as the copier may be seriously damaged When installing a thermostat ensure the correct clearance if specified using a thickness gauge Do not turn the red screw on the image...

Страница 158: ...number of the simulation to be run with the numeric keys Press the print key The selected simulation is run Press the stop clear key Enter 01 with the numeric keys and press the print key Start End S...

Страница 159: ...hold the paper feed solenoid on Turn the drive motor counterclockwise by hand drawer paper feed shaft A turns to an angle where the paper feed pulleys can be easily removed Drive motor Composite PCB D...

Страница 160: ...B from drawer paper feed shaft A 9 Clean or replace paper feed pulley A and or B When refitting paper feed pulley A and B orient them with their white surfaces toward the machine front 10 Refit all th...

Страница 161: ...and take the image formation unit out of the copier 5 Place the copier on its left side as shown below 6 Remove the screw and the limiter mount Limiter mount Screw Figure 3 3 4 7 Remove the E ring an...

Страница 162: ...er feed shaft by lifting the shaft slightly and remove the stopper and bushing from the shaft Do not lift the bypass paper feed shaft too far 3 Remove the screw and bypass upper pulley from the bypass...

Страница 163: ...ove the two screws and composite PCB 4 Remove the two screws and power supply assembly 5 Remove the bypass table 10 pin connector from CN12 on the main PCB 6 Open the drawer and remove the two screws...

Страница 164: ...itch Screws Bypass paper width switch 5 pin connector Bypass table assembly Figure 3 3 8 Detaching the bypass paper width switch 10 Apply the specified grease to the printed surface of the new bypass...

Страница 165: ...softheoriginal and the copy image Procedure Yes No Start Make a test copy at 100 with the maximum size of copy paper Is the center of the image aligned with that of the original End Screw Original siz...

Страница 166: ...ant Before starting this adjustment ensure 5 Adjusting the position of the original size indicator has been completed Procedure Yes No Start End Make a test copy at 100 with the maximum size of copy p...

Страница 167: ...starting this adjustment ensure 5 Adjusting the position of the original size indicator has been completed Procedure Yes No Make a test copy at 100 with the maximum size of the copy paper Start End I...

Страница 168: ...the print key Press the all clear reset key Press the print key to make a test copy Does the copy image look like example 1 Does the copy image look like example 2 Increase the setting with the zoom...

Страница 169: ...1AF 3 3 13 End Yes No Press the stop clear key Exit simulation mode Adjust for another mode...

Страница 170: ...fied range 1 Change the setting with the zoom up down keys Press the print key Setting range 1 to 200 References 75 for 100 copy 100 for enlargement copy 30 for reduction copy Increasing the value mak...

Страница 171: ...ess the all clear reset key Press the stop clear key Press the print key to make a test copy Exit simulation mode Is trailing edge margin A 0 mm Change the setting with the zoom up down keys Press the...

Страница 172: ...r key Press the print key to make a test copy Exit simulation mode Is black band A about 3 mm Change the setting with the zoom up down keys Press the print key Setting range 0 to 35 Reference 25 Incre...

Страница 173: ...r the charger wire retainer pin Use a clean undamaged tungsten charger wire Keep the charger wire taut by ensuring the charger spring is under tension Clean the main charger shield first with a damp c...

Страница 174: ...t least five turns around one end of the charger spring and trim the end of the wire The length of the twists and the cut wire must be less than 2 mm 7 Hook the other end of the charger spring to the...

Страница 175: ...otch Charger wire retainer pin Trim Figure 3 3 22 Replacing the charger wire 11 Refit the front and rear lids to the main charger 12 Refit the main charger grid and grid tension plate When refitting t...

Страница 176: ...urce unit 1 to the cutout in the upper rear frame 3 Remove the halogen lamp by pressing its terminals at the front and rear of light source unit 1 outward When removing the lamp touch only the ceramic...

Страница 177: ...se the copier will be seriously damaged Procedure 1 Remove the left cover 2 Unplug the two 1 pin connectors of the optical section thermostat 3 Remove the two screws and optical section thermostat 4 F...

Страница 178: ...sure that the main and transfer chargers mirrors and dust filter are not stained with toner Procedure Yes No Make a test copy at 100 with the maximum size of copy paper Start Adjust the positions of t...

Страница 179: ...urce unit 1 to the center of the machine 3 Remove each screw and retainer holding the scanner wires to light source unit 1 4 Unhook the wire springs on one end of each scanner wire from their holders...

Страница 180: ...ner wire with the spring on the right side of the machine and the round terminal on the left insert the ball into the hole in the scanner wire drum 1 3 Run the end with the spring of the scanner wire...

Страница 181: ...he outer groove in the scanner wire pulley on light source unit 2 from bottom to top 9 11 Hook the round terminal to its holder on the right side of the machine 0 12 Repeat steps 2 to 11 on the machin...

Страница 182: ...e is out of focus Procedure Yes No Make a test copy at 100 with the maximum size of copy paper Start Loosen the screw holding the mirrors 4 5 frame on the lens unit and adjust the distance to the lens...

Страница 183: ...copy image is laterally skewed lateral squareness is not obtained Procedure Yes No Make a test copy at 100 with the maximum size of copy paper Start End Is the copy image correct Mirrors 4 5 frame Ad...

Страница 184: ...ongitudinal image squareness first adjust the levelling bolts and if the problem persists only then adjust the height of mirror 2 Procedure Adjusting the levelling bolts Yes No Make a test copy at 100...

Страница 185: ...irror 2 Yes No Make a test copy at 100 with the maximum size of copy paper Start End Is the copy image correct Mirror 2 Adjustment screw Figure 3 3 36 Adjusting the height of mirror 2 Original Copy ex...

Страница 186: ...ode exposure amount Procedure Enter simulation mode Enter 24 with the numeric keys Yes Yes No No Start Press the print key Place the NTC on the contact glass and select mode 2 with the paper select ke...

Страница 187: ...mode 4 with the paper select key Press the all clear reset key Press the print key to make a test copy Is the image abnormally light Is the image abnormally dark Decrease the setting with the zoom do...

Страница 188: ...e paper select key Change the value to the mode 4 setting plus 10 with the zoom up down keys Press the stop clear key Press the print key Exit simulation mode The new setting is stored Setting range 1...

Страница 189: ...Press the all clear reset key Press the stop clear key Press the print key to make a test copy Is the image abnormally light Is the image abnormally dark Decrease the setting with the zoom down key In...

Страница 190: ...tting the exposure amount Place ten sheets of A3 11 17 plain white paper on the contact glass Press the all clear reset key to prescan repeatedly Press the all clear reset key to start prescanning Pla...

Страница 191: ...Press the print key The new setting is stored Press the stop clear key Exit simulation mode Setting ranges 0 to 50 for 100 copy 0 to 40 for enlargement copy 0 to 40 for reduction copy References 25 f...

Страница 192: ...ally than the original Increase the value if the image is shorter longitudinally than the original Press the print key The new setting is stored Press the stop clear key Exit simulation mode Setting r...

Страница 193: ...value if the image is abnormally light Press the print key The new setting is stored Press the stop clear key Exit simulation mode Setting range 102 to 243 References 166 for enlargement copy 170 for...

Страница 194: ...of the lens unit The adjustment is necessary to obtain correct enlargement and reduction ratios Procedure Start Enter simulation mode Enter 28 with the numeric keys Press the print key Press the stop...

Страница 195: ...key Change the setting with the zoom up down keys The new setting is stored Setting range 0 or 1 If 0 is selected the optical section fan motor is under normal control If 1 is selected the optical se...

Страница 196: ...itting the drum Hold the drum at the ends and never touch the drum surface After removing the drum keep it in the drum case or storage bag to protect the surface from light Procedure 1 Open the copier...

Страница 197: ...ne Do not touch the drum separation claws when holding the image formation unit Image formation unit Image formation unit lever Image formation unit handle Figure 3 3 39 Removing the image formation u...

Страница 198: ...m Orient the drum correctly with the thin shaft hole on the machine front and the thick shaft hole on the machine rear 10 Push the drum shaft into the rear of the drum and while turning the shaft inse...

Страница 199: ...ly Do not clean the drum with alcohol thinner or other organic solvent Required supplies Polishing cloth specified synthetic cotton Toner Procedure 1 Detach the drum see page 3 3 40 2 Apply a polishin...

Страница 200: ...Is the copy image correct Is the image abnormally dark Setting range 0 to 255 References 190 for normal mode 100 for photo mode Changing the value by one changes the drum potential grid potential by...

Страница 201: ...1AF 3 3 45 End Yes Press the stop clear key Exit simulation mode No Adjust for another mode...

Страница 202: ...fromthemagnetrollerretainerontheback of the developing unit 3 Loosen the screw holding the magnet roller retainer 4 Adjust the magnet roller retainer right and left until the distance between the top...

Страница 203: ...ing unit upper cover Figure 3 3 44 3 Adjust the distance between the doctor blade and the developing roller using thickness gauges at the three points indicated by the arrows in the diagram Turn the t...

Страница 204: ...ter s negative terminal to an uncoated part of the copier s frame Enter simulation mode Press the all clear reset key Press the stop clear key Does the devel oping bias voltage read the specified valu...

Страница 205: ...ger wire taut by ensuring the charger spring is under tension Clean the charger shield when replacing the charger wire Procedure 1 Open the front cover and turn the paper conveying section lever down...

Страница 206: ...r lids 6 Remove the charger wire retainer pins charger springs and then the charger wires Charger wire retainer pins Charger wires Charger terminals Charger springs Transfer charger front lid Transfer...

Страница 207: ...in the charger wire retainer pin and pull it tight so that the charger spring stretches to between 9 5 and 11 mm 10 Insert the retainer pins into the projections of the transfer charger front housing...

Страница 208: ...No No Start Enter simulation mode Enter 31 with the numeric keys Change the setting with the zoom up down keys Press the print key The new setting is stored Press the stop clear key Exit simulation m...

Страница 209: ...pply the tester s negative terminal to an uncoated part of the copier s frame Enter simulation mode Press the all clear reset key Press the stop clear key Does the sepa ration shift bias voltage read...

Страница 210: ...aning blade as follows Procedure 1 Open the front cover and take the image formation unit out of the copier 2 Detach the main charger and drum 3 Push up the blade mount and slide the blade lever towar...

Страница 211: ...Removing the cleaning blade 5 Fit the new cleaning blade Ensure the cleaning blade is not riding over the boss of the blade mount 6 Slide the blade lever toward the rear to lock the blade away from th...

Страница 212: ...w mount ensure the claw lever sits between the two tabs of the blade mount Blade mount Screws Separation claw mount Separation claw lever Figure 3 3 53 4 Remove the separation claw lever from the claw...

Страница 213: ...ector of the fixing heater relay wire 2 pin connector of the fixing unit thermistor and 3 pin connector of the eject switch 3 pin connector 2 pin connector 1 pin connectors white and red Figure 3 3 55...

Страница 214: ...xing heater connector from fixing unit thermostat 1 and free the heater wire from the wire holder 8 Remove the two screws and heater front and rear retainers 9 Pull the fixing heater out of the front...

Страница 215: ...e fixing unit cover 2 Remove the screw and fixing unit thermistor 3 Fit the new fixing unit thermistor with its projection seated into the upper hole in the fixing unit housing 4 Refit all the removed...

Страница 216: ...lows Procedure 1 Remove the fixing unit cover 2 Remove the two screws fixing unit thermistor partition and the fixing unit blade 3 Clean or replace the fixing unit blade 4 Refit all the removed parts...

Страница 217: ...and fixing heater relay wire from the fixing unit thermostats 3 Remove the two screws for each thermostat and then fixing unit thermostats 1 and 2 4 Replace fixing unit thermostats 1 and or 2 When fit...

Страница 218: ...edure 1 Unlock the fixing unit at the front and rear by pulling the press levers in the directions of the arrows in the diagram and open the unit Fixing unit press levers Figure 3 3 62 2 Remove the st...

Страница 219: ...sure the slot is on the machine rear and the projections of the claw mount are seated in the hole and slot of each claw as shown in the diagram 6 Refit all the removed parts When refitting the press r...

Страница 220: ...n the fixing unit see Fig 3 3 62 Removing the heat roller 3 Remove the two pins and fixing unit upper guide from the fixing unit 4 Remove the circlip and bushing from the front of the heat roller 5 Re...

Страница 221: ...w shaft out to remove the claws 9 Clean or replace the heat roller and or its separation claws 10 Refit all the removed parts When refitting the heat roller separation claws ensure that their tips are...

Страница 222: ...f the lower eject roller 3 Remove the two E rings eject gear 22 spring pin and bushing from the rear of the lower eject roller 4 Remove the lower eject roller from the eject cover 5 Clean or replace t...

Страница 223: ...the ozone filter Replace the ozone filter as follows Procedure 1 Detach the left cover 2 Replace the ozone filter with a new one 3 Refit all the removed parts Ozone filter Ozone exhaust fan motor Figu...

Страница 224: ...1 1 25 1AF CONTENTS 3 4 PCB Initial Settings 3 4 1 Replacing the main PCB 3 4 1 3 4 2 Adjustment free variable resistors VR 3 4 4...

Страница 225: ...tingsofthefollowingitemswhichmustbereenteredafterreplacement Drawer paper size setting Auto exposure adjustment Manual exposure adjustment 2 Enter simulation mode 3 Run the following simulations and r...

Страница 226: ...clearing the maintenance count 73 Checking clearing service call records 74 Checking clearing jam counts 76 Checking clearing the service call counts 77 Checking clearing the paper feed counts 80 Sele...

Страница 227: ...user settings recorded in step 1 Sim No Contents 88 Setting the paper size 89 Setting the maximum preset number of copies 91 Setting operation under the toner empty condition 92 Selecting between aut...

Страница 228: ...able resistors VR The variable resistors listed below are set at the factory prior to shipping and cannot be adjusted in the field High voltage transformer PCB VR101 VR201 VR202 VR301 VR401 and VR402...

Страница 229: ...1 1 27 1AF CONTENTS 3 5 Self Diagnostics 3 5 1 Self diagnostic function 3 5 1 1 Self diagnostic display 3 5 1...

Страница 230: ...h itself it disables copying and displays the problem as a code consisting of C followed by a number between 01 and 90 indicating the nature of the problem Afterremovingtheproblem theself diagnosticfu...

Страница 231: ...uit in the drive motor Poor contact in the con nector termi nals Defective drive trans mission sys tem Defective main PCB Defective safety switch 2 After turning safety switch 1 off then back on run s...

Страница 232: ...tact in the home position switch con nector termi nals Loose scan ner drive belt Loose scan ner wire Loose screws holding the scanner wire retainers Defective main PCB Check for continuity across the...

Страница 233: ...ration charger leaks Defective high voltage transformer PCB Defective main PCB Check for continuity across the coil If none replace the lens motor Check if CN5 2 on the main PCB goes high when the len...

Страница 234: ...ater installed in correctly Fixing unit thermostat triggered Fixing unit thermistor installed in correctly Defective main PCB Broken fixing unit thermis tor Poor contact in the fixing unit thermis tor...

Страница 235: ...m thermistor Defective main PCB Poor contact in the humid ity sensor PCB connec tors Broken exter nal tempera ture thermis tor wire Defective main PCB Shorted exter nal tempera ture thermis tor Defect...

Страница 236: ...tion error is detected three times in succession Poor contact in the connec tor Defective main PCB Defective power source box Check the connections at CN3 on the main PCB and the connector on the ADF...

Страница 237: ...n copies 3 6 13 16 Image is partly missing 3 6 13 17 Fixing is poor 3 6 14 18 Image is out of focus 3 6 14 19 Image is not square longitudinally 3 6 14 20 Image is not square laterally 3 6 15 21 Image...

Страница 238: ...cleaning lamp does not light 3 6 33 15 The fixing heater does not turn on C61 C63 3 6 33 16 The fixing heater does not turn off fixing unit thermostat 1 or 2 triggered C64 3 6 34 17 Main charging doe...

Страница 239: ...ge 3 6 6 See page 3 6 7 See page 3 6 7 4 Background is visible 5 A white line appears longitudinally 6 A black line appears longitudinally See page 3 6 8 See page 3 6 9 See page 3 6 9 7 A black line a...

Страница 240: ...inal 12 The leading edge of the image is sporadi cally misaligned with the original See page 3 6 11 See page 3 6 12 See page 3 6 13 13 Paper creases 14 Offset occurs 15 Black lines appear on both side...

Страница 241: ...3 6 3 1AF See page 3 6 14 See page 3 6 15 See page 3 6 15 19 Image is not square longitudinally 20 Image is not square laterally 21 Image is partially missing laterally...

Страница 242: ...on Replace the wire Clean the main charger housing Check for continuity across the terminals If none replace them Run simulation 32 and check if CN1 21 on the main PCB goes low or check if the correct...

Страница 243: ...tinuity If none replace the thermostat after determining the cause Check for continuity across the terminals If none replace them Run simulation 20 and check if CN4 5 on the main PCB remains high If i...

Страница 244: ...the specified limit replace the devel oper Adjust the developing section see page 3 3 46 Clean the drum or if the maintenance level has been reached replace it see page 3 3 40 Causes Check procedures...

Страница 245: ...eck procedures corrective measures 6 A black line appears longitudinally Causes 1 Dirty optical section 2 Dirty or flawed drum 3 Deformed or worn cleaning blade 4 Dirty or flawed main charger grid 1 D...

Страница 246: ...voltage transformer PCB Check the drum visually If it is flawed replace see page 3 3 40 Check for poor developing bias wire contact Clean any part contaminated with toner or carrier in the developing...

Страница 247: ...s dust filter and any other dirty parts in the optical section Check if the main charger wire or grid is dirty If it is replace it Causes Check procedures corrective measures 9 Black dots appear on th...

Страница 248: ...wire see page 3 3 23 Check visually and remove if any Check visually and replace see page 3 3 62 Check the gears and belts Grease the gears or readjust the belt tension if necessary Causes Check proce...

Страница 249: ...ck the installation position and operation of the registration solenoid Causes Check procedures corrective measures 13 Paper creases Causes 1 Paper curled 2 Paper damp 3 Defective fixing pressure spri...

Страница 250: ...ct B Defective cleaning lamp C Defective main PCB 4 Abnormally high heat roller control tempera ture Check the installation position of the cleaning blade and correct it if necessary Replace the clean...

Страница 251: ...ch blank lamp If none replace the blank lamp unit Check for signal level changes on the main PCB Replace the main PCB if necessary Causes Check procedures corrective measures 16 Image is partly missin...

Страница 252: ...age 3 3 62 Causes Check procedures corrective measures 18 Image is out of focus Causes 1 Incorrect focus adjustment 1 Incorrect focus adjust ment Adjust the focus of the image see page 3 3 26 Causes C...

Страница 253: ...mage is partially missing laterally Causes 1 Registration solenoid incorrectly installed or malfunctioning 2 Paper feed solenoid incorrectly installed or malfunctioning 1 Registration solenoid incorre...

Страница 254: ...age 3 6 32 1 A paper jam in the registra tion section is detected as soon as the main switch is turned on J30 appears 2 A paper jam in the eject section is de tected as soon as the main switch is turn...

Страница 255: ...and lower pre trans fer rollers is correct Defective eject switch The registration solenoid mal functions Electrical problem with the reg istration solenoid Replace if deformed With 5 V DC present at...

Страница 256: ...eformed Check if the heat roller separa tion claws are extremely dirty or deformed Check if the contact between the upper and lower eject roll ers is correct Clean or replace the press roller see page...

Страница 257: ...ards do not touch the components with bare hands ICs can be damaged by static discharges If a PCB contains ICs do not touch the ICs cable connectors or edge connectors Store the circuit boards wrapped...

Страница 258: ...DC 5 V DC supply for MPCB output 2 7 2 5 0 24 V DC pulse HL light intensity control PWM input 2 8 2 5 0 24 V DC H on off input 2 9 2 5 24 V DC SSW2 on off output 3 1 3 2 5 V DC 5 V DC supply for DM ou...

Страница 259: ...CN13 TR2 E C B C31 C30 C28 85 84 IC6 C14 C11 X1 80 25 40 C3 CN10 C10 2 1 6 5 1 2 CN6 IC22 1 CN3 D7 4 2 3 1 C18 CN4 7 1 A A B K K C A C C C E C B E B E A A A A A K K K A K A K K Terminals CN Voltage R...

Страница 260: ...4 3 0 24 V DC Separation charging on off output 1 24 4 3 0 5 V DC Grid control voltage output 1 25 4 3 0 5 V DC Main charging control voltage output 1 26 4 3 0 5 V DC Transfer charging control voltage...

Страница 261: ...24 V DC pulse SM coil energization pulse SM A output 8 2 4 3 24 V DC 24 V DC supply for SM output 8 3 4 3 0 24 V DC pulse SM coil energization pulse SM A output 8 4 4 3 0 24 V DC pulse SM coil energiz...

Страница 262: ...half speed stop output 11 16 4 3 24 V DC 24 V DC supply for KC option output 11 17 4 3 0 24 V DC KC option on off output 11 18 4 3 24 V DC 24 V DC supply for TC output 11 19 4 3 0 24 V DC TC on off ou...

Страница 263: ...15 3 4 4 0 4 V DC DM drive stop output 16 1 4 3 24 V DC 24 V DC supply for OPFM output 16 2 4 3 0 24 V DC OPFM on off output 17 1 17 3 5 V DC 5 V DC supply for RSW output 17 2 17 3 0 5 V DC RSW on of...

Страница 264: ...2 J76 D6 J92 D7 D8 J93 J77 J78 J64 J65 J63 L21 L27 L24 L26 D3 J30 J28 J16 J15 J67 D1 D2 J68 J69 J70 J71 J37 J38 J41 J39 J43 J42 J44 J45 J47 J46 J40 J48 J52 J51 L22 J80 J81 J94 J82 J83 J95 L30 L31 L32...

Страница 265: ...y with segment g of the 10s digit 7 seg LED lit 1 3 Continuity with segment f of the 10s digit 7 seg LED lit 1 4 Continuity with segment e of the 10s digit 7 seg LED lit 1 5 Continuity with segment d...

Страница 266: ...t 1 6 Continuity with add toner indicator L21 lit 1 7 Continuity with paper source drawer indicator L20 lit 1 6 2 10 Continuity with auto selection indicator L29 lit 1 7 Continuity with photo original...

Страница 267: ...the key released 2 2 Continuity with stop clear key K20 pressed no continuity with the key released 2 3 Continuity with numeric key 9 K18 pressed no continuity with the key released 2 1 2 9 Continuity...

Страница 268: ...ntinuity across the coil If none replace the scanner motor Check for continuity across the connector terminals If none replace them Run simulation 21 and check if the motor drive coil energization pul...

Страница 269: ...place them Run simulation 23 and check if the motor drive coil energization pulse signals are out put at CN5 9 10 11 and 12 on the main PCB If not replace the main PCB Check for continuity across the...

Страница 270: ...Check for continuity across the connector terminals If none replace them Run simulation 10 and check if CN11 13 on the main PCB goes low about 12 V at half speed If not replace the main PCB Check for...

Страница 271: ...If none replace the halogen lamp see page 3 3 20 See page 3 6 5 If HL CONT PWM signal is always output from CN4 5 on the main PCB replace the main PCB If the halogen lamp does not turn off when no HL...

Страница 272: ...Broken transfer charger wire Leaking transfer charger housing Poor contact in the high voltage trans former PCB con nector terminals Defective main PCB Defective high voltage trans former PCB Check v...

Страница 273: ...ss the connector terminals If none replace them Run simulation 31 and if separation charging does not take place while CN1 5 on the high voltage transformer PCB goes low re place the high voltage tran...

Страница 274: ...inals If none replace them Check if CN12 2 on the main PCB goes low when the bypass paper length switch is turned on If not replace the bypass paper length switch If the levels of CN12 7 8 and 9 on th...

Страница 275: ...ch 2 Wiring is broken shorted or makes poor contact Noise Check for continuity across the connector terminals If none replace them Check for continuity across the contacts of safety switch 2 If none w...

Страница 276: ...al problem with the paper feed or bypass solenoid Check if the surfaces of the upper lower registration rollers and upper lower pre transfer rollers are dirty with paper powder Electrical problem with...

Страница 277: ...the developing unit is ex tremely dirty Check if the rollers and gears oper ate smoothly Check if the paper feed bypass and registration solenoids are installed correctly Clean the developing unit Gr...

Страница 278: ...chart No 1 3 7 1 Timing chart No 2 3 7 2 Timing chart No 3 3 7 3 Composite PCB 1 3 3 7 4 Composite PCB 2 3 3 7 5 Composite PCB 3 3 3 7 6 Operation unit PCB 3 7 7 Main PCB 3 7 8 General connection dia...

Страница 279: ...ICFM With the fixing temperature at 13 C 55 4 F or above but below 100 C 212 F and with the external temperature at 18 C 64 4 F or above when the main switch is turned on Fixing stability temperature...

Страница 280: ...CN1 23 HL CN4 5 BL CN9 1 11 PFSOL CN2 4 RSOL CN14 2 OPFM CN16 2 ICFM CN11 15 OEFM CN11 13 Print key on HPSW off HPSW off RSW on HPSW on RSW off ESW on ESW off HPSW on 480 ms 300 ms 480 ms 1500 ms 200...

Страница 281: ...0 MC CN1 21 TC CN1 22 SC CN1 23 HL CN4 5 BL CN9 1 11 PFSOL CN2 4 RSOL CN14 2 OPFM CN16 2 ICFM CN11 15 OEFM CN11 13 Print key on HPSW off RSW on RSW off ESW on ESW off HPSW on 480 ms 1500 ms 200 ms 10P...

Страница 282: ...1 CN6 3 LIVE NUTRAL T3 T5 F1 F2 F001 C001 L001 C2 C1 R2 R1 L1 D B C D SW1 1A 3A 1B 3B C3 C4 D001 4 1 2 3 LIVE NUTRAL C002 C003 C004 C007 C005 C006 Q102 C110 1 3 2 D104 C101 D103 R103 NTC R112 R101 ZD1...

Страница 283: ...CN3 2 CN3 3 7 8 11 12 CN3 4 CN5 5 CN2 9 CN5 3 CN2 1 CN2 2 CN5 1 GND GND GND GND GND 24 V A 24 V 24 V C206 R206 TRNS C207 ZD402 R402 8 7 6 5 1 2 3 4 ZD401 R401 C203 IC3 D301 D302 C302 PC2 1 2 AB2 AB1 D...

Страница 284: ...01 C602 ZD601 C601 IC601 VR601 PC3 R605 R608 R610 R614 VR603 R615 C603 4 3 3 8 4 2 1 3 2 1 R604 C606 C604 IC601 Q602 6 2 5 7 1 3 PC4 PT2 PT1 4 1 2 3 1 2 R607 D601 D602 D603 VR602 R609 R611 R612 1 2 PC...

Страница 285: ...0 CN2 9 CN2 8 CN2 7 CN2 6 CN2 5 CN2 4 CN2 3 CN2 2 CN2 1 SEG a SEG b SEG c SEG d SEG e SEG f SEG g SEG h DEG 0 DEG 1 DEG 2 DEG 3 DEG 4 DEG 5 DEG 6 DEG 7 KEY 0 KEY 1 KEY 2 7seg 1a 7seg 2a 7seg 3a 7seg 1...

Страница 286: ...0 21 22 23 24 AN0 D A2 D A1 DAVref ADVref AVss AVcc Vcc Vss P37 P36 TxD RxD PWMout P32 NC D0 D1 D2 D3 D4 D5 D6 D7 VSS NC Xout Xin NC _RES CN Vss 9 10 12 2 3 6 7 9 11 5 13 15 14 16 64 63 62 61 60 59 58...

Страница 287: ...REM MC REM TC REM SC REM GRID CONT MC CONT TC CONT HVT ALM NC 24 V 5 V G 24 V G 5 V HL CONT H REM SSW2 5 V G 5 V G 24 V 24 V DM F R DM ALM DM S D 5 V FTH G 5 V LHPSW 5 V G 24 V AES 24 V 24 V 24 V LM...

Страница 288: ...7 CN1 BK BK 1 2 3 1 2 3 LIVE COM LIVE C20 CN4 C18 3 WE C18 1 OE 1 2 3 1 COM 1 C40 TH2 TH3 C44 LHPSW 5V HPSW G 5V 1 2 3 24V AES G 24V 1 2 3 C7 3 C7 2 C7 1 WE WE WE WE WE WE C45 C5 4 C5 5 C5 6 C47 HPSW...

Страница 289: ...B V Hoeksteen 40 2132 MS Hoofddorp The Netherlands Phone 020 6540000 Home page http www kyoceramita europe com Email info kyoceramita europe com KYOCERA MITA NEDERLAND B V Gyroscoopweg 122 1042 AZ Am...

Отзывы: