background image

4-16

A-61635  December 2010


Use the Default Value Setup dialog box to create or revise a formula for the 

default value of the index field. 

Select a predefined value from the 

Predefined Values

 list. The Default 

Value Formula (if any) will be displayed on the right side of the box.

Click 

Add Item.

NOTE:

Delete Item 

removes the last predefined value that was added 

to the Default Value Formula; 

Delete Formula

 removes the 

entire Default Value Formula. 

Click 

OK

 when finished. The revised formula will be populated into the 

Default Value text box. 

14. Enter your input format. See the section entitled “Input formats” later in this 

chapter for more information. 

15. Enter your output format. See the section entitled “Output formats” later in 

this chapter for more information. 

16. If you want to define

 Substitute Characters

, click 

Setup

 to define 

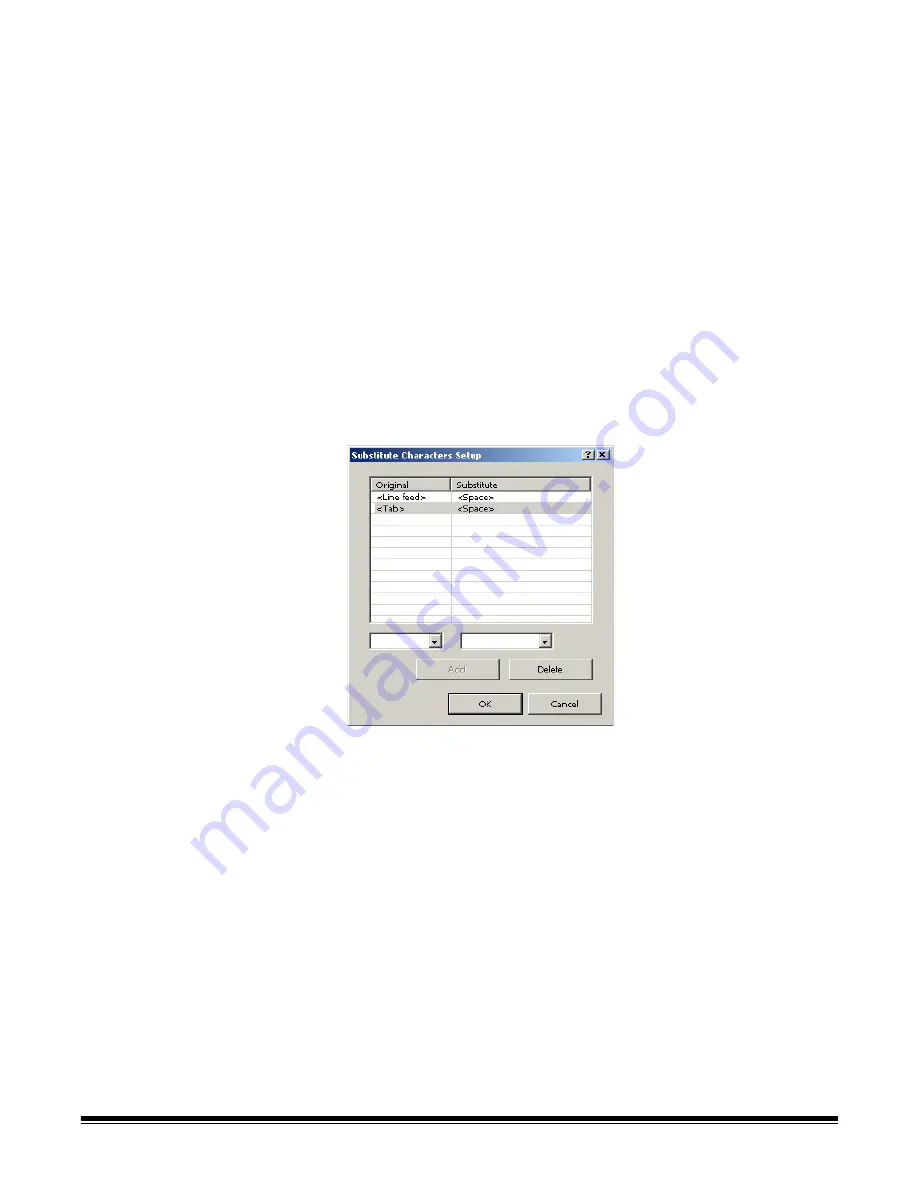
character pairs for automatic substitution. The Substitute Characters Setup 
dialog box will be displayed. 

Original 

column — lists the old characters to be replaced. Select an 

original character from the drop-down list at the bottom of the column. 
Select <

Space

>, <

Linefeed

> or <

Tab

>. An original character can appear 

only once in the 

Original

 column.

Substitute 

column — lists the new characters to be put in. Select a 

substitute character from the drop-down list at the bottom of the column. 
Select <

Space

>, <

Linefeed

>, <

Tab

> or <

Replace

>. A substitute 

character may appear more than once in the 

Substitute

 column.

Add

 — click to add the original and substitute character pair that you 

selected from the two drop-down lists. If you only selected an original 
character, 

Kodak

 Capture Pro Software will default to <Replace> as the 

substitute character. 

Delete

 — deletes the highlighted original and substitute character pair 

from the 

Original

 and 

Substitute

 columns.

Содержание 8383697 - Capture Pro Software

Страница 1: ......

Страница 2: ...OFTWARE AND GETTING STARTED 2 1 THE USER INTERFACE 3 1 JOB SETUP 4 1 PATCH SETUP 5 1 BAR CODE AND OCR SETUP 6 1 PAGE SETUP 7 1 PRODUCTIVITY SHORTCUTS 8 1 USER AND GROUP SETUP 9 1 AUTO IMPORT 10 1 TROU...

Страница 3: ...ease of use It enables optimum scanner throughput and maximum productivity A high speed multi page display presents the images and optional index data as documents are scanned A complete set of icon b...

Страница 4: ...is also available for download for the Capture Pro Software website at www Kodak com go kcsdownloads Reference Guide provides simple procedures for getting started quickly including installing and la...

Страница 5: ...lt folder names are c ScanPro c BatchesPro c Document and Settings All Users Shared Documents KCSPro on Windows XP Systems c Users Public PublicDocuments KCSPro on Windows Vista and Windows 7 Systems...

Страница 6: ...batch 2 16 Installing the software Before you begin refer to the Appendix B System Requirements to ensure your PC is suitable for Capture Pro Software To complete the installation you will need The sc...

Страница 7: ...process does not start automatically navigate to the drive where the DVD is installed and double click Setup exe which is found in the root folder of your Kodak Capture Pro Software installation DVD 4...

Страница 8: ...ching Kodak Capture Pro Software Be sure your scanner is turned on and is attached properly to the PC Your hardware key must be inserted into a USB port on your computer unless you are using Kodak Cap...

Страница 9: ...nner screen will be displayed 2 Select the scanner you have installed on your PC and click OK 3 Click OK on the Workstation Setup screen 4 After selecting your scanner the registration screens will be...

Страница 10: ...Capture Pro Software organizes scanned documents in the following hierarchy Batch contains one or more scanned documents similar to a folder or hanging file containing several separate documents Docu...

Страница 11: ...you to select what states i e Available Processing etc to display in the Batch Status field on the Batch Manager dialog box Open displays the batch that you selected on the list The Open command will...

Страница 12: ...new batch name in the Batch name field By default Kodak Capture Pro Software suggests a new batch name based upon the last batch name created for the job setup For example if the last batch name is He...

Страница 13: ...the batch you selected is already opened at another workstation Kodak Capture Pro Software will not allow you to open the batch The message The batch cannot be opened because it is currently in use b...

Страница 14: ...a batch you can select Batch Open from the menu bar you can click the Open Batch toolbar button or you can press the F3 shortcut key For the purpose of this manual all actions are described by using t...

Страница 15: ...necessary editing options i e remove blank pages rotate images crop images etc See the next section Editing options for a brief description of some of the options available 8 When your batch is how y...

Страница 16: ...er 7 Page Setup All menu options and toolbar options are described in Chapter 3 The User Interface Rotating images Kodak Capture Pro Software allows you to automatically rotate your images as they are...

Страница 17: ...gion To discard a region Right click on the image containing the green rectangle and select Deselect Region Cropping images You can crop an area outside a rectangular region that you create using the...

Страница 18: ...n allows you to scan extra pages into an existing document 1 In the Batch Explorer select the document that is to receive the attachment 2 Click Document Attach Page 3 Scan the images The new pages wi...

Страница 19: ...front images produced by the scanner 1 Select Batch Remove Blank Images The Remove Blank Images Setup dialog box will be displayed 2 Enter the beginning document number in the batch where you want to...

Страница 20: ...es in your batch that match your criteria You can click Setup on the Remove Blank Images window to reopen the Remove Blank Images Setup dialog box and enter higher threshold numbers in bytes for the b...

Страница 21: ...Output Destination selected in the Output tab of the Job Setup dialog box This typically results in the batch being copied to an output subdirectory path To output all available batches in a current j...

Страница 22: ...oolbar 3 16 Navigation toolbar 3 16 Flag toolbar 3 17 Edit toolbar 3 17 Index toolbar 3 18 Scanner Adjustments toolbar 3 18 Keyboard shortcuts 3 19 Batch Explorer 3 20 Image Viewer 3 20 Image context...

Страница 23: ...Batch View Document Navigation Flag Edit and Index 4 Batch Explorer lists all the document folders pages and image files in the batch 5 Image Viewer displays the images in a batch The Image Viewer can...

Страница 24: ...010 3 3 8 Information tab when you click the Information tab located on the right hand side of the Main window the Information window is displayed which provides detailed statistics on the batch docum...

Страница 25: ...tion Export Job Setup displays the Export dialog box which allows you to export the job setup to a file See Chapter 4 Job Setup for more information User Setup displays the User Setup dialog box which...

Страница 26: ...hoose the scanner you want to use 1 Enter the ID and Name of your workstation In a multi scanner environment the ID and name must be unique 2 Click Select The Select Source dialog box will be displaye...

Страница 27: ...images produced by the scanner See Chapter 2 Installing the Software and Getting Started for procedures Output starts processing all images in the current batch Keyboard shortcut O See Chapter 2 Insta...

Страница 28: ...tatus Bar is Ctrl S Toolbars allows you to view or hide the following toolbars Capture Batch View Document Navigation Flag Edit and Index Detailed information regarding the toolbars can be found later...

Страница 29: ...before the image that is selected in the currently displayed document If there are no selected images the imported images will be appended to the end of the current document Both single and multi pag...

Страница 30: ...of the document Keyboard shortcut R Split Document splits the selected document into two documents Merge into Previous places the document currently being scanned into the previous document Delete de...

Страница 31: ...ion Keyboard shortcut Ctrl I Copy Image to Job Setup displays the Copy Image to Job Setup dialog box which allows you to import images into the Bar Code window or the OCR window to create bar code or...

Страница 32: ...image is larger than the pane Keyboard shortcut P Draw Region allows you to draw a rectangle around a portion of an image then blank the area inside the rectangle using Blank or crop the image to the...

Страница 33: ...ewer you want to apply your filter to you can select the Front Side or Back Side Black and White Grayscale or Color images Unflag All Selected removes the flags from the images currently selected Unfl...

Страница 34: ...mage that you want zoomed for display when editing index fields This zoom setting is saved per index field As a result you can define a zoom zone for each index field and the image display automatical...

Страница 35: ...splays the Product Registration dialog box which allows you to register your Kodak Capture Pro Software Kodak Capture Pro Online displays the online help for Kodak Capture Pro Software About Kodak Cap...

Страница 36: ...s to Capture allows you to select Two sided One Sided Front or One Sided Back New batch displays the New Batch dialog box which allows you to create a new batch Open batch displays the Batch Manager d...

Страница 37: ...a portion of an image When you select Magnify the Magnify tool will be displayed You can enlarge any area where you place the tool You must click and hold on the image Pan allows you to move the image...

Страница 38: ...g on an image in the Image Viewer or Batch Explorer and selecting Intelligent QC in the selection list Draw Region allows you to draw a rectangle around a portion of an image then remove the area insi...

Страница 39: ...tured for the current field allowing you to more clearly see difficult to read special language specific characters Drag and Drop OCR allows you to drag and drop indexing via Optical Character Recogni...

Страница 40: ...o select a different scanner settings profile F3 Open a batch F4 Attach a page to the current document F5 Display the Page Setup dialog box F6 Stop scanning F7 Start scanning F8 Delete the selected do...

Страница 41: ...ns Image Viewer The Image Viewer is the area where your images are displayed You can view 1 2 4 or 8 images at a time or customize the Image Viewer layout The title bar contains the batch name and the...

Страница 42: ...l selected images will be available for review and processing If not images have been selected all flagged images will be available Split Document performs a manual document separation which splits th...

Страница 43: ...them If the Magnify tool is active the Magnification Ratio option will be displayed This option displays the Magnification Ratio Setup dialog box which allows you to specify the image size displayed...

Страница 44: ...our convenience the Index window on the right side of the Image Viewer displays the index data for each batch and document that has indexes defined It is available as a pull out tab on the right hand...

Страница 45: ...Image information includes the image sequence number page ID location on disk compression resolution image size and print string To open the Information window 1 Highlight an image page or document f...

Страница 46: ...for viewing all the files in Capture Pro Software Exit opens the Shutdown Options dialog box which contains commands for exiting Capture Pro Software Output processing is performed in the background...

Страница 47: ...Pro Software remembers the settings for each job when exiting the job This means different jobs can be displayed the way you want each job displayed At any time you can select View Layout Classic or E...

Страница 48: ...plays the Image Viewer only The number of images displayed is selectable from 1 2 4 8 or customizable up to 6 columns by 6 rows Enhanced Layout displays the Image Viewer Thumbnail Viewer and Batch Exp...

Страница 49: ...harePoint Index Setup Wizard 4 40 Index tab Database Lookup 4 45 Configuring Database Lookup 4 45 Using Database Lookup 4 50 Edit Index mode 4 51 Batch Output 4 51 Job Setup Output tab 4 52 Destinatio...

Страница 50: ...e the jobs you need to use in your environment There are three predefined jobs that come with Kodak Capture Pro Software Ready to Scan allows you to start scanning documents without any setup using de...

Страница 51: ...settings create and modify bar code or OCR zones and set them up for use Separation settings set up separations by count blank page bar code zone OCR zone or patch code Scanner settings create settin...

Страница 52: ...to delete the selected job setup You cannot delete a job setup if it is open or until all batches are processed or deleted 1 Select a job setup you want to delete from the Job Name drop down list 2 Cl...

Страница 53: ...e Import icon The Import dialog box will be displayed 2 Click Browse to navigate to an exported job setup you want to import 3 The import name will be filled in with the job name that you are importin...

Страница 54: ...h documents or document pages Bar Code OCR allows you to create and modify bar code and OCR zones and set them up for use Separation allows you to set up batch and document separations by count blank...

Страница 55: ...your output images If you do not want the images to go to the displayed location click Browse to select another location Description allows you to enter any important notes as a reminder of the settin...

Страница 56: ...ter the desired next batch number The actual batch number is determined at the time the batch is created You will not be able to enter a value if Enable Job Level batch numbering is unchecked See Sett...

Страница 57: ...e you want to add from the Predefined values list 2 Click Add Item The item will be added to the formula NOTE When specifying a path name the limit is 248 characters in length 3 If you want to add mor...

Страница 58: ...p using the By Blank Page option by selecting Document New or Batch Next by pressing Enter during scanning by right clicking on a page file in the Batch Explorer and clicking Split The sections that f...

Страница 59: ...the page as blank If the software does not recognize a blank page it will ignore it as a separator NOTE It is recommended that you test these values to ensure that the software will detect your blank...

Страница 60: ...nformation What to do if a page is blank select one of the options as the next step after the software recognizes a blank page separation Create a new batch creates a new batch when a blank page is de...

Страница 61: ...nput formats later in this section For information on creating output formats see Output formats later in this section For information on setting up indexes for output to SharePoint see Using the Shar...

Страница 62: ...x Field dialog box to create a new field in a batch Edit opens the Document Edit Index Field dialog box to modify an index field in a document or the Batch Edit Index Field dialog box to modify an ind...

Страница 63: ...9 Check Required to make this index a must have check item 10 If you selected Single Value you can check Hidden to hide this index from users This protects sensitive information 11 Enter a number to d...

Страница 64: ...fine Substitute Characters click Setup to define character pairs for automatic substitution The Substitute Characters Setup dialog box will be displayed Original column lists the old characters to be...

Страница 65: ...e text box under the Value column Enter a description of the value in the text box under the Description column Click Add to add the value and description pair that you entered in the two text fields...

Страница 66: ...he drop down list Use value only Use description only or Use value and description Click OK when finished and return to the Document Add Index Field dialog box 18 Click OK on the Document Add Index Fi...

Страница 67: ...ct File Job Setup The Job Setup dialog box will be displayed 2 Select a job from the Job Name drop down list and open the Index tab 3 Open the Document tab 4 Click Edit The Document Edit Index Field d...

Страница 68: ...rom the Job Name drop down list and open the Index tab 3 Open the Batch tab 4 Click Add The Batch Add Index Field dialog box will be displayed 5 Complete the information in the dialog box and click OK...

Страница 69: ...b z A valid input character set includes all characters in Z and z type C valid input character set includes all characters in Z and 9 type c valid input character set includes all characters in z and...

Страница 70: ...DEFG too long 0 Description any text value minlength maxlength used to represent a fixed or variable length input value that may have a minimum and maximum length If minlength is 0 the input string ma...

Страница 71: ...ive or negative does not contain a decimal point n any number positive or negative and may contain a decimal point The value range or precision of the number is limited by the operating system The val...

Страница 72: ...cription any integer number greater than 100 and less than 100 Valid input examples 99 0 99 Invalid input examples 100 too small must be greater than 100 99 9 must be an integer decimal not allowed 10...

Страница 73: ...cription any integer number greater than or equal to 100 and less than or equal to 100 Valid input examples 100 0 100 Invalid input examples 100 1 too small must be greater or equal to 100 100 001 too...

Страница 74: ...nd t Examples T yyyyMMdd Description a full date Valid input examples 20051025 19000101 Invalid input examples 2005 10 25 unexpected character 20051032 invalid date 20050229 invalid date because the y...

Страница 75: ...Invalid input examples 99 59 00 invalid hour 120000 no separator T hhmmsst Description a full time Valid input examples 010000a 120000p Invalid input examples 010000A A should be lower case 000000a in...

Страница 76: ...ut Format can consist of multiple formats that are used in combination To use multiple formats to define an Input Format connect the format expressions together with or without a blank space No format...

Страница 77: ...ion this is an invalid input format because A 2 3 specified a variable length and no additional format can follow it A 3 3 XX Description combined with formats A 3 3 and XX Valid input example XYZXX I...

Страница 78: ...ng delimiter character double quote is not allowed in the format A fixed text string format is normally used in combination with other formats Using multiple tags A default value may include more than...

Страница 79: ...when you scan folders of documents with the same date When you start scanning into a new batch and no index value has yet to be assigned enter the date once and it remains the same for every new docu...

Страница 80: ...document in the batch will be reformatted based on the output format For instance a date index with a value of MMddyy can be reformatted to MM dd yyyy The output format is entered on the Index tab an...

Страница 81: ...of the original value If end is 0 or the end position will be the end the original value If the start position is after the end position the sub string will have the reverse order of the original val...

Страница 82: ...fields It is also useful when assigning different lines of multi line OCR results to different index fields The delimited produced by multi line OCR is the carat character Examples 2 Description get t...

Страница 83: ...width number of characters and at most fracwidth characters after the decimal width defines the total number of digits to be included in the output string If width is a positive number the output text...

Страница 84: ...h padding used to format a number that will be padded with the padding character to the specified width including fracwidth characters after the decimal point padding defines the character to fill the...

Страница 85: ...ats width fracwidth padding used to format a number that is extracted from a string using textformats and padded with the specified character This format is a extension of the format textformats width...

Страница 86: ...month year format Examples Input Format T yyyyMMdd the string 20051026 26102005 Input Format T yyyyMM the string 102005 102005 yyyy year 1900 2099 yy year 00 99 y year MM month 01 12 M month 1 12 dd...

Страница 87: ...00 yyyy MM dd HH mm ss Description combined with formats yyyy MM dd HH mm and ss Examples 20051026080405PM 2005 10 26 20 04 05 Input Format T yyyyMMddhhmmssTT Output formats An Output Format is a tex...

Страница 88: ...rePoint Index Setup Wizard will guide you through four steps Step 1 SharePoint setup Create Edit Select SharePoint Connection 1 Select a connection to the SharePoint site where you want to place the b...

Страница 89: ...red in a column As an example of when to uncheck the Create Index check box imagine that the SharePoint column Full Name is to contain a persons name in the form last name first name Two existing inde...

Страница 90: ...dd or edit other index field parameters such as Output format Substitute Characters and List for drop down index fields select the row for the appropriate index field and click Edit Step 3 SharePoint...

Страница 91: ...older You may select Setup to view the available folders If you have Black White and Color Grayscale images and all the images are to be stored at the same location using the same image format then se...

Страница 92: ...version number selected TIP When SharePoint versioning is enabled you may also need to configure SharePoint to Require check out When checking in you may include a Check In Comment The comment may be...

Страница 93: ...on Each Lookup takes the form SELECT table column 1 table column 2 table column n FROM data source WHERE table column x index field value Configuring Database Lookup Configuring Database Lookup starts...

Страница 94: ...t an existing File Data Source or Machine Data Source or click New to create a new data source Depending on the type of data source you have selected you will be prompted for additional information Cl...

Страница 95: ...tching values in the selected database from the Lookup index field drop down list This list contains all defined document and batch index fields 13 Select the table column to be searched for values ma...

Страница 96: ...dex mode allowing scanning to continue uninterrupted Lookup will overwrite existing index value when checked the Lookup will always populate an index field with the lookup value in the database as lon...

Страница 97: ...the Lookup 18 Click Test Query The Test Query dialog box will be displayed 19 Enter a valid value for the parameter that is used to perform the Lookup If you leave the value blank the first 25 records...

Страница 98: ...ing scanning e g as a result of a bar code or zonal OCR read During Scanning Validating index fields When Disable Lookup during capture has not been checked Lookups configured for index field validati...

Страница 99: ...Lookup will be performed immediately and the results of populating the other index fields will be displayed for verification Batch Output Database Lookup only occurs on output if the Disable Lookup on...

Страница 100: ...u to setup up the software to automatically e mail the output Print allows you to setup up the software to automatically print the output Advanced Options allows you to apply Kodak Capture Pro Softwar...

Страница 101: ...can choose different settings for File 2 or use the same settings as in File 1 Under the File 1 or File 2 options you can select the Index option The following indexing options will be displayed Batch...

Страница 102: ...les in output If you select Multi Page the For each drop down list becomes available For each Page every image for every page scanned becomes one file When you open the file there will be two images o...

Страница 103: ...e back If you are scanning dual stream you will have four images For each Document every page scanned into one document will become the contents of one file There may be several or many images in one...

Страница 104: ...For each drop down list becomes available For each Page every image for every page scanned becomes one file When you open the file there will be two images one for the front and one for the back If yo...

Страница 105: ...om dictionary See Appendix E Using Custom Dictionaries for more information 7 When grouping by multi page select either All or Images as a way to select specific images to be included in the output fi...

Страница 106: ...scanned is recommended 2 When finished click OK Selecting Text as your file format If you select Text as your file format to process your output the Text Setup dialog will be displayed 1 Select either...

Страница 107: ...a capability to search for specific text in output files Select the OCR language that your scanned documents will contain for the most accurate character recognition If you have a mixed document set...

Страница 108: ...ll have four image files in output If you select Multi Page the For each drop down list becomes available For each Page every image for every page scanned becomes one file When you open the file there...

Страница 109: ...ct All all images in the Page Document and Batch group selected will be in the output file If you select Images only the specified images in the Page Document or Batch group selected will be in the ou...

Страница 110: ...atch index file HVCS 16 bit Format allows you to define the Client number 1 999 and Application number 1 9 Text delimited allows you to select an ASCII or Unicode text file format XML no property setu...

Страница 111: ...r in this chapter 5 When finished click OK Document Index File To set up a Document Index file 1 Select Document Index file 2 Select the desired index file type If you selected Text delimited click Op...

Страница 112: ...e Location Setup dialog box to create a path for your outputted image index file See the section entitled Building location and filename formulas using the Location Setup dialog box later in this chap...

Страница 113: ...ab To build file name formulas open the File name tab if it appears on this dialog box Procedures for creating Location formulas and File name formulas are the same 1 Select a predefined value from th...

Страница 114: ...2 and continues outputting the batch 7 If you select Page Sequence Number or Image Sequence Number the Reset Feature is available Set the sequence numbering behavior for page and or image numbers Star...

Страница 115: ...limiter drop down list 4 Check the Include header record option if you want to include image file header information in the output index file If you are defining index content for the Text delimited i...

Страница 116: ...uide A 61638 To change the output root path click Setup and the Location Setup dialog box will be displayed For more information see the section entitled Building location and filename formulas using...

Страница 117: ...rop down list 4 Enter the information you want to appear as the subject line of the e mail in the Default title of e mail field You can select a predefined value to this subject line e g date name etc...

Страница 118: ...efined values by clicking Setup The attachment name must be enclosed in double quotes e g Patient file 10 Check Include associated document index data if you want data to automatically be displayed in...

Страница 119: ...utput tab 2 Select the desired printer from the Printer name drop down box 3 If you want to change the printer properties click Properties The properties for the selected printer will be displayed 4 C...

Страница 120: ...thing using this option for documents or forms with a background color will help produce images with a uniform background color Image Edge Fill fills unwanted black or white edges on an image thus pro...

Страница 121: ...if you want to delete pages with a lot of busy explanatory content on them For example if you are scanning documents with similar content e g insurance forms on the front and back page and the front...

Страница 122: ...Image content option only looks at the percentage of information on the image and therefore is a more consistent and dependable option to use when images may vary in size resolution compression etc N...

Страница 123: ...ted and smoothed automatically Change to White identifies up to three background colors and substitutes each one with white If you select this option the Apply to drop down box will be available allow...

Страница 124: ...nch holes or ragged images that you want to clean up Select a value in the Top Left Right and or Bottom area s from each side of the scanned image to be filled in 1 100ths of an inch or select All sid...

Страница 125: ...formation see Building location and filename formulas using the Location Setup dialog box in the Setup option for File 1 and File 2 section earlier in this chapter Location Top or Bottom places the st...

Страница 126: ...electing Page Sequence Number or Image Sequence Number you will also have the option to specify when the page or image sequence number should be reset and the value to which it should be reset To remo...

Страница 127: ...e image stamping region If an image stamp is larger than the allocated region excess text will be truncated Image stamp size is difficult to predict and depends on the complexity of the formula font s...

Страница 128: ...fix the image width and all but the last image must be the same length Split When this option is selected the front and rear image will be converted into multiple up to 6 images Images must be the sa...

Страница 129: ...boxes the two book icons will appear with a red X on each page NOTE When using a simplex only scanner selecting both Front and Back will result in no split Select Front only to cause a split Output or...

Страница 130: ...f needed click Browse to search for the application Parameters parameters can be any combination of literal text strings and variable values which are determined at the time a batch is output Variable...

Страница 131: ...ual value will be substituted and the value passed as a parameter For example the parameter formula BATCH_NAME one two three four produces the following four parameters BATCH_NAME Batch99999 one two t...

Страница 132: ...fy the parameter type like BATCH_NAME A schema file KCCustomApplication xsd see Appendix D can be used to validate resultant XML files and as a reference during code development For example the locati...

Страница 133: ...tribute jobs among output servers in a round robin fashion Auto Select If the Auto Select option is selected batches will be assigned in rotation to available output servers No load balancing will occ...

Страница 134: ...s Scanners This section provides information that is specific to Kodak i1800 Series Scanners The Scanner Options box allows you to access the TWAIN Datasource and setup Message Configuration and Image...

Страница 135: ...messages in Kodak Capture Pro Software NOTE The printer configuration that you set up in Capture Pro Software will override any printer configuration setup in the TWAIN Datasource 1 Click Message Con...

Страница 136: ...dress on new batch sets the image address value when a new batch is manually created in Capture Pro Software This option does not affect the image address when batches are automatically created in Cap...

Страница 137: ...el 2 the current Capture Pro Software document number Level 1 the number of pages in the current document if the image address format is Level 2 or Level 3 Number of pages in the current document 1 if...

Страница 138: ...have six characters left in the print string then the length would be limited to 6 Counter format allows you to configure the format of the counter when the width of the value is less than the field...

Страница 139: ...The Imprinter tab provides the following options Enable imprinter check this box to enable the imprinting function NOTE The Counter is the document count for the scan session This value is incremented...

Страница 140: ...Setup to display the Message Configuration dialog box This dialog box allows you to specify custom text to be included in your print string A maximum of 20 characters is allowed You can have up to six...

Страница 141: ...l are available Information is printed on each document in one of the two orientations Comic or Cinema You can choose Large Comic Large Cinema Small Comic Small Cinema Large Comic 180 Large Cinema 180...

Страница 142: ...would be limited to 6 Date format select one of the following formats MMDDYYYY DDMMYYYY or YYYYMMDD Print string allows you to define your print string The maximum amount of characters for the print...

Страница 143: ...tting of all image fields widths set to 0 will disable image addressing in the scanner The i800 Series Scanners have more options available for image addressing schemes with the following guidelines O...

Страница 144: ...ence pages are scanned Once complete the Level key is pressed again to set the image address level back to Level 2 for regular scanning Image Address format the image address can be printed on the ori...

Страница 145: ...canner start automatically resynchronizes the scanner image address with the current scan batch in Capture Pro Software every time the scanner is started The image address value is set to what the ima...

Страница 146: ...field value can consist of one or more pre defined values as specified in the formula The total number of characters in the formula cannot exceed the defined length for the Fixed field To set up a Fi...

Страница 147: ...Address tab Size define the number of documents to be counted prior to beginning the action to take place when the count has been reached Start function defines the action to be taken prior to process...

Страница 148: ...p down list Level 2 or Level 3 The Transfer patch will be treated as Level 0 Feature patch Patch Types 1 4 and 6 can be used by the scanning application for post scan image control they are not used f...

Страница 149: ...ormation on setting up printing in Kodak Capture Pro Software using the Kodak Digital Science 3520 Scanner For more information on your scanner consult your scanner User Guide The Kodak 3520 page of t...

Страница 150: ...a patch code to create an attachment For new jobs and for compatibility reasons it is recommended that you use patch codes the way they were designed to be used For information on patch code reading w...

Страница 151: ...any of the Separation by Patch dialog boxes Kodak Capture Pro Software checks each page for the type of patch code you selected Alternatively search on 180 rotated images if patch code reading is uns...

Страница 152: ...important when you use inserts used for document separation purposes that do not contain any other information Rotate document based on patch rotates the image containing the patch code so the patch c...

Страница 153: ...ion 3 Open the Capture tab and select Separation By Patch Code 4 Select the patch type you want to define Patch 2 Patch 3 or Patch T The Patch Code window will be displayed You can enable as many of t...

Страница 154: ...bar code image size 6 20 Creating an attachment with bar code zones 6 21 Testing bar code zones 6 21 Bar code types 6 22 Special syntax for two dimensional bar codes 6 22 Using OCR zones 6 23 Scanning...

Страница 155: ...or defining your bar code or OCR Define where on the template image the bar code or OCR zone will be found Specify how a correct bar code or OCR value will be recognized Set up the actions connected t...

Страница 156: ...Use a higher resolution to obtain better read rates 300 vs 200 dpi Check the positioning of the zone around the bar code it can affect the confidence level of a bar code Leave at least a 1 4 inch of...

Страница 157: ...hat have been scanned for bar code setup You must have at least one image in this list before you can define a bar code or OCR zone For typical job setups using bar code zones or OCR zones a single im...

Страница 158: ...e Fit window changes the image display so the image fits the Bar Code OCR window Actual size displays the image at the actual size One scanned pixel equals one pixel on the Bar Code OCR window Test se...

Страница 159: ...OCR zones of the exact same properties except for location are required After defining the first zone use the Paste option to duplicate it After creating each duplicate zone move it by left clicking o...

Страница 160: ...label and zone coordinates displayed Zone Properties allows you to define the properties for the currently selected bar code or OCR zone The Bar Code Zone Setup dialog box or the OCR Zone Setup dialo...

Страница 161: ...te an image as long as you have other images on the image list However if the image to be deleted is the last image in the image list the following message will be displayed This is the last image Del...

Страница 162: ...he bar codes into Capture Pro Software Draw and select the bar code zones Set up your job for bar code zone separation Kodak Capture Pro Software allows you to scan bar code images directly into the B...

Страница 163: ...emplate will also be applied to the scanned image before it appears If the image is acceptable enter a name in the Image Name field The image name should not contain any of the following special chara...

Страница 164: ...image Therefore when you create a new image Kodak Capture Pro Software will display the zones that you defined using previous images When drawing the location for a bar code zone leave a border area o...

Страница 165: ...r code zones are defined The bar code value is only retained for the defined zone when it complies with the mask specified in the Keep bar codes with mask field This ensures that the bar code values r...

Страница 166: ...you enter these values only when you are sure of the dimensions of the bar code NOTE You must specify a bar code height for bar codes that are smaller than 40 pixels high e g at 200 dpi 40 pixels is...

Страница 167: ...racters option It will report the data characters even if checksum fails The invalid checksum will not be returned When the bar code has an optional checksum it will not be validated by the software I...

Страница 168: ...where option This situation often occurs when bar codes may be found at unpredictable locations on documents When looking for Anywhere bar codes Kodak Capture Pro Software searches the image from top...

Страница 169: ...evel or that separate batches are available for Batch and Document indexing Batch level bar codes are only read when they are present on a Batch Header page A Batch Header page exists whenever batch s...

Страница 170: ...to a specific bar code value or mask 8 Select Rotate based on bar code if you want to rotate all pages in the document in the same orientation as the orientation of the bar code on the Document Heade...

Страница 171: ...y are present on a Batch Header page A Batch Header page exists whenever batch separation is defined using patch codes bar codes or OCR zones at least one zone in the job is configured for Batch separ...

Страница 172: ...log box Transferring an image to the bar code window Kodak Capture Pro Software allows you to transfer an image containing bar codes from the Image Viewer into the Bar Code window for creating bar cod...

Страница 173: ...a job setup from the Job Name drop down list and open the Capture tab 3 Select Separation By Bar Codes The Bar Code window will be displayed 4 Select any image and right click on a bar code zone The...

Страница 174: ...Select the Rotate based on bar code checkbox if you want to rotate the attachment both front and rear in the same orientation as the orientation of the bar code on the page 9 Click OK to save your set...

Страница 175: ...ar code can be used to contain all the index data for a document or batch To facilitate indexing with two dimensional bar codes a special substring syntax has been added barcode zonename start length...

Страница 176: ...an an image into the OCR window and define zones and OCR zone specific properties NOTE The components of the Bar Code and OCR window icons and context sensitive menu are described in detail in the sec...

Страница 177: ...Setup dialog box will be displayed 2 Select a job setup from the Job Name drop down list and open the Capture tab 3 Select Separation By OCR Zones The OCR window will be displayed 4 Click on any OCR z...

Страница 178: ...ion By OCR Zones The OCR window will be displayed 4 Position the original in the feeder and click Start Scan The image will be displayed in the dialog box Scan the image as straight as possible Your s...

Страница 179: ...zone For variable length and height OCR indexing make sure that you draw the zone large enough to capture all the indexing data At the same time be careful not to draw the zone so large that stray dat...

Страница 180: ...only OCR read strings that meet this rule will be kept For example if the expression entered is A 10 then only OCR read strings containing 10 or less alpha characters will be kept For more informatio...

Страница 181: ...batch and document indexing Only separate when change in value system separates by document or batch only if a value changes Delete page delete the page that contains the OCR read value that initiated...

Страница 182: ...will be displayed If you define an area on an image for OCR batch separation that area should remain blank on all the other pages in the batch 6 Under Separation click the Create a new batch option 7...

Страница 183: ...n OCR zone test the OCR zone to verify that it is still readable Deleting an OCR zone To delete an existing OCR zone 1 Select File Job Setup The Job Setup dialog box will be displayed 2 Select a job s...

Страница 184: ...ch as a corresponding memo that needs to be appended to a document To append an attachment manually to a document 1 Select File Job Setup The Job Setup dialog box will be displayed 2 Select a job name...

Страница 185: ...R zone settings test them again Using separators when color scanning Kodak Capture Pro Software can scan color grayscale and black and white images with separators bar code zones OCR zones or patch co...

Страница 186: ...ginal in the scanner and click the green Start Scan icon The images will be displayed in the Image Viewer 4 Select the black and white image containing bar codes and OCR zones and click the right mous...

Страница 187: ...e art OCR and bar code technology accurate recognition under all conditions cannot be guaranteed All software and documentation are delivered as such without any express or implied warranty of OCR and...

Страница 188: ...Page Setup click File Page Setup Page Setup Name select an existing Page Setup from the drop down list Icons Image tab allows you to define the way images will be displayed after scanning Auto Delete...

Страница 189: ...ored Settings when you click Settings the TWAIN Datasource will be displayed allowing you to configure your scan settings For more specific scanner information see the User s Guide for your scanner Di...

Страница 190: ...s in a 90 rotated back Calendar typically used for presentation handouts financial reports wall calendars etc The 2 sided mode option only influences the way the front image is rotated in relation wit...

Страница 191: ...using the Image size byte is option or the Image content option For more information see the next section Testing your settings Image size byte is Above select this option if you want to delete pages...

Страница 192: ...re consistent and dependable option to use when images may vary in size resolution compression etc Never click Never if you do not want the software to delete any images automatically Apply deletion t...

Страница 193: ...red Splitting images Splitting images is frequently used in forms processing When scanning folded forms you may want them to be split in several smaller images to make forms registration and verificat...

Страница 194: ...neither side will be split 10 Select Front and or Back to activate a split A graphic will be displayed showing your selection For example if you enable both checkboxes the icons will appear with a red...

Страница 195: ...um and maximum image widths and heights in 1 100ths of an inch for front and back images to be merged in the if width is between and the if height is between fields Capture Pro Software merges only th...

Страница 196: ...nner must be setup to scan color or grayscale While scanning the image will be converted to black and white and checked for noise If excessive noise is detected the image will be flagged and you will...

Страница 197: ...g Intelligent QC enabled the grayscale image will only be available for those images identified by the scanner as containing excessive noise Selecting Keep all images will not result in auto deleted i...

Страница 198: ...n the control panel To access the Button Manager dialog box 1 Right click on the Kodak Capture Pro Software icon in the system tray and select Button Setup The Button Manager dialog box will be displa...

Страница 199: ...desired job shortcut name from the drop down list You can also use the icons to add rename or delete a job shortcut Add displays the Save As dialog box which allows you to add a new job shortcut Renam...

Страница 200: ...p dialog box The User Setup dialog box allows an administrator to set up and manage users of Kodak Capture Pro Software The user setup functions can only be set by individuals with Capture Pro Softwar...

Страница 201: ...To add a new user 1 Select File User Setup 2 Open the User tab 3 Click New The New User dialog box will be displayed 4 Enter the name of the user in the User name field 5 Enter a password for this us...

Страница 202: ...To delete a user 1 Select File User Setup and open the User tab The User Setup dialog box will be displayed 2 Select the user you want to delete from the User name drop down list 3 Click Delete A con...

Страница 203: ...new group name and click OK The new group name will be displayed in the Group Name drop down list You can also add notes about the group in the Description field NOTE When creating a new group you mu...

Страница 204: ...Select File User Setup and open the Group tab The Group tab of the User Setup dialog box will be displayed 2 Select the group that you want to delete from the Group Name drop down list 3 Click the Del...

Страница 205: ...tch folder that the AI batch folder is contained within A countdown timer will then be started on the new AI batch The user will copy files which may be contained in nested subfolders into the AI batc...

Страница 206: ...watching your auto import watch folder when Capture Pro is launched 3 Enter a name for this auto import setup The name is just a user friendly reference and does not refer to a folder name or any othe...

Страница 207: ...iles to the watch folder This can vary a great deal depending on the operation For example Network Scanner a user has set up a Scan Station 500 to send images directly to a watch folder over a network...

Страница 208: ...10 4 A 61635 December 2010 7 Select or create a page setup to be associated with this watch folder Page setup options are restricted to those shown below...

Страница 209: ...ve folder for every auto import setup The archive location must be a local or mapped drive 10 Specify the number of errors that are allowed before auto import processing is interrupted Errors occur wh...

Страница 210: ...ps If you have not selected Start Auto Import when application is launched then you will need to select Start as if you were starting a scanner Auto import will begin watching all previously defined w...

Страница 211: ...l begin to count down After 5 seconds no new files have been added to the AI batch folder 06112009_AIBatch and the counter is now at 5 Whenever a file appears in the AI batch folder or any subfolder o...

Страница 212: ...timer Nested subfolders do not have their own timers There is only one timer for the 06112009_AIBatch NOTE Paths that exceed 256 characters may not be supported by the Windows operating system It is r...

Страница 213: ...irst in first out order In this example the entire contents of 06112009_AIBatch will be processed followed by 06112009_AIBatch2 Since these two AI batches have the same job setup they came from the sa...

Страница 214: ...ssed if a supported image file cannot be opened the bad file will be copied into the error cache a generic error image will substituted and the error count for the AI batch will be incremented If the...

Страница 215: ...is the cause of the conflict Formatter dll Lecsomgr dll Prerendering dll RecDiag dll Rnapi dll To resolve the conflict remove these DLL files from the System32 directory and restart Capture Pro Softw...

Страница 216: ...lation problem that prevents patch code or bar code functions from working The conflict may be caused by an older version of an AMP release or toolkit from All My Papers that was installed on your PC...

Страница 217: ...Login as a non administrator account You can assign an application to each individual button number by using this method For example buttons 1 through 4 can be set to activate Desktop and buttons 5 th...

Страница 218: ...ckbox is checked If it is not check the box and exit Smart Touch 6 Launch Smart Touch again 7 Log off the administrator account 8 Login as a non administrator account NOTE If you are typically logged...

Страница 219: ...Question Can the buttons of non Kodak scanners be configured to use shortcuts Answer No The Button Manager Shortcut Setup only supports Kodak scanners Technical support Support for Kodak Capture Pro...

Страница 220: ...a file folder or article Document index the document index links search fields up to 10 search fields with the document number of each document The document index can be built manually or automaticall...

Страница 221: ...setup allowing you to get familiar with Capture Pro Software and start scanning right away Scan to PDF similar to Ready to Scan this job will scan a document and display the first page and prompt the...

Страница 222: ...profile to use when scanning and any software related settings for scanned pages These include any image rotation if not supported by the scanner blank page removal image merging join both front rear...

Страница 223: ...768 DVD ROM drive NOTE Depending on your scanning resolution and feature set there may be some modes that do not drive your scanner at full rated speed using the minimum system hardware requirements I...

Страница 224: ...ack sides Bi tonal images Black and white images both front and back sides Button bar Replaced by six separate toolbars Duplex Two sided Simplex One sided OCR indexing Indexing using bar code zones an...

Страница 225: ..._LOCATION type xs string minOccurs 0 xs element name FILE1_BW_BATCH_LOCATION type xs string minOccurs 0 xs element name FILE1_CG_BATCH_LOCATION type xs string minOccurs 0 xs element name FILE1_BATCH_I...

Страница 226: ...t name SYSTEM1_BATCH_INDEX_FILE type xs string minOccurs 0 xs element name SYSTEM2_BATCH_LOCATION type xs string minOccurs 0 xs element name SYSTEM2_OUTPUT_ROOT_PATH type xs string minOccurs 0 xs elem...

Страница 227: ...reate a custom dictionary 1 Select the Custom Dictionary Browse button The Open dialog box will be displayed A sample custom dictionary will be created in the folder current Job User Dictionary The cu...

Страница 228: ...ure that the Count value is set equal to the number of items you entered 6 Save the file using UNICODE encoding NOTE If you want to share a custom dictionary among several jobs you can place the custo...

Страница 229: ...and the Kodak Scan Station Service tools The Kodak Scan Station Pro 550 Administration is a subset of the functionality provided by the Kodak Capture Pro Software It runs on a separate PC and allows...

Страница 230: ...b setup As part of creating a job setup a specific page setup is required to be used This is done by accessing Job Setup General tab using Kodak Capture Pro Software 1 From the Current Page Setups Cur...

Страница 231: ...e Export has been completed will be displayed 4 On the PC running the Kodak Scan Station Pro 550 Administration copy KCPConfigure kcp from the desktop to a blank USB drive 5 Log into the Scan Station...

Страница 232: ...t The Scan Station 550 will restart with Kodak Capture Pro Software and display with the Login screen or a menu of the imported job setups If the Login screen is displayed login with your Capture Pro...

Страница 233: ...ation 2 On the PC running the Kodak Scan Station Pro 550 Administration copy KCPEmbedded_Installer to a blank USB drive 3 Insert the USB drive into the Scan Station 550 4 Click Upgrade KODAK Scan Stat...

Страница 234: ...ny defined job setups SharePoint configuration changes Depending on the network configuration in order to have the Scan Station Pro 550 communicate with SharePoint Servers you may need to change certi...

Страница 235: ...SecureProtocols dword 000000a0 PrivDiscUiShown dword 00000001 PrivacyAdvanced dword 00000000 ZonesSecurityUpgradeDone dword 00000001 DisableCachingOfSSLPages dword 00000000 WarnonZoneCrossing dword 0...

Страница 236: ...Output Directory 7 Click Process to create KCProxy dat 8 Copy KCProxy dat to the USB drive 9 Log into the Scan Station Pro 550 in Service mode as previously described in Exporting job setups 10 Inser...

Страница 237: ...a file DSN 3 Save the file DSN to a shared folder 4 Put the database on the shared folder 5 Make sure job setup uses file DSN in a shared folder 6 Make sure all workstations have mapped the shared fo...

Страница 238: ...ing computer intensive output jobs to output servers Remote Administration RA Kodak Capture Pro Software maintains its various setups Job Page User etc in files Kodak Capture Pro Software Network Edit...

Страница 239: ...automatically be downloaded to the client Data conflicts Versioning is also used to prevent data conflicts during the creation or update of a setup When a user creates or changes a setup the following...

Страница 240: ...e operations to proceed Following a data conflict it is recommended that users close out any setup windows and reopen the setup after waiting to allow data refresh to occur Deleting and renaming setup...

Страница 241: ...de on the originating workstation and the entire batch resubmitted No Capture Pro client user interface is available on the server Output server configuration Remote output servers are not self config...

Страница 242: ...is currently set to 10 minutes The client will continue to operate for this interval while issuing warnings that the license is due to expire If a license fails to renew due to sporadic communication...

Страница 243: ......

Отзывы: