70
When the system starts recording a red triangle mark would appear at the upper left corner of the screen.
The recording modes are listed below:
-
Always Recording
Record the video from the selected camera and save it to the designated storage path (see also
-
Motion Recording
Start recording the video from the selected camera only when the system detects movement. Once a
motion is detected, the system automatically saves the previous frames and stop based on the
Start
Record Prior
and Stop
Record After settings
.
-
Smart Recording
Automatically switch to recorded at the maximum frame rate setting once a motion is detected and if
there is no motion, it records at the minimum frame rate setting Set the maximum and minimum frame
section.
-
Voice Detecting Recording
DVR system will record the sound when the voice exceeds the intensity value in Voice Detection setting.
-
No Recording
The system won’t do any recording.
-
KeyFrame Recording
Only record one frame per second.
(3) Enable Audio
Select to assign the audio channel of the selected camera. You can only assign one audio channel to one
camera source. This way you can record both audio and video.
(4) Motion Detection
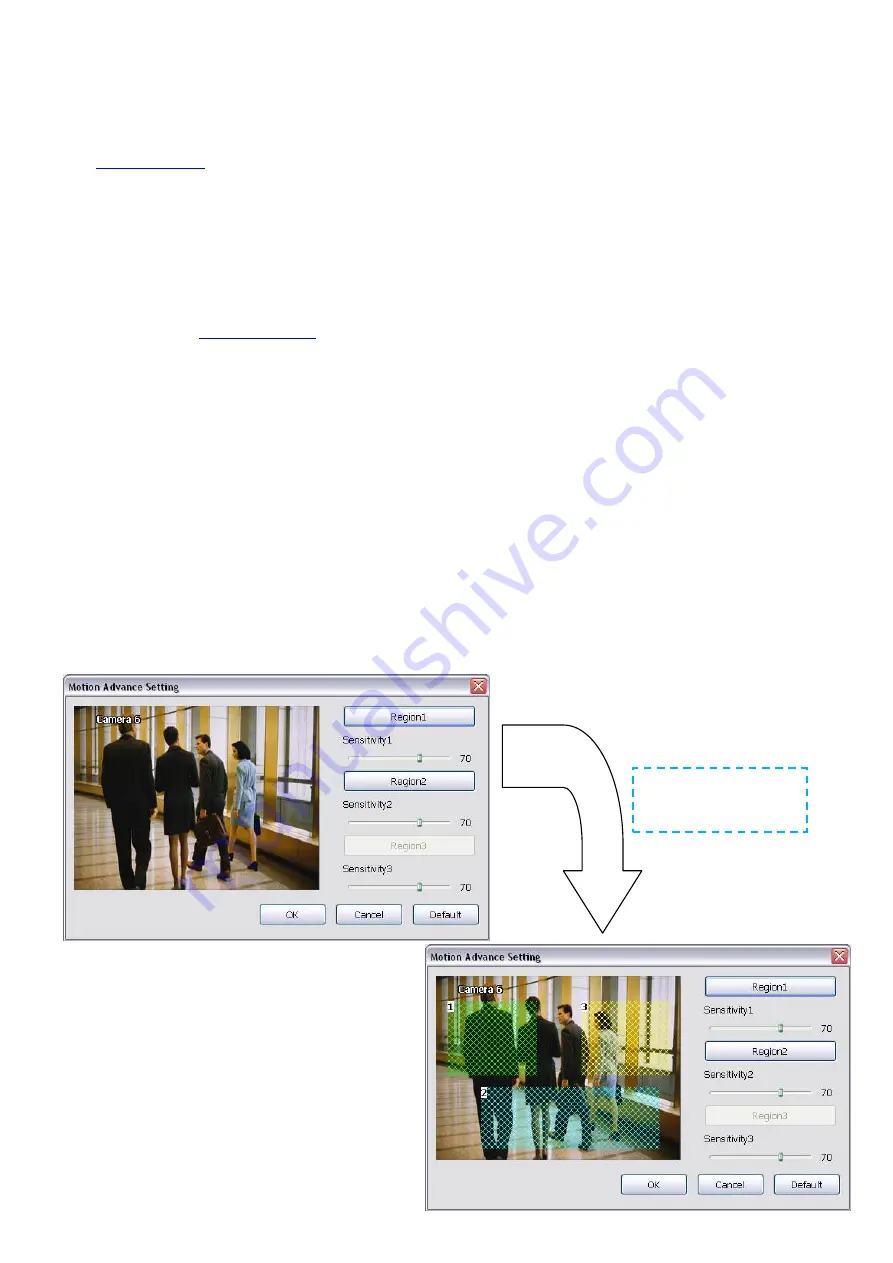
Adjust the sensitivity of the motion detector. The higher the value, the finer the sensitivity is detected. When it
detects a motion, a green triangle mark would appear at the upper left corner of the screen. Click
Advanced
button to select the area for motion detection. Click
Region 1/2/3
button, and then, click-and-drag an area on
camera screen for motion detect. To adjust motion detect sensitive, scroll the
Sensitivity 1/2/3
bar. Click
OK
to save and exit the setting window. To reset all setting, click
Default
.
Click Region button to
select the motion detect
area.
Содержание IWH3216 Touch
Страница 1: ...AVerMedia IWH3216 Touch User Manual June 2010...
Страница 51: ...45 Power Management To setup UPS configuration Device Management To manage the DVR system devices...
Страница 153: ...147 10 To switch back to iEnhance interface click iEnhance button...
Страница 176: ...170 11 If user wants to burn the back file into DVD disk click Burn button and select the file to burn...
Страница 180: ...174 4 When the below screen show up press CTRL I 5 Select Create RAID Volume...


