109
Automatically adjust the brightness.
(6) Night View
Automatically adjust the exposure to make the image more visible especially when the site is dark. You can
only use this function when the Auto Brightness Control is enabled.
(7) Noise Reduction
Reduce undesirable video signal and improve the quality of the video.
i
Noise Reduction uses lots of CPU resource. Please use this feature only if it is really necessary.
(8) Recording Setting
-
Video Size
Select the size of the video and click the
button. The higher the size, the larger the file it create.
You can also activate the
Enable Deinterlace
to enhance the video quality. Set the
Enable
Deinterlace
mode to #1, if you are capturing motionless picture and #2, if it captures lots of
movement.
-
Enable Audio
Select to assign the audio channel of the selected camera. You can only assign one audio channel to
one camera source. This way you can record both audio and video.
-
Quality
Adjust the video quality. The higher the value, the lower the compression level and uses more hard
disk space.
-
Frame Rate
Set the number of images per second of the video to be recorded. The higher frame rate, it uses
more hard disk space.
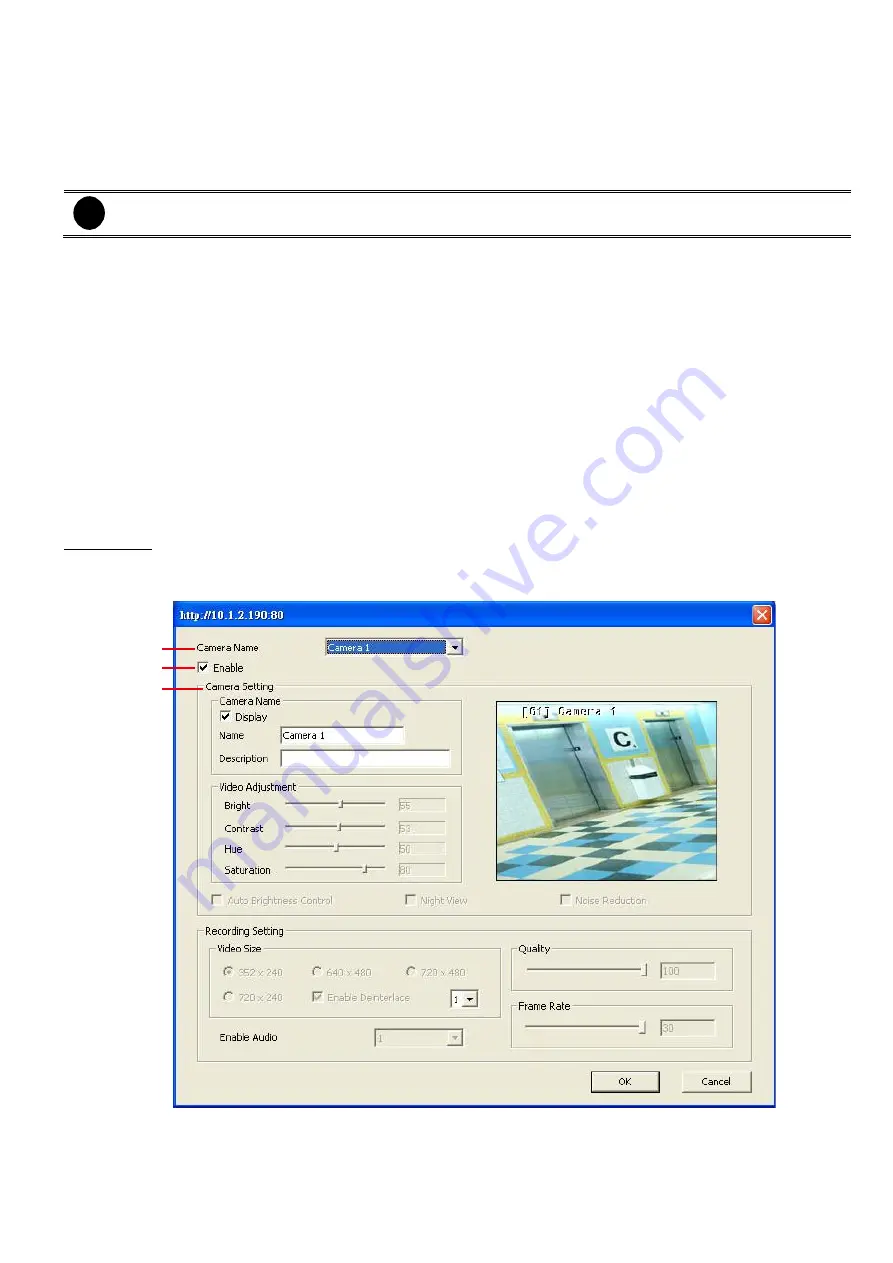
IP Camera
Click
OK
to exit and save the setting and
Cancel
to exit without saving the setting. The setting here applies
to Remote DVR only.
(1)
(2)
(3)
(1) Camera Name
Select the camera you want to adjust the settings.
(2) Enable
Set to enable/disable the selected camera. When there is no video source on the camera, we suggest
Содержание IWH3216 Touch
Страница 1: ...AVerMedia IWH3216 Touch User Manual June 2010...
Страница 51: ...45 Power Management To setup UPS configuration Device Management To manage the DVR system devices...
Страница 153: ...147 10 To switch back to iEnhance interface click iEnhance button...
Страница 176: ...170 11 If user wants to burn the back file into DVD disk click Burn button and select the file to burn...
Страница 180: ...174 4 When the below screen show up press CTRL I 5 Select Create RAID Volume...


