112
Set the time gap of the Auto Scan function from 3 to 10 seconds. This automatically switches to the
next video in cycle depending on the set time gap.
-
Playback Mode
Select the mode of playback the video.
Select date and time:
Select the date and time which user wants to playback.
Play the last file:
Automatically playback the video from the last hour
Instant Playback:
Automatically playback the video which has just recorded
-
Date Format
Select the date format which wants to display in
Select date and time
playback mode
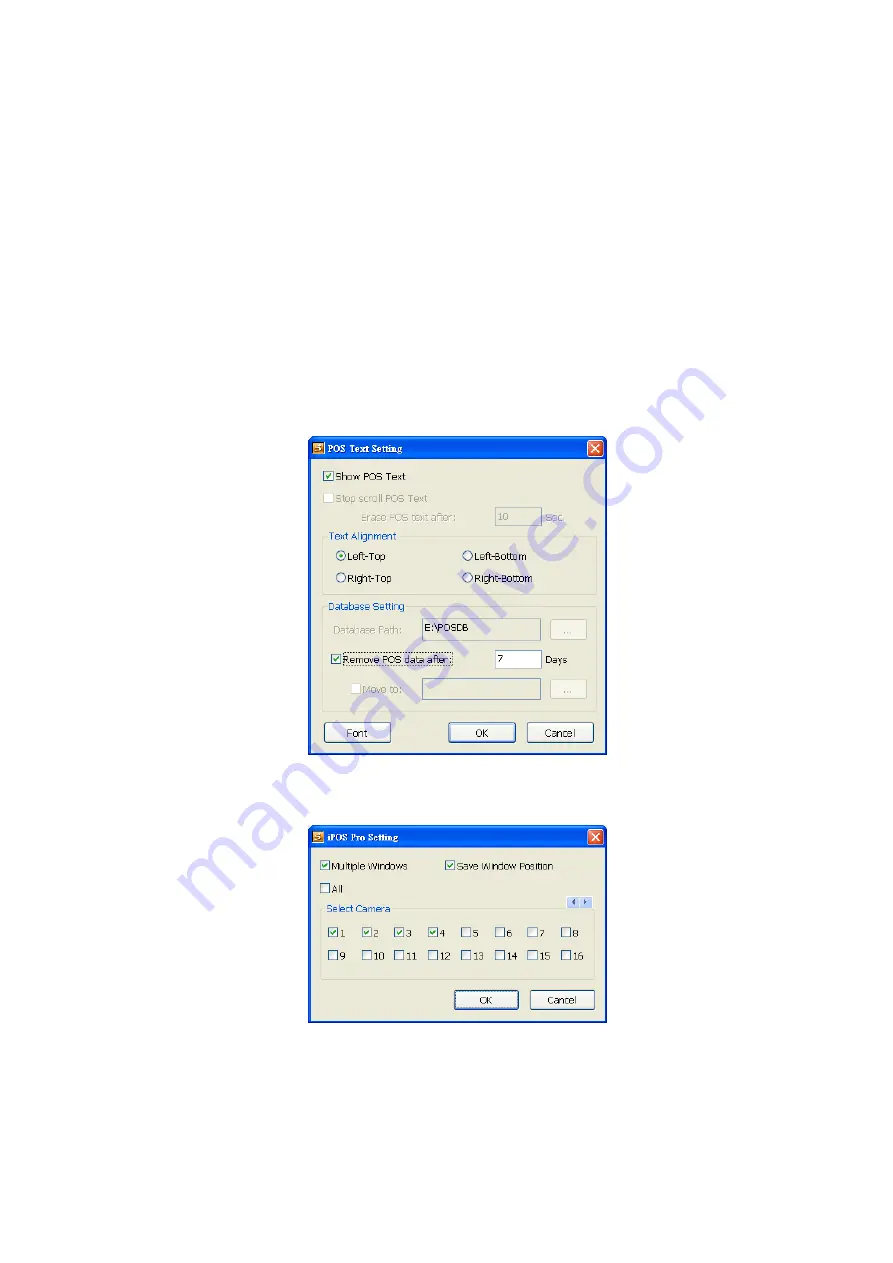
(8) POS
Advanced
Set from which camera screen to display the data from the POS equipment. To set the text flow, color format,
and POS database export, click
Advanced
.
1. Mark
Show POS Text
to allow POS data to be display on surveillance screen.
2. Select the POS data display position on surveillance screen – Left-Top, Left-Bottom, Right-Top, or
Right-Bottom.
3. To change the POS data font and color, click
Font
.
4. Mark
Remove POS data after
the POS data will be delete from DVR hard disk on the day that user has
setup.
iPOS Pro Setting
Enable
Multiple windows
for viewing multi-channels of iPOS live data. To save the iPOS live data window
position on the preview mode, mark the
Save window Position
. To select all channels, mark
All
check box.
(9) UPS (Uninterruptible Power Supply)
Protect the system from damaging, such as power surges or brownouts. This automatically gives time to
close the DVR properly when the battery backup power has reached the Shutdown when capacity below
percentage level setting. The UPS device must be connected to your DVR server.
Содержание IWH3216 Touch
Страница 1: ...AVerMedia IWH3216 Touch User Manual June 2010...
Страница 51: ...45 Power Management To setup UPS configuration Device Management To manage the DVR system devices...
Страница 153: ...147 10 To switch back to iEnhance interface click iEnhance button...
Страница 176: ...170 11 If user wants to burn the back file into DVD disk click Burn button and select the file to burn...
Страница 180: ...174 4 When the below screen show up press CTRL I 5 Select Create RAID Volume...


