


Using Help
|
Contents
|
Index
Back
69
Adobe Premiere Pro Help
Capturing and Importing Source Clips
Using Help
|
Contents
|
Index
Back
69
8
Enter information into the Logging Data section as needed.
Note:
To avoid confusion, make sure that the Tape Name is unique. Some types of device
control software may ask you to specify the Tape Name each time you insert a new tape.
The other Logging Data options aren’t required.
Using Capture window device controls
You can use the controls in the Capture window to operate the device as you log clips. The
jog control lets you navigate quickly to nearby frames, and the shuttle control
lets you
change the speed of the tape as you play it forward or backward. The Record button lets
you begin a manual capture.
If you press the Rewind button
when the tape is stopped, the device rewinds the tape
at full speed. If you rewind when the tape is playing or paused, the device rewinds while
displaying video in the Capture window. You can press the J key to rewind at regular
speed, or press J multiple times to increase the rewinding speed.
If you press the Fast Forward button
when the tape is stopped, the device moves the
tape forward at full speed. If you fast forward when the tape is playing or paused, the
device moves the tape forward while displaying video in the Capture window. You can
press the L key to fast forward the tape at regular speed, or press L multiple times to
increase the forwarding speed.
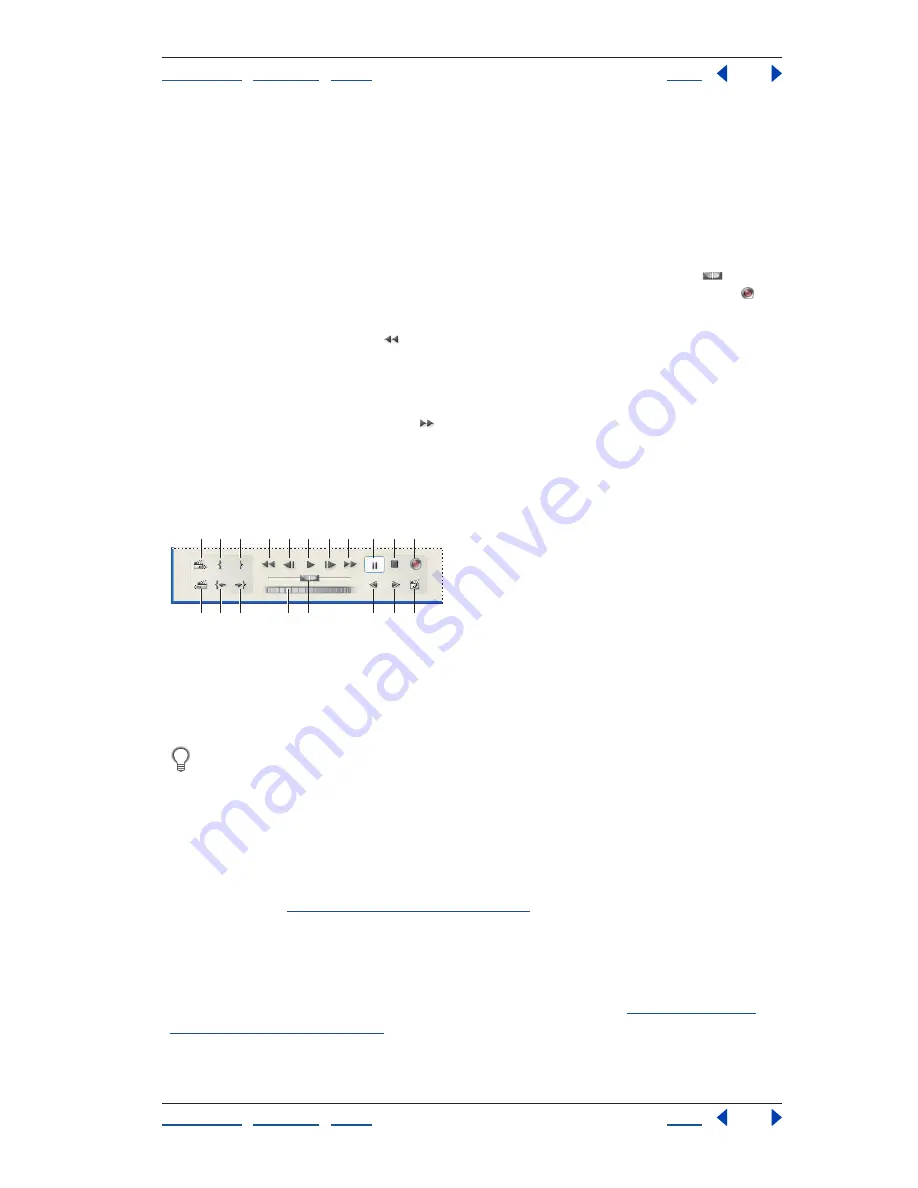
Capture window playback controls
A.
Next scene
B.
Set In point
C.
Set Out point
D.
Rewind
E.
Step back
F.
Play
G.
Step forward
H.
Fast forward
I.
Pause
J.
Stop
K.
Record
L.
Previous scene
M.
Go To In point
N.
Go To Out point
O.
Jog
P.
Shuttle
Q.
Slow reverse
R.
Slow play
S.
Scene detect
To operate Capture window controls using the keyboard, see the tool tips in the
Capture window. You can change the shortcuts using the Edit > Keyboard Customi-
zation command.
Performing a capture using device control
When a device and the project are set up properly, you can begin capturing clips using
device control. First you mark In and Out points, and then you capture the clip. If you want
to mark In and Out points for many clips and have Adobe Premiere Pro capture all of the
clips at once, see
“Batch-capturing video” on page 72
.
To capture an entire tape:
1
Choose File > Capture to open the Capture window.
2
Make sure that your device is online, as indicated above the preview in the Capture
window. If the message “Capture Device Offline” appears there, see
“Setting up device
control equipment” on page 68
.
3
Rewind the entire tape to the beginning.
S
R
Q
P
O
N
M
L
K
J
I
F
C
D
E
G
H
B
A


