


Using Help
|
Contents
|
Index
Back
116
Adobe Premiere Pro Help
Assembling a Sequence
Using Help
|
Contents
|
Index
Back
116
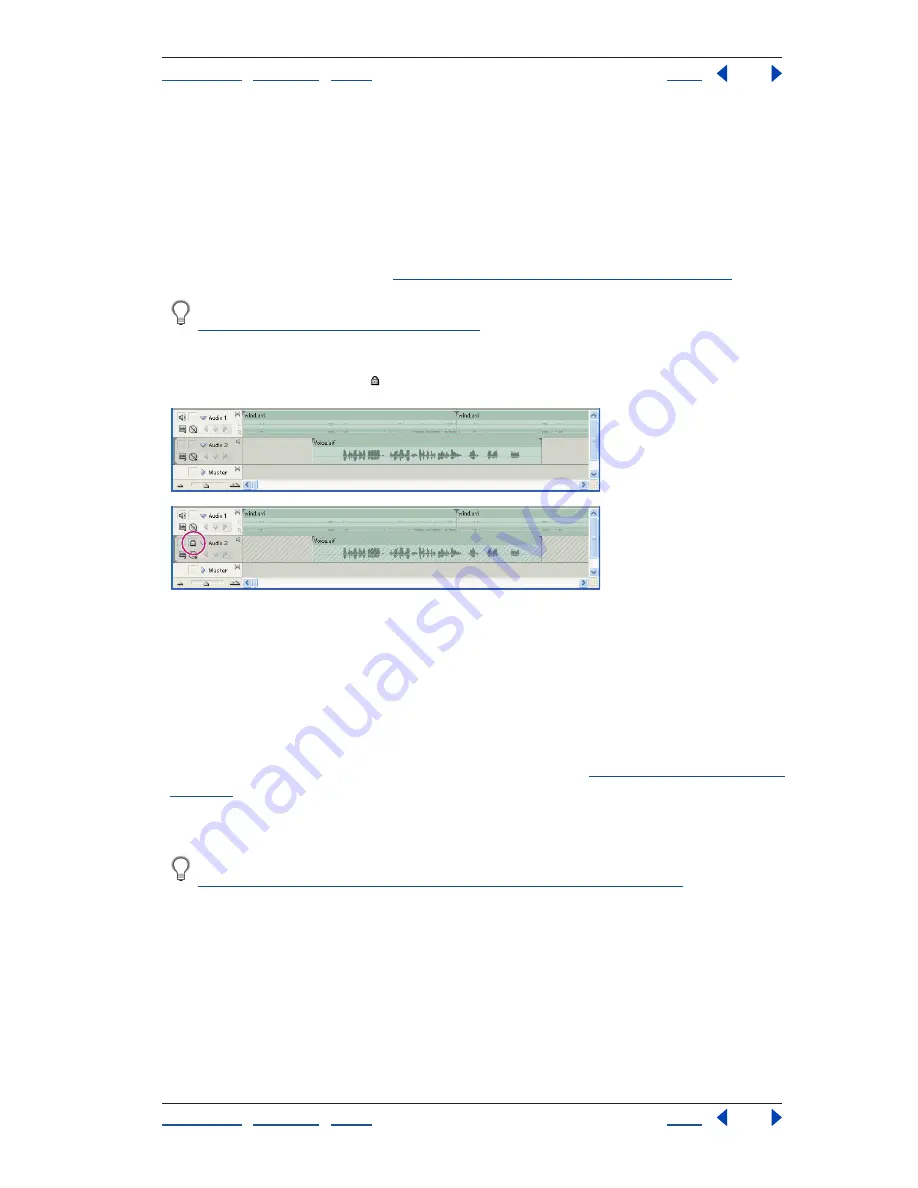
Locking and unlocking tracks
Locking an entire track is useful for preventing changes to any clips on that track while you
work on other parts of the sequence. In the Timeline window, a pattern of slashes appears
over a locked track. Although clips in a locked track cannot be modified in any way, they
are included when you preview or export the sequence. If you want to lock both a video
track and a track with corresponding audio, lock each track separately. When you lock a
target track, it is no longer the target; source clips cannot be added to the track until you
unlock it and target it again (see
“Specifying source and target tracks” on page 128
).
You can lock a track to prevent it from shifting when you perform insert edits. See
“Adding clips to a sequence” on page 127
.
To lock a track:
Click to display the Lock icon next to the track name.
An unlocked track (top) and locked track (bottom)
Adding, renaming, and deleting tracks
You can add or delete tracks at any time and specify a custom name for each one. Each
sequence can contain up to 99 video and 99 audio tracks. However, a sequence must
contain at least one of each type of track, and sequences with audio tracks must also
contain a master audio track, where the output of regular audio tracks is directed for
mixing. You can also create audio submix tracks, through which you can direct other audio
tracks before eventually reaching the master audio track (see
“Working with submixes” on
page 187
). In the Timeline window, new video tracks appear above existing video tracks,
and new audio tracks appear below existing audio tracks. Deleting a track removes all clips
in the track but does not affect source clips listed in the Project window.
You can specify the default number and type of tracks in new sequences. See
“Working with multiple sequences and nested sequences” on page 135
.
To add tracks:
1
With the Timeline window active, choose Sequence > Add Tracks.
2
In the Add Tracks dialog box, do any of the following:
•
To add tracks, type the number of tracks you want to add in the Add field for video,
audio, and audio submix tracks.
•
To specify the placement of added tracks, choose an option from the Placement pop-up
menu for each type of track added.


