


12-5
IM 704510-01E
Ethernet Communications (Option)
3
2
1
4
5
6
7
8
9
10
11
12
12
13
14
15
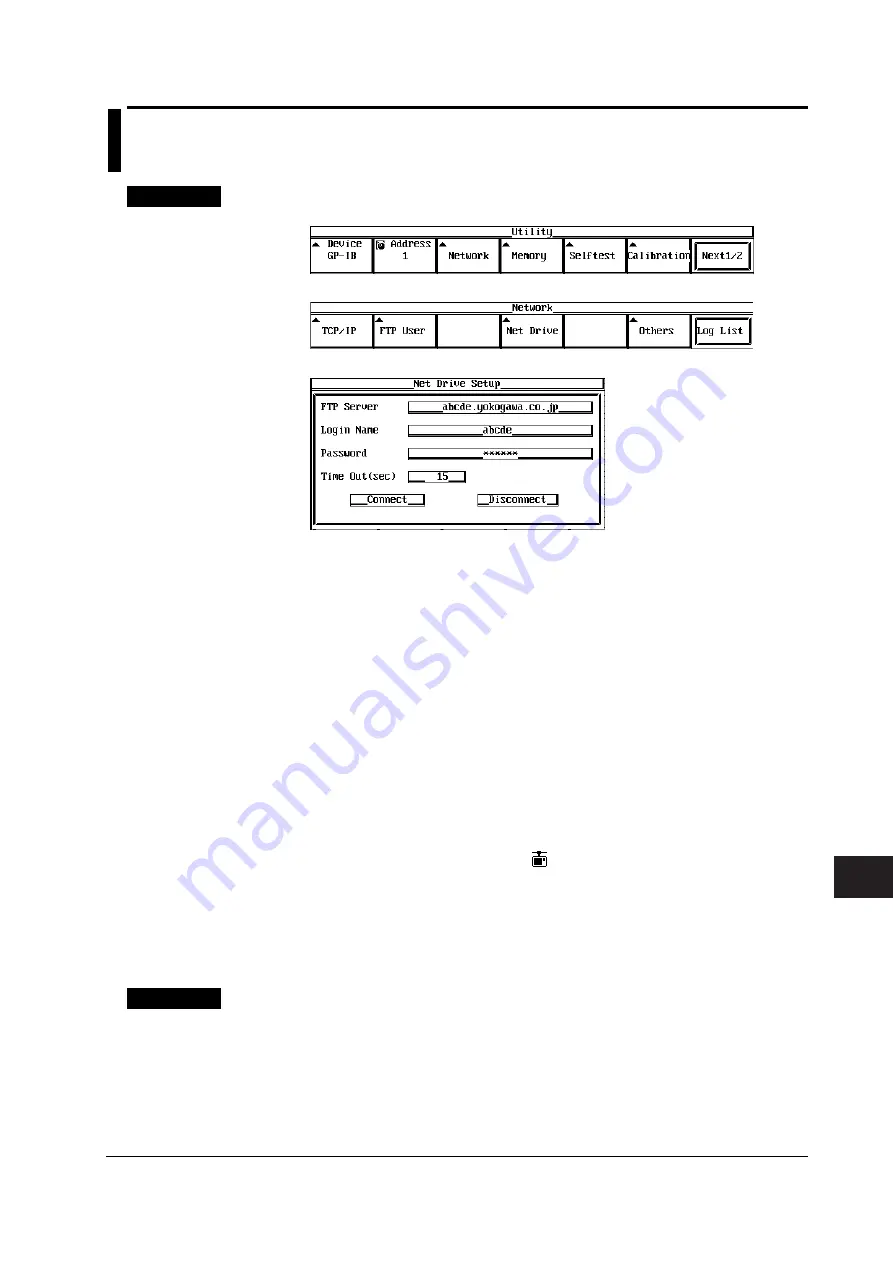
12.3 Setting the Network Drive (FTP Client
Function)
Procedure
1.
Press the UTILITY key to display the Utility menu.
2.
Press the Network soft key to display the Network menu.
3.
Press the Net Drive soft key to display the Net Drive Setup dialog box.
4.
Turn the rotary knob to move the cursor to FTP Server and press the SELECT key
to display the keyboard.
5.
Enter the FTP server address using the keyboard.
If you are using DNS, you can specify the server by name.
6.
Turn the rotary knob to move the cursor to Login Name and press the SELECT
key to display the keyboard.
7.
Enter the login name using the keyboard.
For the procedure to enter the character string, see section 4.4.
8.
Turn the rotary knob to move the cursor to Password and press the SELECT key
to display the keyboard.
9.
Enter the password corresponding to the login name using the keyboard.
Password is not required if Login Name is anonymous.
10.
Turn the rotary knob to move the cursor to Timeout and press the SELECT key to
set the timeout time.
11.
Turn the rotary knob to move the cursor to Connect and press the SELECT key to
establish a connection.
When the connection is established,
is displayed at the upper right corner of the
screen.
12.
For the operation of files that follows the above procedure, see the procedures in
sections 11.4 to 11.10.
On the File List that is displayed when files are managed, the network drive is
indicated as ND0.
Explanation
Notes on Setting the FTP Server
• Set the list output (string returned by the dir command) to UNIX format.
• Set the home directory and its subdirectories to allow writing.


