


Appendix C: Configuring a Simple Data Network
96
Version 1.0 Rev B - 08/00
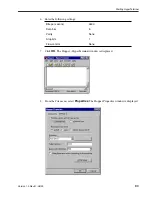
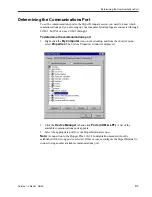
5.
In the
Network
window, double-click
TCP/IP
. The TCP/IP Properties window is
displayed:
Note:
If TCP/IP is not listed in the Network window, click
Add
and select
Protocol, Add, Microsoft, TCP/IP
, and then click
OK
.
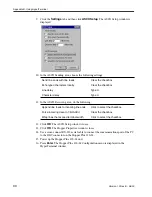
6.
Click the
IP Address
tab.
7.
Click
Specify an IP Address
, and type the following:
8.
Click
OK.
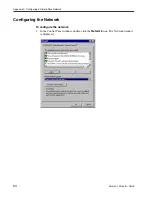
9.
Click
File and Print Sharing
. The File and Print Sharing window appears.
10. Click to select the
I want to be able to give others access to my files
checkbox.
11. Click
OK
.
12. In the Network window, click the
Identification
tab and type the following:
IP Address
196.2.2.1
Note:
Increment the last digit by 1 (i.e. type 196.2.2.2)
when configuring the second computer.
Subnet Mask
255.255.255.0
Note:
This number is the same for both computers.
Computer Name
A unique name for each computer. For example,
computer 1 and computer 2.
Workgroup
A workgroup name. For example, Test.
Note:
All computers in the network must have the
same workgroup name.


