62
Chapter 04:
Using Your Sahara NetSlate with Microsoft® Windows® 7
7.
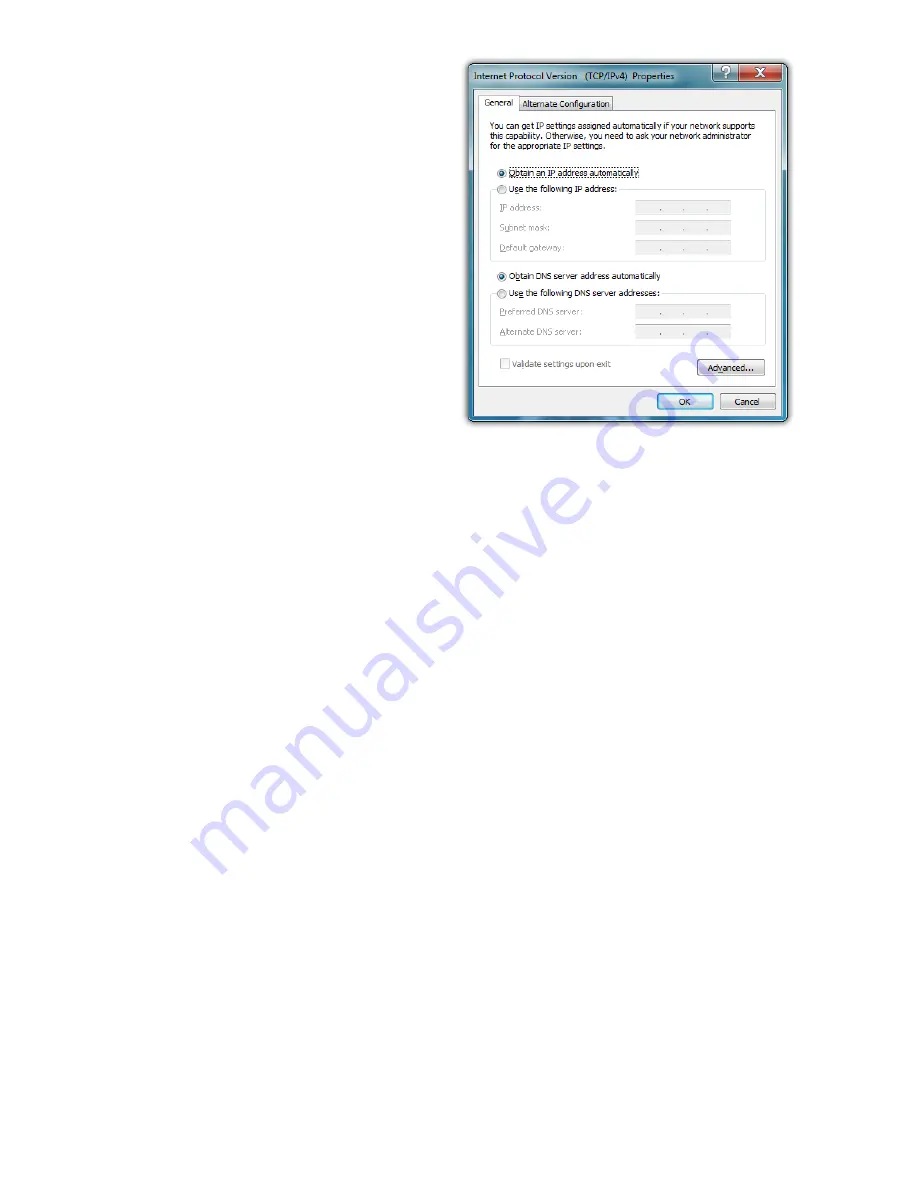
If DHCP is used on your
network, tap “Obtain an
IP address automatically”
and “Obtain DNS server
address automatically”.
Otherwise, enter the
correct IP and DNS server
addresses by selecting the
two options that begin
with “Use the following…”
If you are unsure of which
option to use, contact
your network adminis-
trator or your Internet
Service Provider (ISP).
8.
After entering the correct information in the “Internet
Protocol (TCP/IP) Properties” window, tap “OK” to accept
your changes and close the window.
9.
Repeat steps 5 through 7 selecting “Internet Protocol Ver-
sion 6 (TCP/IPv6) this time if your network supports it.
10.
If you need to specify additional DNS servers, WINS servers
or gateways, tap on the “Advanced...” button to open the
“Advanced TCP/IP Settings” panel.
11.
Tap “OK” in the “Local Area Connection Properties” window
to finish and accept the changes.
Using Both DHCP and a Static IP Address
If you are using alternating networks with either DHCP or static
IP addressing, you can use alternative settings that will enable
simultaneous configurations of both DHCP and a static IP. This
will allow you to connect to both of the networks without having
to reconfigure each time you want to switch.
1.
Follow steps 1 through 7 above when using a wired LAN
connection.
Summary of Contents for Sahara NetSlate a525
Page 2: ......
Page 17: ...Preface xv This Page Left Blank Intentionally ...
Page 18: ......
Page 26: ......
Page 36: ......
Page 44: ......
Page 52: ......
Page 110: ......
Page 126: ......
Page 138: ......
Page 145: ...Chapter 07 Troubleshooting 119 ...
Page 159: ...Appendix A BIOS Set up 133 This page intentionally left blank ...
Page 160: ......
Page 172: ......


