Chapter 04:
Using Your Sahara NetSlate with Microsoft® Windows® 7
57
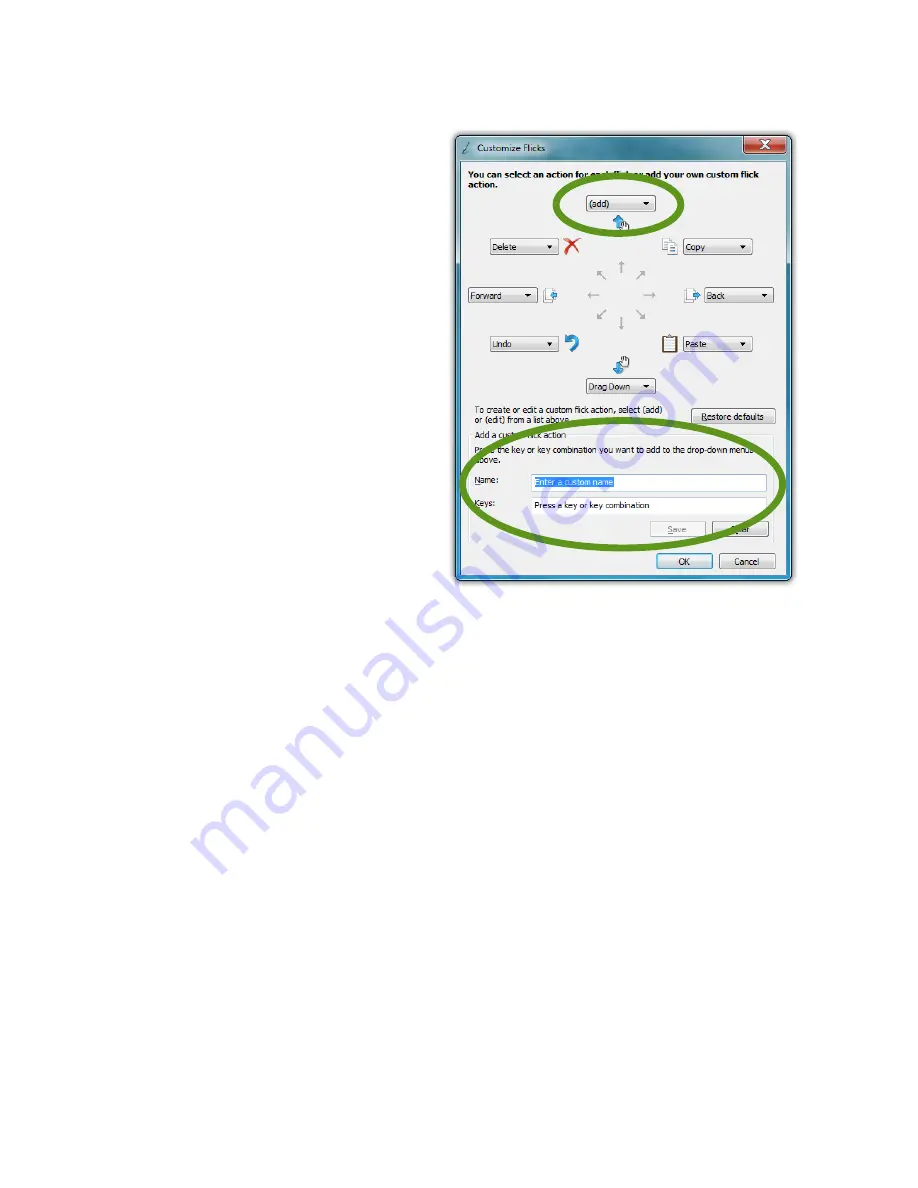
down menu or by creating your own custom action. To create a
custom action:
1.
Choose “(add)” from the
specific direction’s drop
down menu.
2.
At the bottom of the
panel are two fields that
should now be active.
Tap in the top field
labeled “Name:”. Enter
the name you would
like for the action you
are about to create by
tapping on the keyboard
tool tip that appears.
This is the name that will
display in the drop down
menu and as a tool tip
when you invoke the
flick action.
3.
Either tap on the “Tab” key in the on-screen keyboard or tap
on the “Keys:” field to switch focus to it and then enter your
desired keyboard key combination for the action you want
to create. For example, tap on the [Windows] modifier key
and then the [E] key to open the Windows Explorer.
4.
Tap the “Save” button to save your custom flick action.
When you are done customizing all of your flicks, tap on the
“OK” button at the bottom of the panel to return to the “Pen
and Touch” control panel and then tap on the “Apply” button to
activate and test your flicks.
Touch Gestures
As the name implies, touch gestures are meant to be used when
navigating on a touch screen. Windows Touch enables several
gestures that support both single and multi-touch contacts.
Summary of Contents for Sahara NetSlate a525
Page 2: ......
Page 17: ...Preface xv This Page Left Blank Intentionally ...
Page 18: ......
Page 26: ......
Page 36: ......
Page 44: ......
Page 52: ......
Page 110: ......
Page 126: ......
Page 138: ......
Page 145: ...Chapter 07 Troubleshooting 119 ...
Page 159: ...Appendix A BIOS Set up 133 This page intentionally left blank ...
Page 160: ......
Page 172: ......


