Chapter 01:
Getting Started
5
to the Internet and/or a corporate LAN using a wired connection
as opposed to wirelessly, connect the external peripheral
or cable now. See the chapter entitled
Touring Your Sahara
NetSlate
, to identify which ports to use.
Step 4: Powering on the Sahara NetSlate
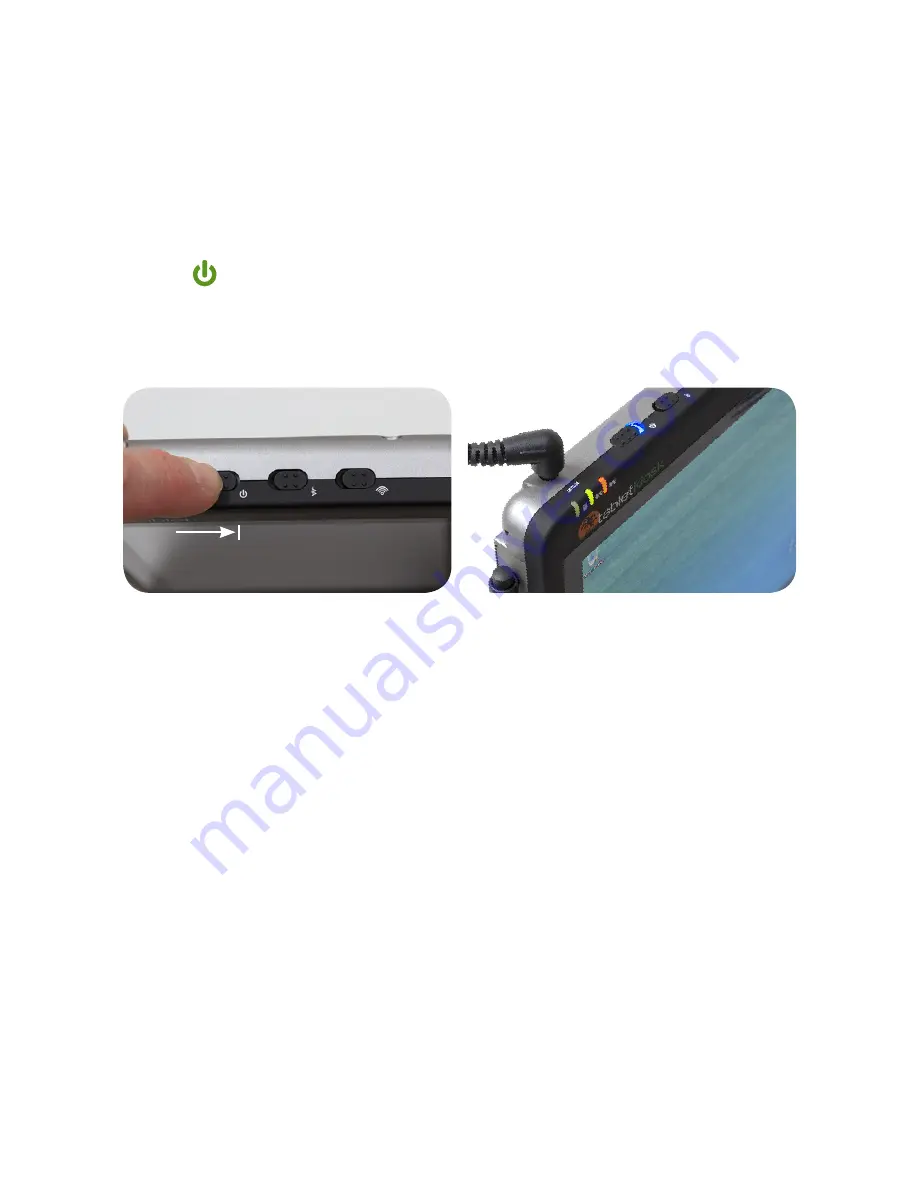
Locate the three power switches on the top of the Tablet PC.
The
switch is the computer’s main power toggle. Slide it to
the right and hold it there for three (3) seconds and release. The
switch will then emit a blue glow and the Sahara NetSlate will
boot up.
Step 5: Completing the Operating System Installation
When your system powers on for the first time, Windows will
have a few questions for you to answer in order to localize your
installation. If you are planning on using the Fingerprint Reader
to assist you in securing your system and logging in, you should
create a password when you make your initial user account.
Refer to your operating system’s manual for information on any
of the questions you are unsure how to answer.
Step 6: Navigating with the Touch Screen and Digitizer (pen)
Unlike a regular laptop or desktop PC, standard navigational
activities on a Tablet PC are typically completed using your
Press and hold the power switch on the
top of the Tablet PC for three seconds
or until the switch glows blue. The
system should then boot up.
Once the system is powered on, the
power switch will glow blue and the
battery indicators will light up (green if
the battery is fully charged, orange if it
is charging).
Summary of Contents for Sahara NetSlate a525
Page 2: ......
Page 17: ...Preface xv This Page Left Blank Intentionally ...
Page 18: ......
Page 26: ......
Page 36: ......
Page 44: ......
Page 52: ......
Page 110: ......
Page 126: ......
Page 138: ......
Page 145: ...Chapter 07 Troubleshooting 119 ...
Page 159: ...Appendix A BIOS Set up 133 This page intentionally left blank ...
Page 160: ......
Page 172: ......


