


1-57
BEFORE USING THE MACHINE
Contents
CLEANING THE LASER UNIT
When the laser unit inside the machine becomes dirty, line patterns (coloured lines) may form in the printed image.
Identifying lines (coloured lines) caused by a dirty laser unit
• Coloured lines always appear in the same place. (The lines are never black.)
• The coloured lines are parallel to the direction of paper feeding.
• Coloured lines appear not only on copies but also on print jobs from a computer. (The same lines appear on both
copies and print jobs.)
If the above problems occur, follow the steps below to clean the laser unit.
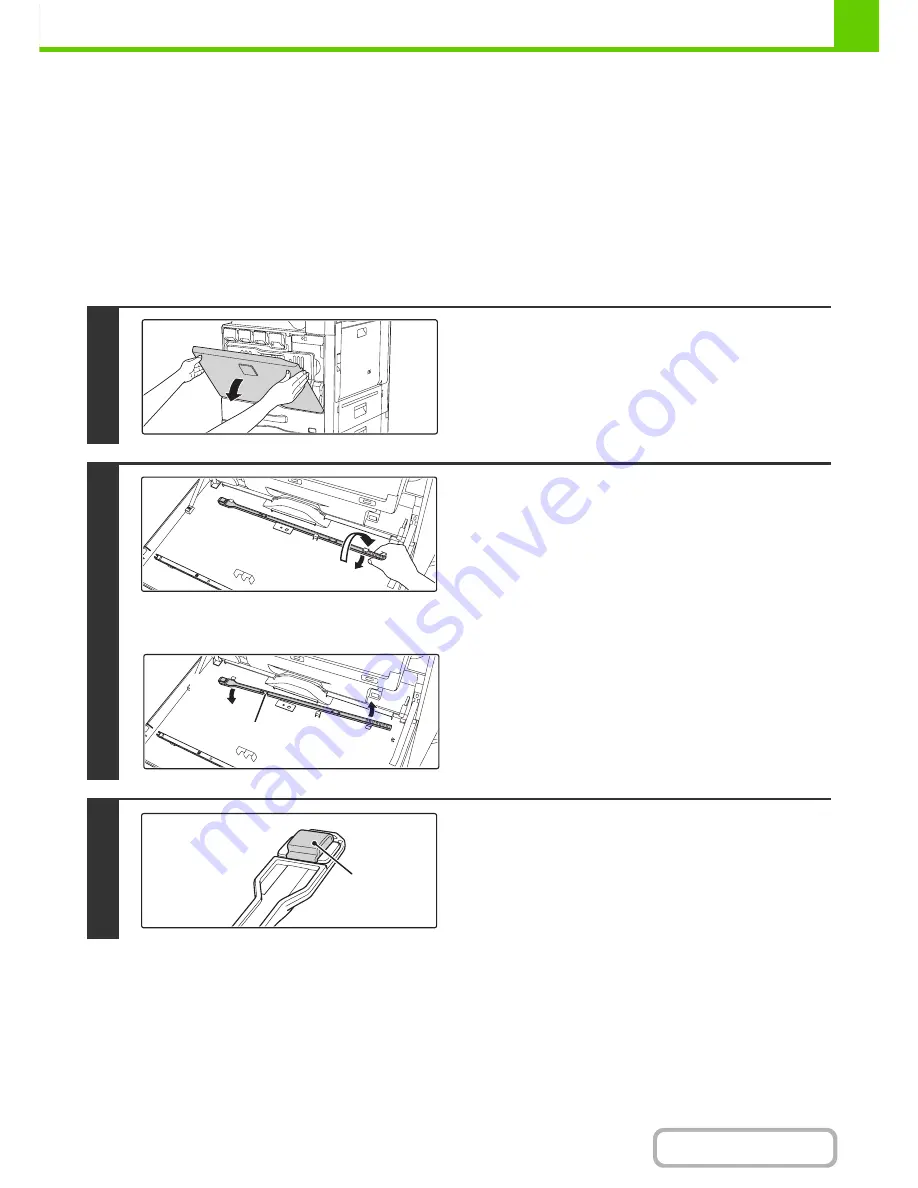
1
Open the front cover.
2
Take out the cleaning tool for the laser
unit.
The cleaning tool is attached to the front cover.
(1) Pull the right side of the cleaning
instrument and unfasten it from the claw.
(2) Place it in the front spread across the top of
the claw.
(3) Unfasten the cleaning instrument rotating
around the boss from the claw on the left
side.
3
Make sure that the cleaner at the tip of
the cleaning tool is not dirty.
If the cleaner is dirty, remove the cleaner and replace it with a
clean one. For the procedure for replacing the cleaner, see
steps 4 through 6. If the cleaner is not dirty, go to step 7.
(2)
(1)
(3)
Boss
Cleaner
Summary of Contents for MX-2615N
Page 11: ...Conserve Print on both sides of the paper Print multiple pages on one side of the paper ...
Page 35: ...Organize my files Delete a file Delete all files Periodically delete files Change the folder ...
Page 283: ...3 19 PRINTER Contents 4 Click the Print button Printing begins ...
Page 836: ...MX3114 3115 EX ZZ Operation Guide MX 2614N MX 2615N MX 3114N MX 3115N MODEL ...