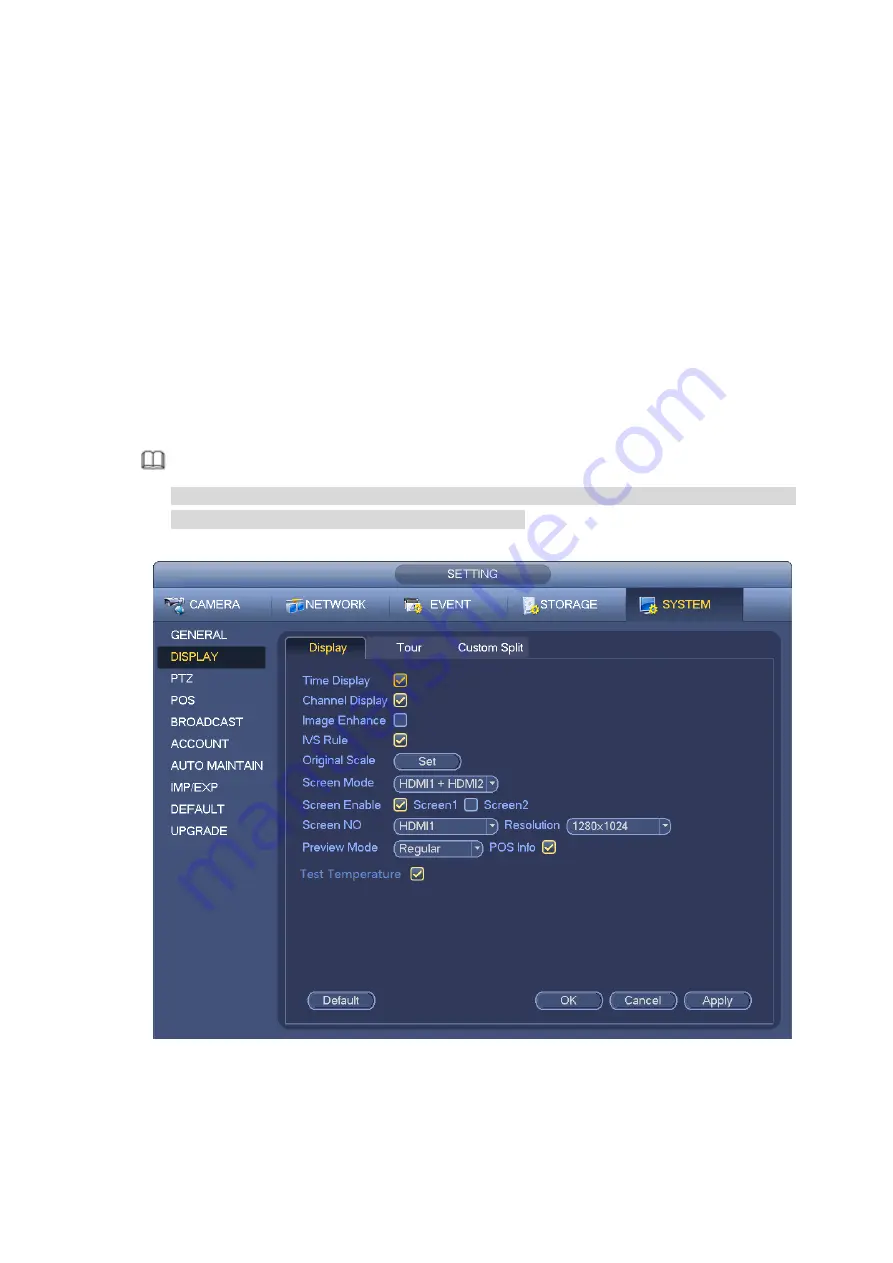
Channel display: You can select to channel name or not when system is playback.
Image enhance: Check the box; you can optimize the margin of the preview video.
IVS rule: Check the box to enable IVS function. System can display IVS rule on the preview video.
Original scale: You can set different original rates for different channels. Click Set and then select a
channel, you can restore original rate.
Screen mode: It is for dual-screen operation. Please select from the dropdown list according to your
actual situation. Click Apply button, system needs to restart to activate new setup. For example,
32+4 means for VGA, system max supports 32-window split and for HDMI2, system max supports
4-window split. Please note this function is for some series product only.
Screen enable: Check the box here to enable the screen. In this way, it can display the video.
Screen No. Select the corresponding screen from the dropdown list and then set resolution.
Resolution: There are four options: 1920×1080, 1280×1024, 1280×720, and 1024×768. The VGA
default resolution is 1280×1024; HDMI default resolution is 1920×1080. Please note the system
needs to reboot to activate current setup.
Test temperature: Select the check box to enable the real-time spot temp test function.
Note
It might collect the human body temperature information in the monitor screen. Be careful!
Only products of some series support this function.
Figure 3-66
Preview mode: It is to set preview display mode. Please select from the dropdown list.
General: There is no displayed information on the preview interface.
Summary of Contents for ELITE Network IP Series
Page 1: ...64 Channel 4K Hot Swap NVR NVR ELHS 64 4K DH...
Page 108: ...Figure 3 92 Figure 3 93...
Page 131: ...Figure 3 111 Figure 3 112 Figure 3 113...
Page 144: ...Figure 3 126 Figure 3 127...
Page 146: ...Figure 3 129 Click draw button to draw the zone See Figure 3 130 Figure 3 130...
Page 149: ...Figure 3 133 Click Draw button to draw a zone See Figure 3 134 Figure 3 134...
Page 154: ...Figure 3 139 Click draw button to draw the zone See Figure 3 140...
Page 172: ...Figure 3 157 Figure 3 158...
Page 173: ...Figure 3 159 Figure 3 160...
Page 176: ...Figure 3 164 Figure 3 165...
Page 211: ...Figure 3 199...
Page 234: ...Figure 3 227 Step 2 Click Add group Enter add group interface See Figure 3 228 Figure 3 228...
Page 298: ...Figure 4 56 Figure 4 57...
Page 304: ...Figure 4 62 Figure 4 63...
Page 305: ...Figure 4 64 Figure 4 65...
Page 330: ...Figure 4 101 Figure 4 102...
Page 339: ...Figure 4 115 Figure 4 116...
Page 359: ...Figure 4 144 Note For admin you can change the email information See Figure 4 145...


