4.6.5.4 FTP
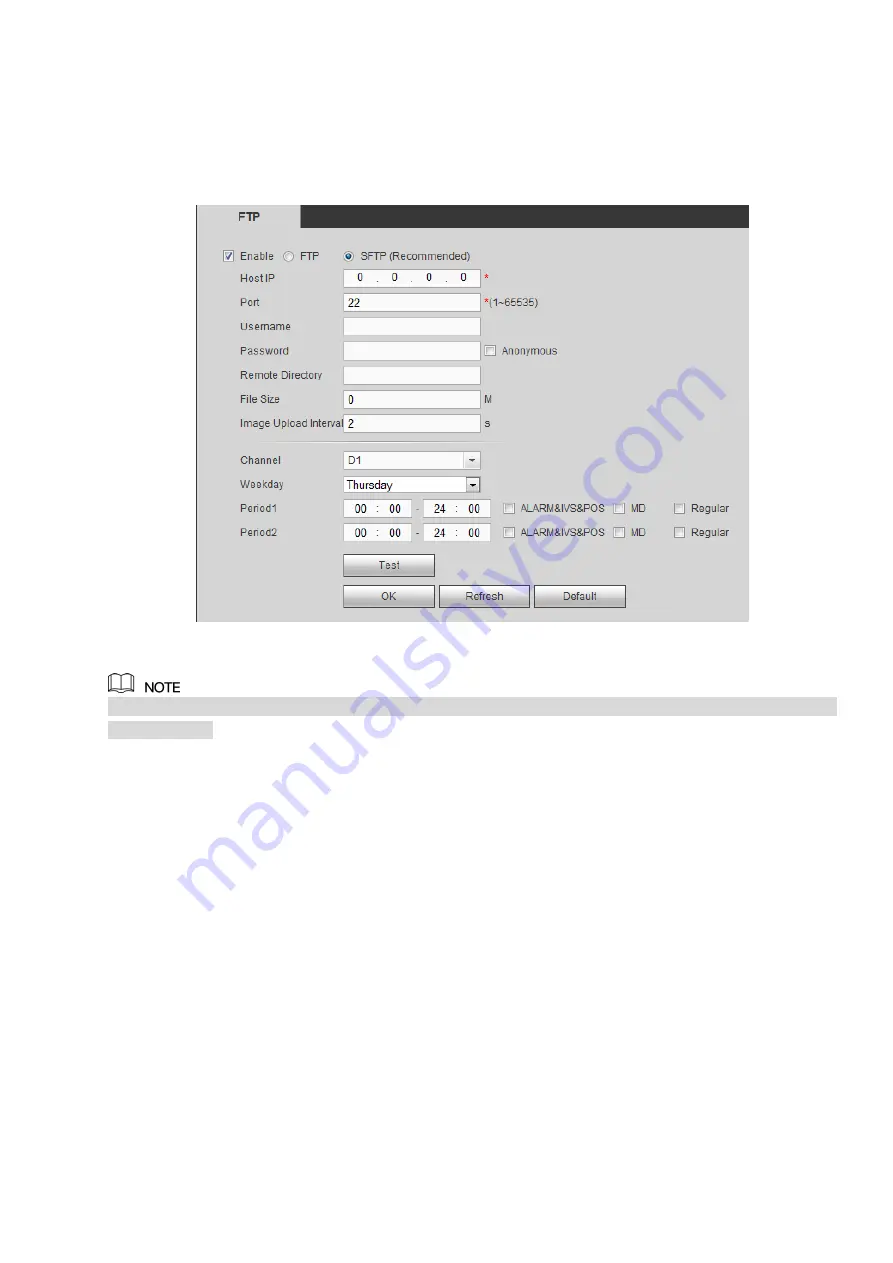
Configure FTP information on the FTP interface. See Figure 4-119.
Set the FTP as your remote storage location. System can save record file or snapshot picture to the FTP
once the network is offline or malfunction.
Figure 4-119
FTP transmits data with clear text mode and SFTP transmits data with encrypted mode. SFTP is
recommended.
Host IP: The host IP you have installed the FTP server.
Port: The default SFTP port number is 22 and the default FTP port number is 21.
User name/Password: The account for you to access the FTP server.
Remote directory: The folder you created under the root path of the FTP according to the
corresponding rule.
If there is no remote directory, system can auto create different directories according to the IP,
time and channel.
If there is remote directory, system can create corresponding folder under the FTP root path and
then create different folders according to IP address, time and channel.
File length: File length is upload file length. When setup is larger than the actual file length, system
will upload the whole file. When setup here is smaller than the actual file length, system only uploads
the set length and auto ignore the left section. When interval value is 0, system uploads all
corresponding files.
Image upload interval: It is the image upload interval. If the image upload interval is larger than the
image snapshot frequency, system just uploads the lasted image.
If the image interval is 5 seconds and the snapshot frequency is 2 seconds, system will send out
the latest image at the buffer at 5 seconds.
Summary of Contents for ELITE Network IP Series
Page 1: ...64 Channel 4K Hot Swap NVR NVR ELHS 64 4K DH...
Page 108: ...Figure 3 92 Figure 3 93...
Page 131: ...Figure 3 111 Figure 3 112 Figure 3 113...
Page 144: ...Figure 3 126 Figure 3 127...
Page 146: ...Figure 3 129 Click draw button to draw the zone See Figure 3 130 Figure 3 130...
Page 149: ...Figure 3 133 Click Draw button to draw a zone See Figure 3 134 Figure 3 134...
Page 154: ...Figure 3 139 Click draw button to draw the zone See Figure 3 140...
Page 172: ...Figure 3 157 Figure 3 158...
Page 173: ...Figure 3 159 Figure 3 160...
Page 176: ...Figure 3 164 Figure 3 165...
Page 211: ...Figure 3 199...
Page 234: ...Figure 3 227 Step 2 Click Add group Enter add group interface See Figure 3 228 Figure 3 228...
Page 298: ...Figure 4 56 Figure 4 57...
Page 304: ...Figure 4 62 Figure 4 63...
Page 305: ...Figure 4 64 Figure 4 65...
Page 330: ...Figure 4 101 Figure 4 102...
Page 339: ...Figure 4 115 Figure 4 116...
Page 359: ...Figure 4 144 Note For admin you can change the email information See Figure 4 145...


