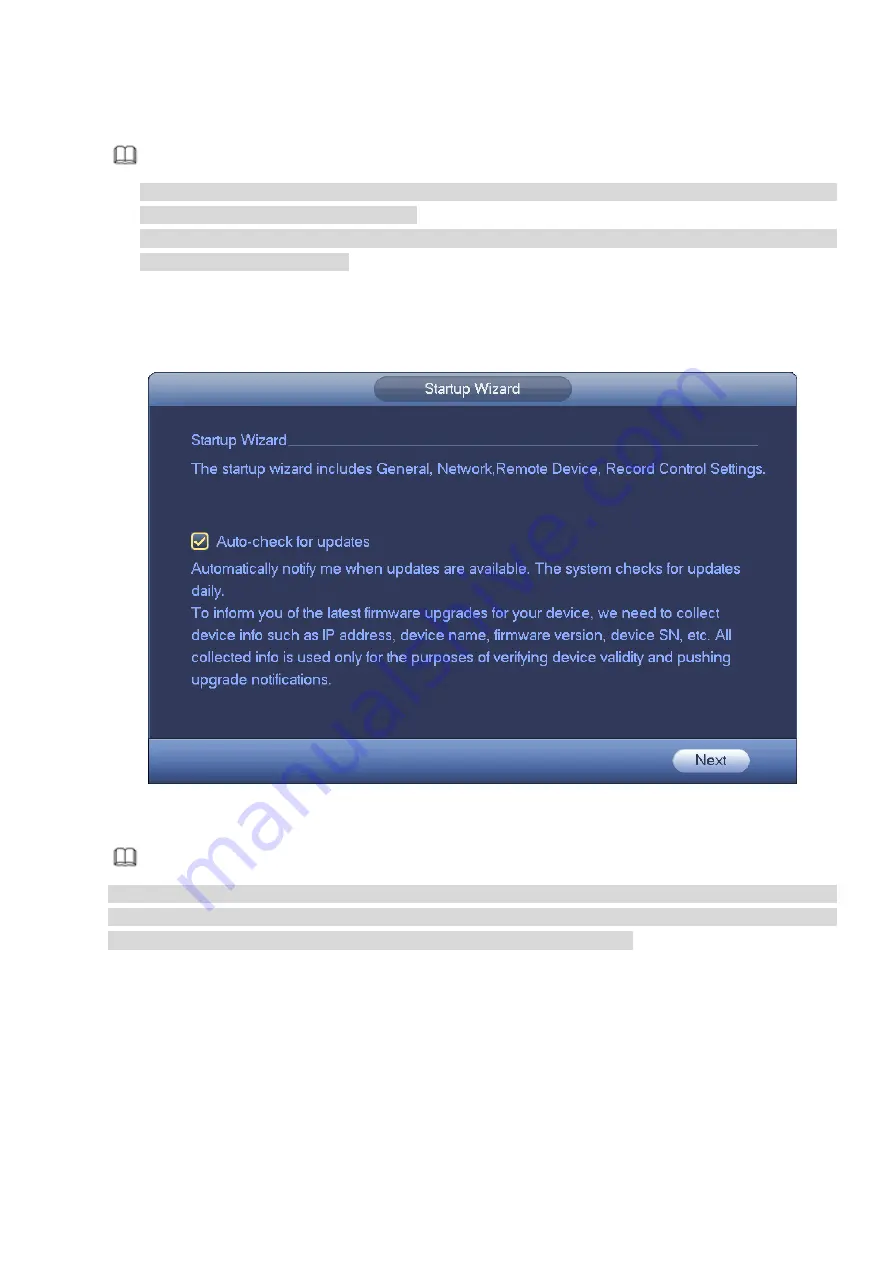
After you successfully initialize the device, it goes to startup wizard. Here you can quickly configure your
device. It includes general setup, basic network setup, camera registration, P2P, and schedule interface.
Note
Once the power is off during the quick settings process, you need to go through startup wizard again
when the device boot up the next time.
After completing all items on the startup wizard, the startup wizard automatically hides when the
device boot up the next time.
Please follow the steps listed below.
Boot up the device and complete the device initialization. Device goes to startup wizard. See Figure 3-11.
Select Auto-check for updates, device automatically checks if there is new applications or not every
day.
Figure 3-11
Note
After auto-check is enabled, in order to inform you of the latest firmware upgrades, we will collect your
personal information such as IP address, device name, firmware version and device SN. The collected
information is used for verifying device legality and pushing upgrade notice.
3.4.1
General
It is to set NVR basic information such as system date, holiday and etc.
3.4.1.1 General
It is to set device basic information such as device name, serial number and etc.
Please follow the steps listed below.
Step 1 Click Next button,
Enter General interface.
Step 2 Click General button.
Summary of Contents for ELITE Network IP Series
Page 1: ...64 Channel 4K Hot Swap NVR NVR ELHS 64 4K DH...
Page 108: ...Figure 3 92 Figure 3 93...
Page 131: ...Figure 3 111 Figure 3 112 Figure 3 113...
Page 144: ...Figure 3 126 Figure 3 127...
Page 146: ...Figure 3 129 Click draw button to draw the zone See Figure 3 130 Figure 3 130...
Page 149: ...Figure 3 133 Click Draw button to draw a zone See Figure 3 134 Figure 3 134...
Page 154: ...Figure 3 139 Click draw button to draw the zone See Figure 3 140...
Page 172: ...Figure 3 157 Figure 3 158...
Page 173: ...Figure 3 159 Figure 3 160...
Page 176: ...Figure 3 164 Figure 3 165...
Page 211: ...Figure 3 199...
Page 234: ...Figure 3 227 Step 2 Click Add group Enter add group interface See Figure 3 228 Figure 3 228...
Page 298: ...Figure 4 56 Figure 4 57...
Page 304: ...Figure 4 62 Figure 4 63...
Page 305: ...Figure 4 64 Figure 4 65...
Page 330: ...Figure 4 101 Figure 4 102...
Page 339: ...Figure 4 115 Figure 4 116...
Page 359: ...Figure 4 144 Note For admin you can change the email information See Figure 4 145...


