Parameter
Description
Subnet
Mask
gateway and IP address shall be in the same network segment.
Default
Gateway
MTU
It is to set MTU value of the network adapter. The value ranges from 1280 -7200
bytes. The default setup is 1500 bytes. Please note MTU modification may result
in network adapter reboot and network becomes off. That is to say, MTU
modification can affect current network service. System may pop up dialog box
for you to confirm setup when you want to change MTU setup. Click OK button to
confirm current reboot, or you can click Cancel button to terminate current
modification. Before the modification, you can check the MTU of the gateway;
the MTU of the NVR shall be the same as or is lower than the MTU of the
gateway. In this way, you can reduce packets and enhance network
transmission efficiency.
The following MTU value is for reference only.
1500: Ethernet information packet max value and it is also the default value.
It is the typical setup when there is no PPPoE or VPN. It is the default setup
of some router, switch or the network adapter.
1492: Recommend value for PPPoE.
1468: Recommend value for DHCP.
Step 4 Click OK to complete the Ethernet card edit.
System returns to the TCP/IP interface.
Note
Click
to unbind the the Ethernet card. The unbinding comes into effect only after device
reboot.
Step 5 Click OK to save the configuration.
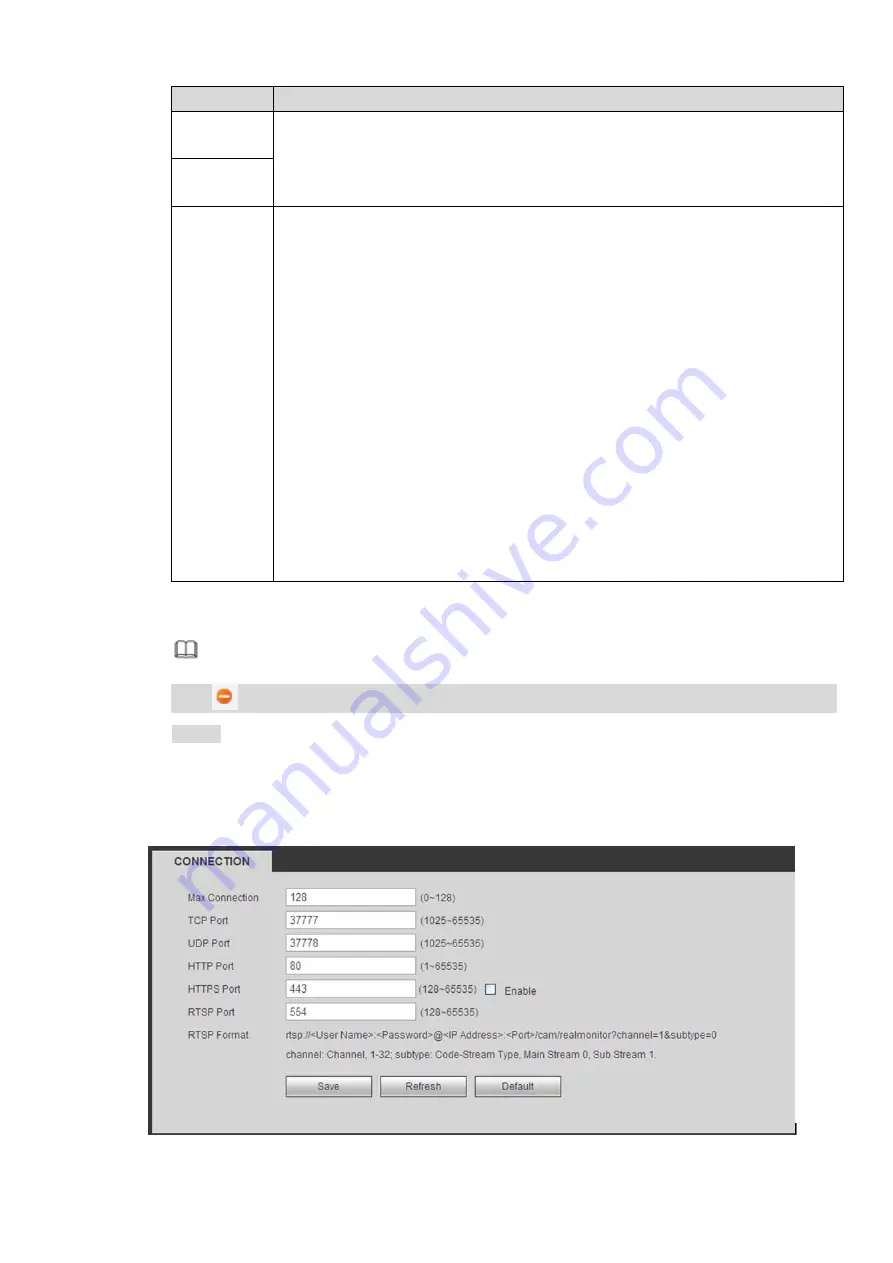
4.6.2.2 Port
The connection interface is shown as in Figure 4-40.
Figure 4-40
Summary of Contents for ELITE Network IP Series
Page 1: ...64 Channel 4K Hot Swap NVR NVR ELHS 64 4K DH...
Page 108: ...Figure 3 92 Figure 3 93...
Page 131: ...Figure 3 111 Figure 3 112 Figure 3 113...
Page 144: ...Figure 3 126 Figure 3 127...
Page 146: ...Figure 3 129 Click draw button to draw the zone See Figure 3 130 Figure 3 130...
Page 149: ...Figure 3 133 Click Draw button to draw a zone See Figure 3 134 Figure 3 134...
Page 154: ...Figure 3 139 Click draw button to draw the zone See Figure 3 140...
Page 172: ...Figure 3 157 Figure 3 158...
Page 173: ...Figure 3 159 Figure 3 160...
Page 176: ...Figure 3 164 Figure 3 165...
Page 211: ...Figure 3 199...
Page 234: ...Figure 3 227 Step 2 Click Add group Enter add group interface See Figure 3 228 Figure 3 228...
Page 298: ...Figure 4 56 Figure 4 57...
Page 304: ...Figure 4 62 Figure 4 63...
Page 305: ...Figure 4 64 Figure 4 65...
Page 330: ...Figure 4 101 Figure 4 102...
Page 339: ...Figure 4 115 Figure 4 116...
Page 359: ...Figure 4 144 Note For admin you can change the email information See Figure 4 145...


