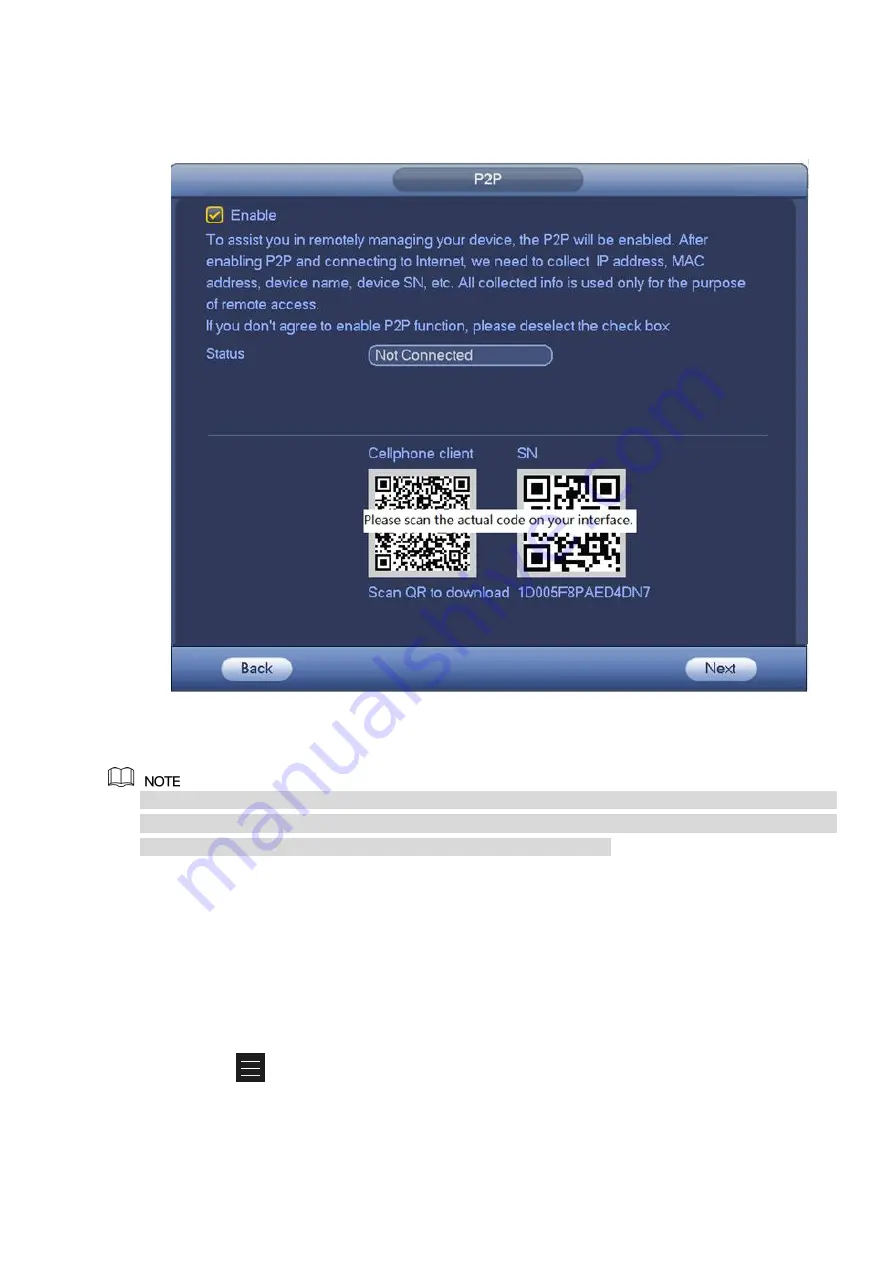
Step 1 Enter from main menu > Setting > Network > P2P.
The P2P interface is displayed. See Figure 3-19.
Figure 3-19
Step 2 Select the check box to enable P2P.
When P2P is enabled and the device is connected to the Internet, it displays Online in the Status box.
We need to collect information like IP address, MAC address, device name and device SN. All
collected information is used only for the purpose of remote access.
Step 3 Click Next to conplete the setting.
If system displays Online in the Status box, P2P registration is successful.
Mobile APP Operation
The following contents are introduced in the example of mobile App.
Step 1 Scan the QR code to download and install the mobile App.
Step 2 Select Camera and enter the main interface.
Step 3 Register device in the mobile App:
1)
Click
and select Device Manager. See Figure 3-20.
Summary of Contents for ELITE Network IP Series
Page 1: ...64 Channel 4K Hot Swap NVR NVR ELHS 64 4K DH...
Page 108: ...Figure 3 92 Figure 3 93...
Page 131: ...Figure 3 111 Figure 3 112 Figure 3 113...
Page 144: ...Figure 3 126 Figure 3 127...
Page 146: ...Figure 3 129 Click draw button to draw the zone See Figure 3 130 Figure 3 130...
Page 149: ...Figure 3 133 Click Draw button to draw a zone See Figure 3 134 Figure 3 134...
Page 154: ...Figure 3 139 Click draw button to draw the zone See Figure 3 140...
Page 172: ...Figure 3 157 Figure 3 158...
Page 173: ...Figure 3 159 Figure 3 160...
Page 176: ...Figure 3 164 Figure 3 165...
Page 211: ...Figure 3 199...
Page 234: ...Figure 3 227 Step 2 Click Add group Enter add group interface See Figure 3 228 Figure 3 228...
Page 298: ...Figure 4 56 Figure 4 57...
Page 304: ...Figure 4 62 Figure 4 63...
Page 305: ...Figure 4 64 Figure 4 65...
Page 330: ...Figure 4 101 Figure 4 102...
Page 339: ...Figure 4 115 Figure 4 116...
Page 359: ...Figure 4 144 Note For admin you can change the email information See Figure 4 145...


