Each rule can set two sizes (min size/max size). Once the object is smaller than the min size or larger
than the max size, there is no alarm. Please make sure the max size is larger than the min size.
Click Ok to complete the rule setup.
For detailed setups, please refer to chapter 4.6.4.1.1 motion detect for detailed information.
4.6.4.3.1.2 Intrusion (Cross warning zone)
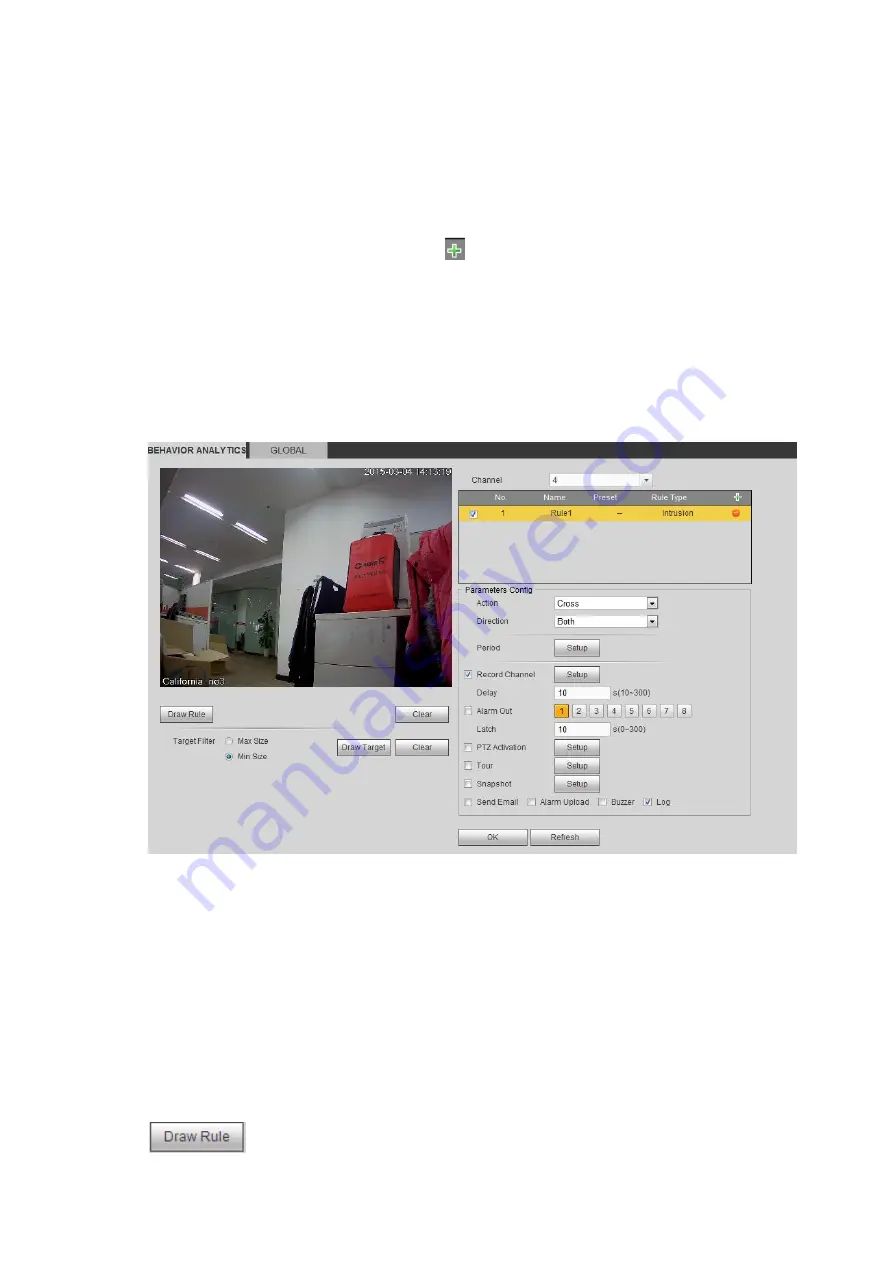
From main menu>Setup>Event> IVS>IVS, click
, and then select rule type as intrusion, you can see
the following interface. See Figure 3-129.
Note:
System supports customized area shape and amount.
Support enter/leave/both detection.
Can detect the moving object operation in the specified zone, customized trigger amount and staying
time.
Support objects filter function.
Figure 4-82
Check the Intrusion box to enable intrusion function.
Select SN (Area1/2/3/4) and direction, and then input customized rule name.
Action: System suppors two types:appear/cross.
Direction: There are three options: A>B, B>A, both. System can generate an alarm once there is any
object enter/exit (Or both) the zone.
Now you can draw a rule. Left click mouse to draw a line first and then right click mouse to draw another
line until you draw a rectangle, you can right click mouse to exit.
Click Ok to complete the rule setup.
Click
to draw the zone. See Figure 4-83.
Summary of Contents for ELITE Network IP Series
Page 1: ...64 Channel 4K Hot Swap NVR NVR ELHS 64 4K DH...
Page 108: ...Figure 3 92 Figure 3 93...
Page 131: ...Figure 3 111 Figure 3 112 Figure 3 113...
Page 144: ...Figure 3 126 Figure 3 127...
Page 146: ...Figure 3 129 Click draw button to draw the zone See Figure 3 130 Figure 3 130...
Page 149: ...Figure 3 133 Click Draw button to draw a zone See Figure 3 134 Figure 3 134...
Page 154: ...Figure 3 139 Click draw button to draw the zone See Figure 3 140...
Page 172: ...Figure 3 157 Figure 3 158...
Page 173: ...Figure 3 159 Figure 3 160...
Page 176: ...Figure 3 164 Figure 3 165...
Page 211: ...Figure 3 199...
Page 234: ...Figure 3 227 Step 2 Click Add group Enter add group interface See Figure 3 228 Figure 3 228...
Page 298: ...Figure 4 56 Figure 4 57...
Page 304: ...Figure 4 62 Figure 4 63...
Page 305: ...Figure 4 64 Figure 4 65...
Page 330: ...Figure 4 101 Figure 4 102...
Page 339: ...Figure 4 115 Figure 4 116...
Page 359: ...Figure 4 144 Note For admin you can change the email information See Figure 4 145...


