Please refer to the following sheet for detailed information.
Parameter
Function
Max connection
The max client login amount (such as WEB, platform, cellphone
and etc). The value ranges from 1 to 128(default).
TCP port
The default value is 37777. You can input the actual port
number if necessary.
UDP port
The default value is 37778. You can input the actual port
number if necessary.
HTTP port
The default value is 80. You can input the actual port number if
necessary.
HTTPS
Select the Enable check box and configure the port according to
your actual needs. The default value is 443. After HTTPS is
enabled, HTTP will be switched to HTTPS by force to transmit
data in a safer way.
RTSP port
The default value is 554.
4.6.2.3 PPPoE
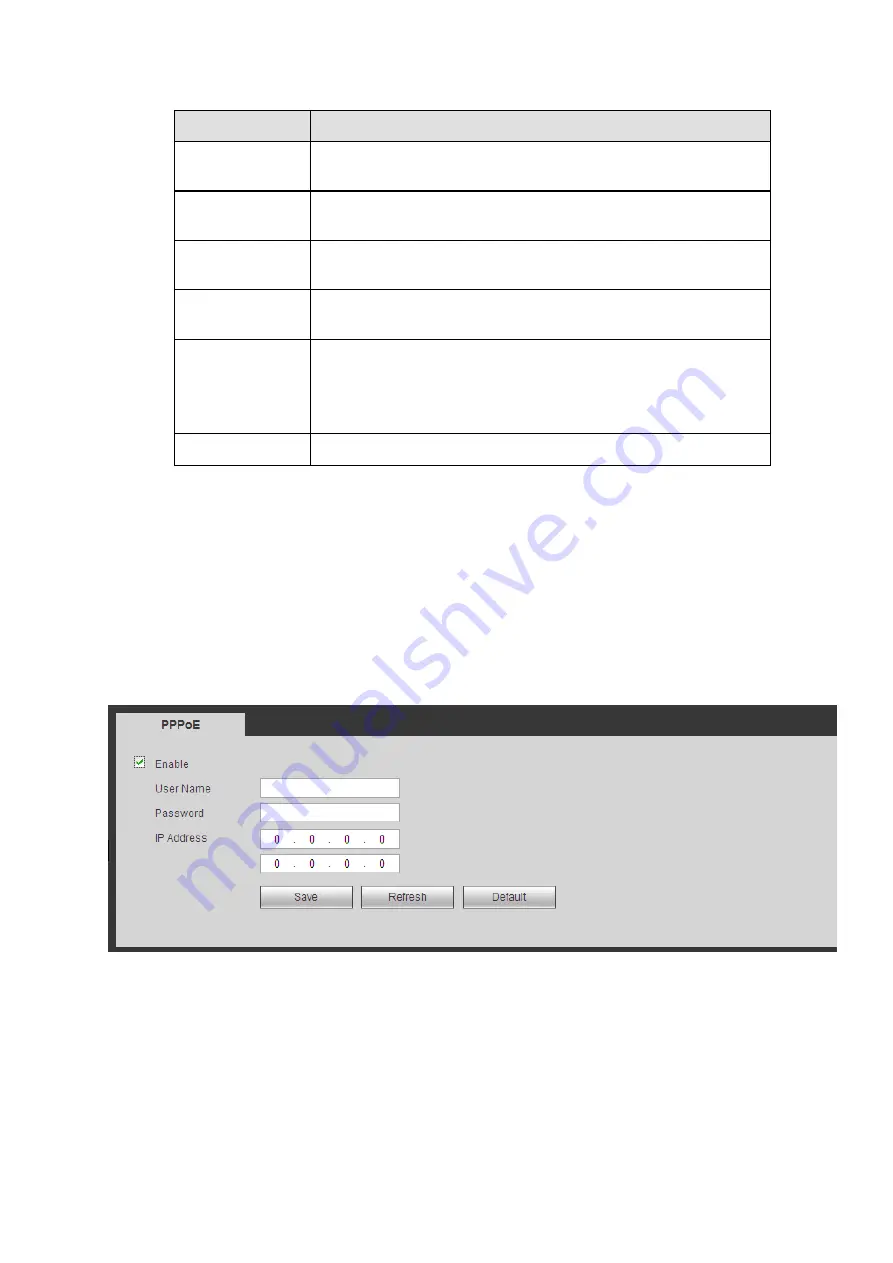
The PPPoE interface is shown as in Figure 4-41.
Input the PPPoE user name and password you get from the IPS (internet service provider) and enable
PPPoE function. Please save current setup and then reboot the device to get the setup activated.
Device connects to the internet via PPPoE after reboot. You can get the IP address in the WAN from the
IP address column.
Please note, you need to use previous IP address in the LAN to login the device. Please go to the
IP address item to via the device current device information. You can access the client-end via
this new address.
Figure 4-41
4.6.2.4 DDNS
DDNS (Dynamic Domain Name Server) is to dynamically refresh the DNS domain name and IP address if
the device IP address has changed frequently. The user can use the domain to access the device.
Preparation
Before the operation, check the DDNS type that the device supports.
If the DDNS type is Quick DDNS. You do not need to register the domain name.
Summary of Contents for ELITE Network IP Series
Page 1: ...64 Channel 4K Hot Swap NVR NVR ELHS 64 4K DH...
Page 108: ...Figure 3 92 Figure 3 93...
Page 131: ...Figure 3 111 Figure 3 112 Figure 3 113...
Page 144: ...Figure 3 126 Figure 3 127...
Page 146: ...Figure 3 129 Click draw button to draw the zone See Figure 3 130 Figure 3 130...
Page 149: ...Figure 3 133 Click Draw button to draw a zone See Figure 3 134 Figure 3 134...
Page 154: ...Figure 3 139 Click draw button to draw the zone See Figure 3 140...
Page 172: ...Figure 3 157 Figure 3 158...
Page 173: ...Figure 3 159 Figure 3 160...
Page 176: ...Figure 3 164 Figure 3 165...
Page 211: ...Figure 3 199...
Page 234: ...Figure 3 227 Step 2 Click Add group Enter add group interface See Figure 3 228 Figure 3 228...
Page 298: ...Figure 4 56 Figure 4 57...
Page 304: ...Figure 4 62 Figure 4 63...
Page 305: ...Figure 4 64 Figure 4 65...
Page 330: ...Figure 4 101 Figure 4 102...
Page 339: ...Figure 4 115 Figure 4 116...
Page 359: ...Figure 4 144 Note For admin you can change the email information See Figure 4 145...


