118
orbitalum tools GmbH
, D-78224 Singen, www.orbitalum.com, Phone +49 (0) 77 31 792-0
(14.01.21) OW_ORBIMAT_300SW_BA_852060202_00_EN
ORBIMAT 300 SW
EnGLISH
8.3.11
Changing the sector
Auto programming divides welding into different sectors (usually 4 to 6). The parameters can be programmed for each
sector.
The sector borders can be shifted manually, and sectors can be added or deleted.
Adjusting sector borders with the rotary knob
1. In the main menu, select "
Manual/Adjust programming
" > "
Divide into levels
".
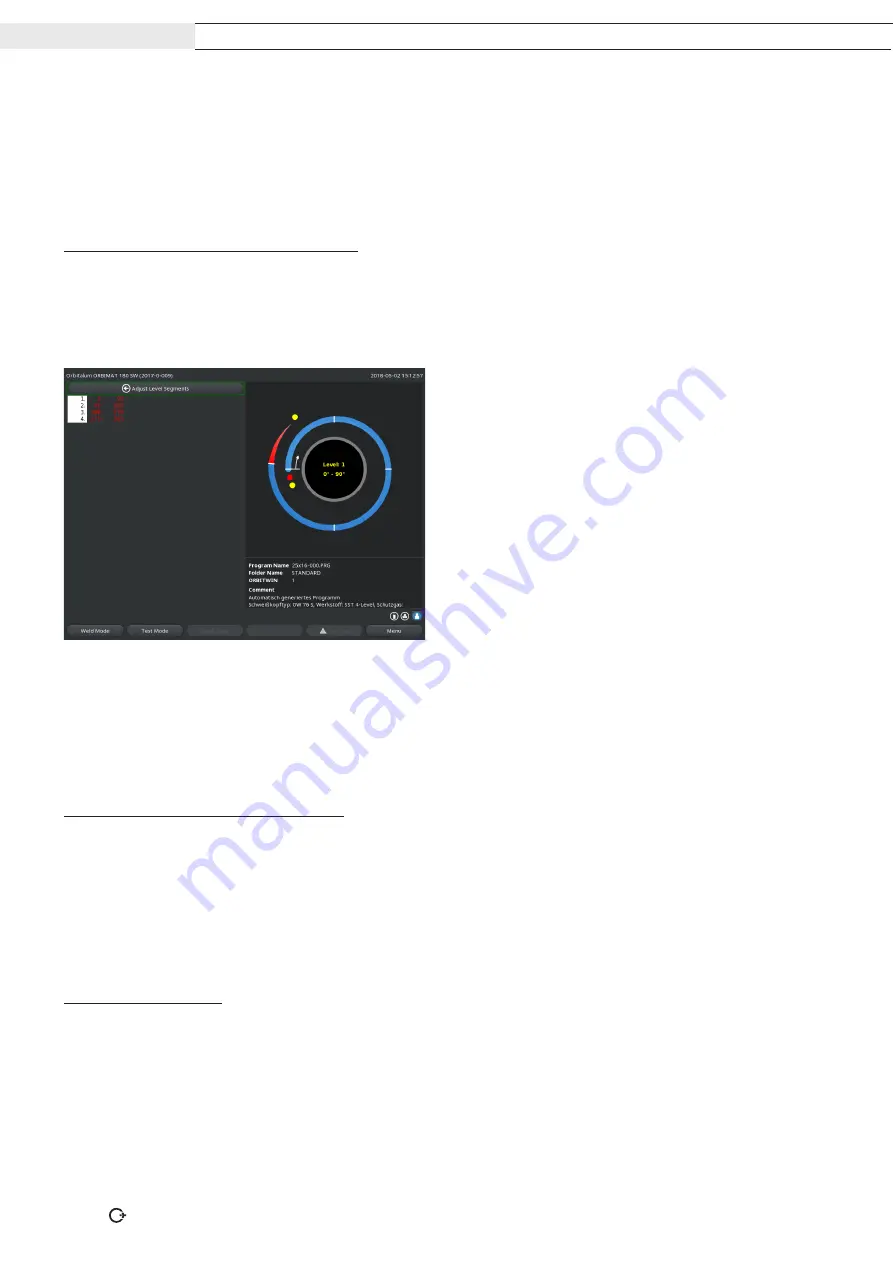
The sector list appears on the left in the display (five sectors in the example, see Abb. 14). The process sequence ap-
pears on the right.
2. Turn rotary knob until the pointer points to a white
sector border.
The green pointer moves through the sector, and the
degree information of the position appears at the bottom
edge of the process representation.
3. Ensure that the pointer is positioned correctly. For
this purpose, compare value in the sector list (end
sector 1 = 90°) with the degree information.
4. Briefly press the rotary knob.
The sector border is displayed in green.
Abb. 14:
Sector list – Pointer position for 90°
5. Move sector border to the desired position with the rotary knob.
6. Briefly press the rotary knob.
7. Rapid jumping to the sector borders by pressing and immediately turning the rotary knob.
The sector border is saved at the new position. The sector list is updated accordingly.
Adjusting sector borders with the keyboard
1. In the main menu, select "
Manual/Adjust programming
" > "
Adjust parameters
".
2. Select the desired sector, e.g. "
Sector 1
".
3. Select and highlight the "
Final angle
" field, enter a value and save it.
To adjust further sectors:
4. Select "
go forward to sector ...
" or "
go backward to sector …
".
Moving/deleting sectors
Example: Divide sector 1 (0 - 90°) into two sectors. New border at 45°.
1. In the main menu, select "
Manual/Adjust programming
" > "
Divide into levels
".
The sector list appears on the left in the display (five sectors in the example, see Abb. 14). The process sequence ap-
pears on the right.


