11. OPTIONS AND PERIPHERAL EQUIPMENT
11 - 9
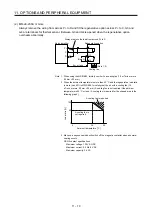
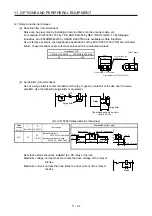
To remove the built-in regenerative resistor mounted on the back of MR-JE-40A to MR-JE-100A, follow
the procedures 1) to 3) with referring to the illustration.
1) Disconnect the wirings of the built-in regenerative resistor from the power connector (CNP1).
(Refer to (3) (b) of 3.3.2.)
2) Remove the wirings of the built-in regenerative resistor from the closest position to the power
connector (CNP1) in order. Please pay full attention not to break the wirings.
3) Remove the screw fixing the built-in regenerative resistor and dismount the built-in regenerative
resistor.
(Note)
3)
1)
2)
Note. Screw size: M3
Tightening torque: 0.72 [N•m]
Summary of Contents for MR-JE-_A
Page 9: ...A 8 MEMO ...
Page 15: ...6 MEMO ...
Page 29: ...1 FUNCTIONS AND CONFIGURATION 1 14 MEMO ...
Page 139: ...4 STARTUP 4 38 MEMO ...
Page 187: ...5 PARAMETERS 5 48 MEMO ...
Page 221: ...6 NORMAL GAIN ADJUSTMENT 6 34 MEMO ...
Page 259: ...8 TROUBLESHOOTING 8 8 MEMO ...
Page 265: ...9 DIMENSIONS 9 6 MEMO ...
Page 273: ...10 CHARACTERISTICS 10 8 MEMO ...
Page 339: ...12 COMMUNICATION FUNCTION MITSUBISHI ELECTRIC GENERAL PURPOSE AC SERVO PROTOCOL 12 34 MEMO ...


