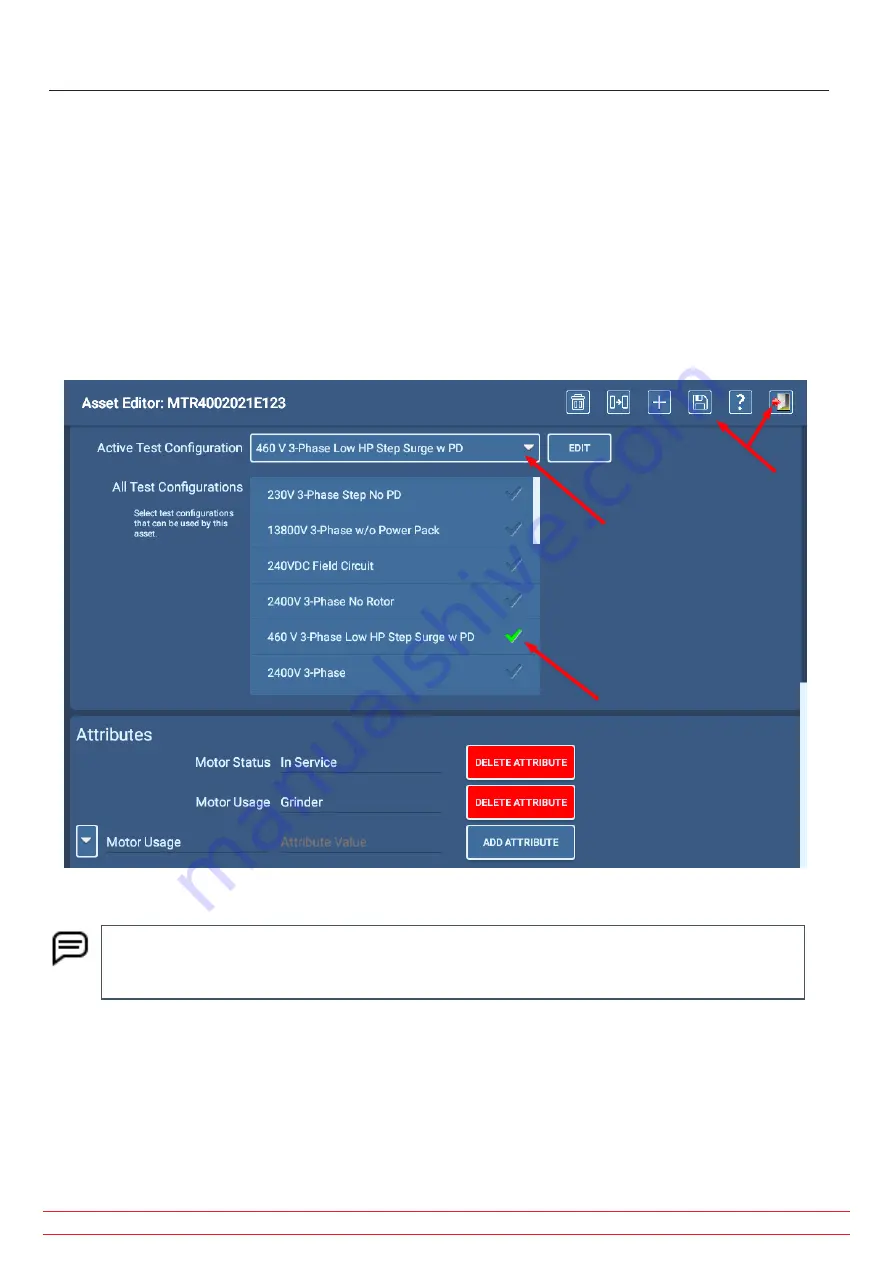
6. The software takes you to the Asset Editor screen. Scroll down to active test configuration and All test
configurations section.
7. Click on the active test configuration drop-down list then select the test configuration that you want to use for your
tests. If the desired configuration is not in this list, scroll through the All test configurations list to ensure that the
target configuration has a check mark highlighted.
8. If the desired test configuration is not in the All test configurations list, it will need to be created. Refer to chapter
“5 — Defining Assets, Test Configurations, Installations, and Routes” for details on creating new test configurations.
9. If you find the test configuration you need, ensure that it is set as the active test configuration then press the Save
icon to commit the changes.
10. Press the Exit icon to leave the Asset Editor and return to the Asset Selection screen.
Fig 76:
Setting the active test configuration.
NOTE: When you are in the Asset Editor, you can revise the active test configuration if needed by clicking
on the EDIT button to the right of the active test configuration drop-down list. The software will take you
to the test configuration Editor where you can make your changes.
www.megger.com
Megger Baker ADX User Guide
81
Selecting an Asset and Test Configuration
Summary of Contents for ADX15
Page 1: ...Megger Baker ADX Automated Diagnostic Test Equipment User Guide...
Page 2: ...www megger com Megger Baker ADX User Guide...
Page 10: ...www megger com Megger Baker ADX User Guide viii Table of Contents...
Page 44: ...www megger com Megger Baker ADX User Guide 34...
Page 84: ...www megger com Megger Baker ADX User Guide 74 Routes...
Page 148: ...www megger com Megger Baker ADX User Guide 138...
Page 172: ...www megger com Megger Baker ADX User Guide 162...


