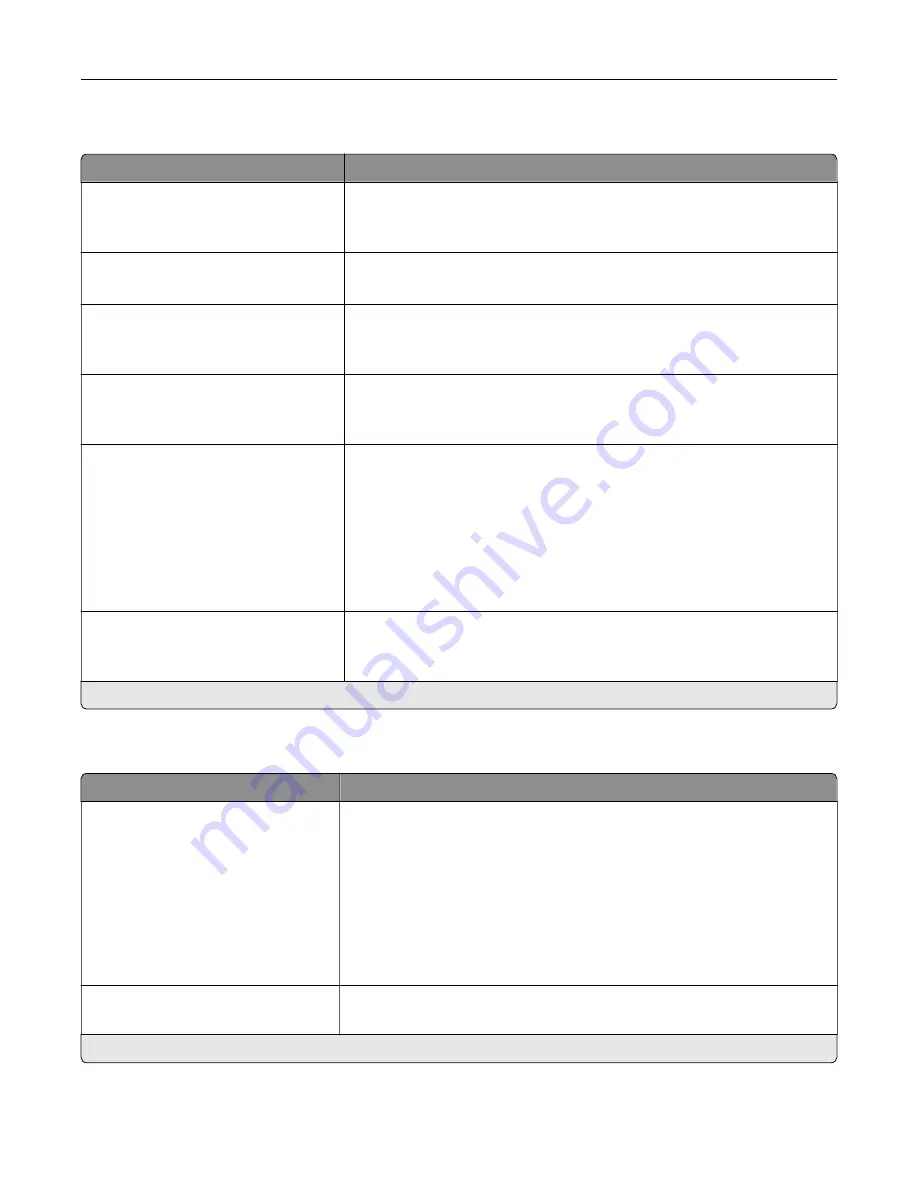
PostScript
Menu item
Description
Print PS Error
Off*
On
Print a page that describes the PostScript® error.
Note:
When an error occurs, processing of the job stops, the printer
prints an error message, and the rest of the print job is flushed.
Minimum Line Width
1–30 (2*)
Set the minimum stroke width.
Note:
Jobs printed in 1200 dpi use the value directly.
Lock PS Startup Mode
Off
On*
Disable the SysStart file.
Image Smoothing
Off*
On
Enhance the contrast and sharpness of low
‑
resolution images.
Note:
This setting has no effect on images with a resolution of 300 dpi or
higher.
Font Priority
Resident*
Flash/Disk
Establish the font search order.
Notes:
•
Resident sets the printer to search its memory for the requested font
before searching the hard disk or intelligent storage drive (ISD).
•
Flash/Disk sets the printer to search the hard disk or ISD for the
requested font before searching the printer memory.
•
This menu item appears only when a hard disk or an ISD is installed.
Wait Timeout
Off
On* (40 seconds)
Enable the printer to wait for more data before canceling a print job.
Note:
An asterisk (*) next to a value indicates the factory default setting.
PCL
Menu item
Description
Font Source
Resident*
Disk
Download
Flash
Font Card
All
Select the source which contains the default font selection.
Notes:
•
Disk and Flash appear only when a non-defective, non-protected
hard disk or intelligent storage drive (ISD) that contains fonts is
installed.
•
Download appears only if downloaded fonts exist in the printer
memory.
•
Font Card appears only when an ISD is installed.
Font Name
[List of available fonts] (Courier*)
Select a font from the specified font source.
Note:
An asterisk (*) next to a value indicates the factory default setting.
Use printer menus
138
Summary of Contents for XC4342
Page 64: ...3 Remove the fax cover 4 Remove the fax bracket Set up install and configure 64 ...
Page 65: ...5 Install the fax card to the bracket Set up install and configure 65 ...
Page 70: ...4 Install the ISP into its housing Set up install and configure 70 ...
Page 71: ...5 Attach the housing to the controller board shield Set up install and configure 71 ...
Page 76: ...Set up install and configure 76 ...
Page 84: ...Set up install and configure 84 ...
Page 85: ...3 Install the wireless module into its housing Set up install and configure 85 ...
Page 86: ...4 Attach the wireless module to the controller board shield Set up install and configure 86 ...
Page 88: ...6 Attach the controller board shield Set up install and configure 88 ...
Page 205: ...2 Remove the used toner cartridge 3 Unpack the new toner cartridge Maintain the printer 205 ...
Page 206: ...4 Insert the new toner cartridge 5 Close door B Maintain the printer 206 ...
Page 207: ...Replacing the black imaging unit 1 Open door B Maintain the printer 207 ...
Page 209: ...3 Remove the toner cartridges Maintain the printer 209 ...
Page 210: ...4 Disconnect the imaging kit cable Maintain the printer 210 ...
Page 214: ...9 Insert the imaging kit Maintain the printer 214 ...
Page 216: ...Replacing the color imaging kit 1 Open door B Maintain the printer 216 ...
Page 218: ...3 Remove the toner cartridges Maintain the printer 218 ...
Page 219: ...4 Disconnect the imaging kit cable Maintain the printer 219 ...
Page 220: ...5 Remove the used imaging kit Maintain the printer 220 ...
Page 222: ...8 Insert the black imaging unit into the new imaging kit Maintain the printer 222 ...
Page 223: ...9 Insert the new imaging kit Maintain the printer 223 ...
Page 225: ...Replacing the waste toner bottle 1 Open door B Maintain the printer 225 ...
Page 238: ...2 Remove the used ADF pick roller Maintain the printer 238 ...
Page 240: ...5 Insert the new ADF separator roller until it clicks into place Maintain the printer 240 ...
Page 250: ...2 Remove the ADF pick roller Maintain the printer 250 ...
Page 252: ...5 Insert the ADF separator roller until it clicks into place Maintain the printer 252 ...


