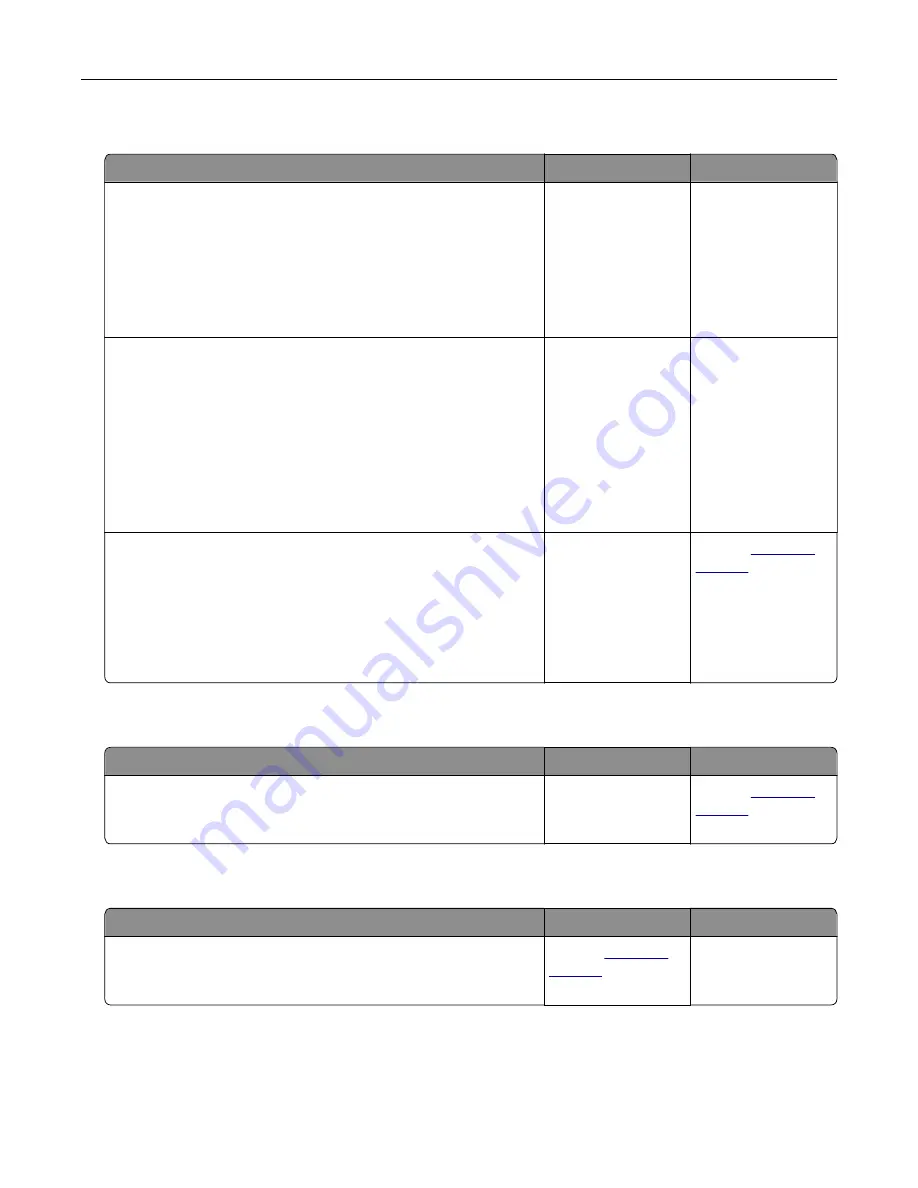
Scan job was not successful
Action
Yes
No
Step 1
Check the cable connections.
a
Make sure that the Ethernet or USB cable is securely connected
to the computer and the printer.
b
Resend the scan job.
Is the scan job successful?
The problem is
solved.
Go to step 2.
Step 2
Check the file you want to scan.
a
Make sure that the file name is not already used in the
destination folder.
b
Make sure that the document or photo you want to scan is not
open in another application.
c
Resend the scan job.
Is the scan job successful?
The problem is
solved.
Go to step 3.
Step 3
a
Make sure that the
Append time stamp
or the
Overwrite
existing file
check box is selected in the destination
configuration settings.
b
Resend the scan job.
Is the scan job successful?
The problem is
solved.
Contact
Scanner does not close
Action
Yes
No
Remove obstructions that keep the scanner cover open.
Did the scanner cover close correctly?
The problem is
solved.
Contact
Scanning takes too long or freezes the computer
Action
Yes
No
Close all applications that are interfering with the scan.
Does scanning take too long or freeze the computer?
Contact
The problem is
solved.
Troubleshoot a problem
322
Summary of Contents for XC4342
Page 64: ...3 Remove the fax cover 4 Remove the fax bracket Set up install and configure 64 ...
Page 65: ...5 Install the fax card to the bracket Set up install and configure 65 ...
Page 70: ...4 Install the ISP into its housing Set up install and configure 70 ...
Page 71: ...5 Attach the housing to the controller board shield Set up install and configure 71 ...
Page 76: ...Set up install and configure 76 ...
Page 84: ...Set up install and configure 84 ...
Page 85: ...3 Install the wireless module into its housing Set up install and configure 85 ...
Page 86: ...4 Attach the wireless module to the controller board shield Set up install and configure 86 ...
Page 88: ...6 Attach the controller board shield Set up install and configure 88 ...
Page 205: ...2 Remove the used toner cartridge 3 Unpack the new toner cartridge Maintain the printer 205 ...
Page 206: ...4 Insert the new toner cartridge 5 Close door B Maintain the printer 206 ...
Page 207: ...Replacing the black imaging unit 1 Open door B Maintain the printer 207 ...
Page 209: ...3 Remove the toner cartridges Maintain the printer 209 ...
Page 210: ...4 Disconnect the imaging kit cable Maintain the printer 210 ...
Page 214: ...9 Insert the imaging kit Maintain the printer 214 ...
Page 216: ...Replacing the color imaging kit 1 Open door B Maintain the printer 216 ...
Page 218: ...3 Remove the toner cartridges Maintain the printer 218 ...
Page 219: ...4 Disconnect the imaging kit cable Maintain the printer 219 ...
Page 220: ...5 Remove the used imaging kit Maintain the printer 220 ...
Page 222: ...8 Insert the black imaging unit into the new imaging kit Maintain the printer 222 ...
Page 223: ...9 Insert the new imaging kit Maintain the printer 223 ...
Page 225: ...Replacing the waste toner bottle 1 Open door B Maintain the printer 225 ...
Page 238: ...2 Remove the used ADF pick roller Maintain the printer 238 ...
Page 240: ...5 Insert the new ADF separator roller until it clicks into place Maintain the printer 240 ...
Page 250: ...2 Remove the ADF pick roller Maintain the printer 250 ...
Page 252: ...5 Insert the ADF separator roller until it clicks into place Maintain the printer 252 ...


