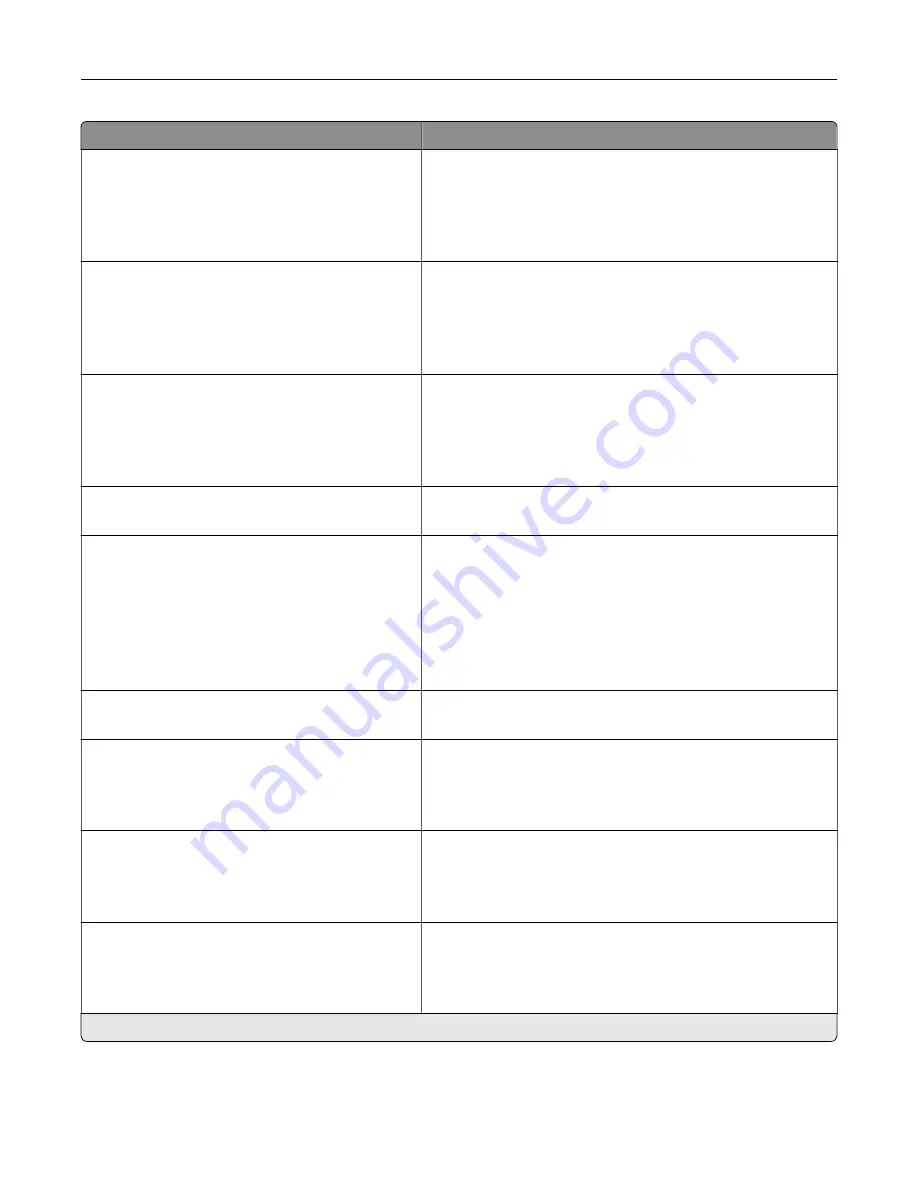
Menu item
Description
Tray Configuration
Envelope Prompts
Auto*
Multipurpose Feeder
Manual Envelope
Set the paper source that the user fills when a prompt to load
envelope appears.
Note:
For Multipurpose Feeder to appear, in the Paper menu,
set Configure MP to Cassette.
Tray Configuration
Action for Prompts
Prompt user*
Continue
Use current
Set the printer to resolve paper- or envelope-related change
prompts.
Reports
Menu Settings Page
Event Log
Event Log Summary
HealthCheck Statistics
Print reports about printer menu settings, status, and event
logs.
Supply Usage And Counters
Clear Supply Usage History
Reset the supply usage history, such as number of pages and
days remaining, to the factory shipped level.
Supply Usage And Counters
ITM Reset
Reset Black Cartridge Counter
Reset Cyan Cartridge Counter
Reset Magenta Cartridge Counter
Reset Yellow Cartridge Counter
Reset Maintenance Counter
Reset the counter after installing a new supply item or
maintenance kit.
Supply Usage And Counters
Tiered Coverage Ranges
Adjust the amount of color coverage for each printing range.
Printer Emulations
PPDS Emulation
Off*
On
Set the printer to recognize and use the PPDS data stream.
Printer Emulations
PS Emulation
Off
On*
Set the printer to recognize and use the PS data stream.
Printer Emulations
Enable Formsmerge
Off*
On
Activate formsmerge to store the forms into the hard disk or
intelligent storage drive (ISD).
Note:
The printer must have a hard disk or an ISD installed.
Note:
An asterisk (*) next to a value indicates the factory default setting.
Use printer menus
127
Summary of Contents for XC4342
Page 64: ...3 Remove the fax cover 4 Remove the fax bracket Set up install and configure 64 ...
Page 65: ...5 Install the fax card to the bracket Set up install and configure 65 ...
Page 70: ...4 Install the ISP into its housing Set up install and configure 70 ...
Page 71: ...5 Attach the housing to the controller board shield Set up install and configure 71 ...
Page 76: ...Set up install and configure 76 ...
Page 84: ...Set up install and configure 84 ...
Page 85: ...3 Install the wireless module into its housing Set up install and configure 85 ...
Page 86: ...4 Attach the wireless module to the controller board shield Set up install and configure 86 ...
Page 88: ...6 Attach the controller board shield Set up install and configure 88 ...
Page 205: ...2 Remove the used toner cartridge 3 Unpack the new toner cartridge Maintain the printer 205 ...
Page 206: ...4 Insert the new toner cartridge 5 Close door B Maintain the printer 206 ...
Page 207: ...Replacing the black imaging unit 1 Open door B Maintain the printer 207 ...
Page 209: ...3 Remove the toner cartridges Maintain the printer 209 ...
Page 210: ...4 Disconnect the imaging kit cable Maintain the printer 210 ...
Page 214: ...9 Insert the imaging kit Maintain the printer 214 ...
Page 216: ...Replacing the color imaging kit 1 Open door B Maintain the printer 216 ...
Page 218: ...3 Remove the toner cartridges Maintain the printer 218 ...
Page 219: ...4 Disconnect the imaging kit cable Maintain the printer 219 ...
Page 220: ...5 Remove the used imaging kit Maintain the printer 220 ...
Page 222: ...8 Insert the black imaging unit into the new imaging kit Maintain the printer 222 ...
Page 223: ...9 Insert the new imaging kit Maintain the printer 223 ...
Page 225: ...Replacing the waste toner bottle 1 Open door B Maintain the printer 225 ...
Page 238: ...2 Remove the used ADF pick roller Maintain the printer 238 ...
Page 240: ...5 Insert the new ADF separator roller until it clicks into place Maintain the printer 240 ...
Page 250: ...2 Remove the ADF pick roller Maintain the printer 250 ...
Page 252: ...5 Insert the ADF separator roller until it clicks into place Maintain the printer 252 ...


