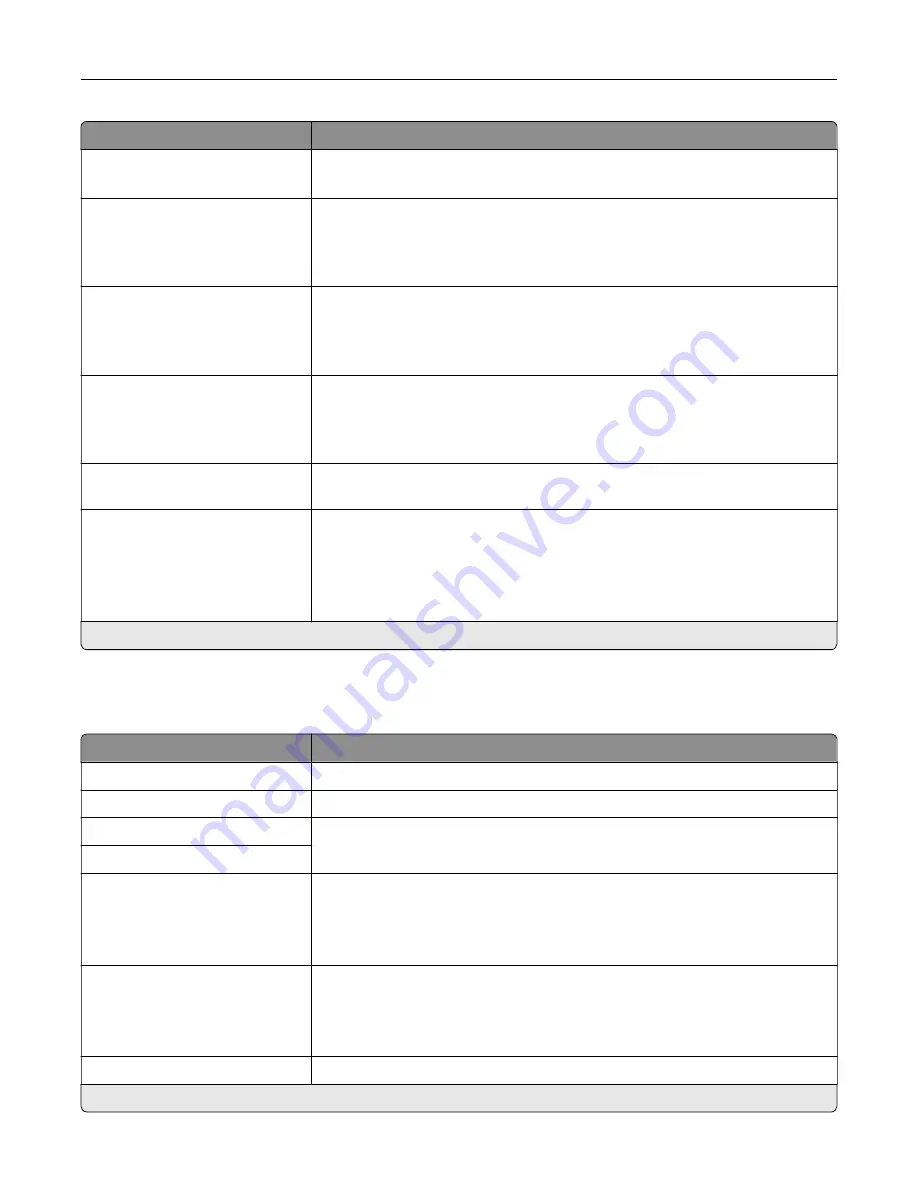
Menu item
Description
Digits to Mask
0–58 (0*)
Specify the number of digits to mask in an outgoing fax number.
Enable Line Connected
Detection
Off
On*
Determine whether a telephone line is connected to the printer.
Note:
Events are detected immediately.
Enable Line In Wrong Jack
Detection
Off
On*
Determine whether a telephone line is connected to the correct port on the
printer.
Note:
Events are detected immediately.
Enable Extension in Use
Support
Off
On*
Determine whether a telephone line is used by another device, such as another
phone on the same line.
Note:
Events are detected immediately.
Optimize Fax Compatibility
Configure the printer fax functionality for optimal compatibility with other fax
machines.
Fax Transport
T.38
Analog
G.711
etherFAX
Set the fax transport method.
Note:
This menu item appears only if an etherFAX or Fax over IP (FoIP) license
bundle is installed in the printer.
Note:
An asterisk (*) next to a value indicates the factory default setting.
HTTPS Fax Settings
Note:
This menu appears only if Fax Transport is set to etherFAX.
Menu item
Description
HTTPS service URL
Specify the etherFAX service URL.
HTTPS Proxy
Specify a proxy server URL.
HTTPS Proxy User
Specify the user name and password for the proxy server.
HTTPS Proxy Password
Fax Send Encryption
Disabled
Enabled*
Required
Enable encryption for outgoing fax messages.
Fax Receive Encryption
Disabled
Enabled*
Required
Enable encryption for incoming fax messages.
HTTPS Fax Status
Show the etherFAX communication status.
Note:
An asterisk (*) next to a value indicates the factory default setting.
Use printer menus
148
Summary of Contents for XC4342
Page 64: ...3 Remove the fax cover 4 Remove the fax bracket Set up install and configure 64 ...
Page 65: ...5 Install the fax card to the bracket Set up install and configure 65 ...
Page 70: ...4 Install the ISP into its housing Set up install and configure 70 ...
Page 71: ...5 Attach the housing to the controller board shield Set up install and configure 71 ...
Page 76: ...Set up install and configure 76 ...
Page 84: ...Set up install and configure 84 ...
Page 85: ...3 Install the wireless module into its housing Set up install and configure 85 ...
Page 86: ...4 Attach the wireless module to the controller board shield Set up install and configure 86 ...
Page 88: ...6 Attach the controller board shield Set up install and configure 88 ...
Page 205: ...2 Remove the used toner cartridge 3 Unpack the new toner cartridge Maintain the printer 205 ...
Page 206: ...4 Insert the new toner cartridge 5 Close door B Maintain the printer 206 ...
Page 207: ...Replacing the black imaging unit 1 Open door B Maintain the printer 207 ...
Page 209: ...3 Remove the toner cartridges Maintain the printer 209 ...
Page 210: ...4 Disconnect the imaging kit cable Maintain the printer 210 ...
Page 214: ...9 Insert the imaging kit Maintain the printer 214 ...
Page 216: ...Replacing the color imaging kit 1 Open door B Maintain the printer 216 ...
Page 218: ...3 Remove the toner cartridges Maintain the printer 218 ...
Page 219: ...4 Disconnect the imaging kit cable Maintain the printer 219 ...
Page 220: ...5 Remove the used imaging kit Maintain the printer 220 ...
Page 222: ...8 Insert the black imaging unit into the new imaging kit Maintain the printer 222 ...
Page 223: ...9 Insert the new imaging kit Maintain the printer 223 ...
Page 225: ...Replacing the waste toner bottle 1 Open door B Maintain the printer 225 ...
Page 238: ...2 Remove the used ADF pick roller Maintain the printer 238 ...
Page 240: ...5 Insert the new ADF separator roller until it clicks into place Maintain the printer 240 ...
Page 250: ...2 Remove the ADF pick roller Maintain the printer 250 ...
Page 252: ...5 Insert the ADF separator roller until it clicks into place Maintain the printer 252 ...


