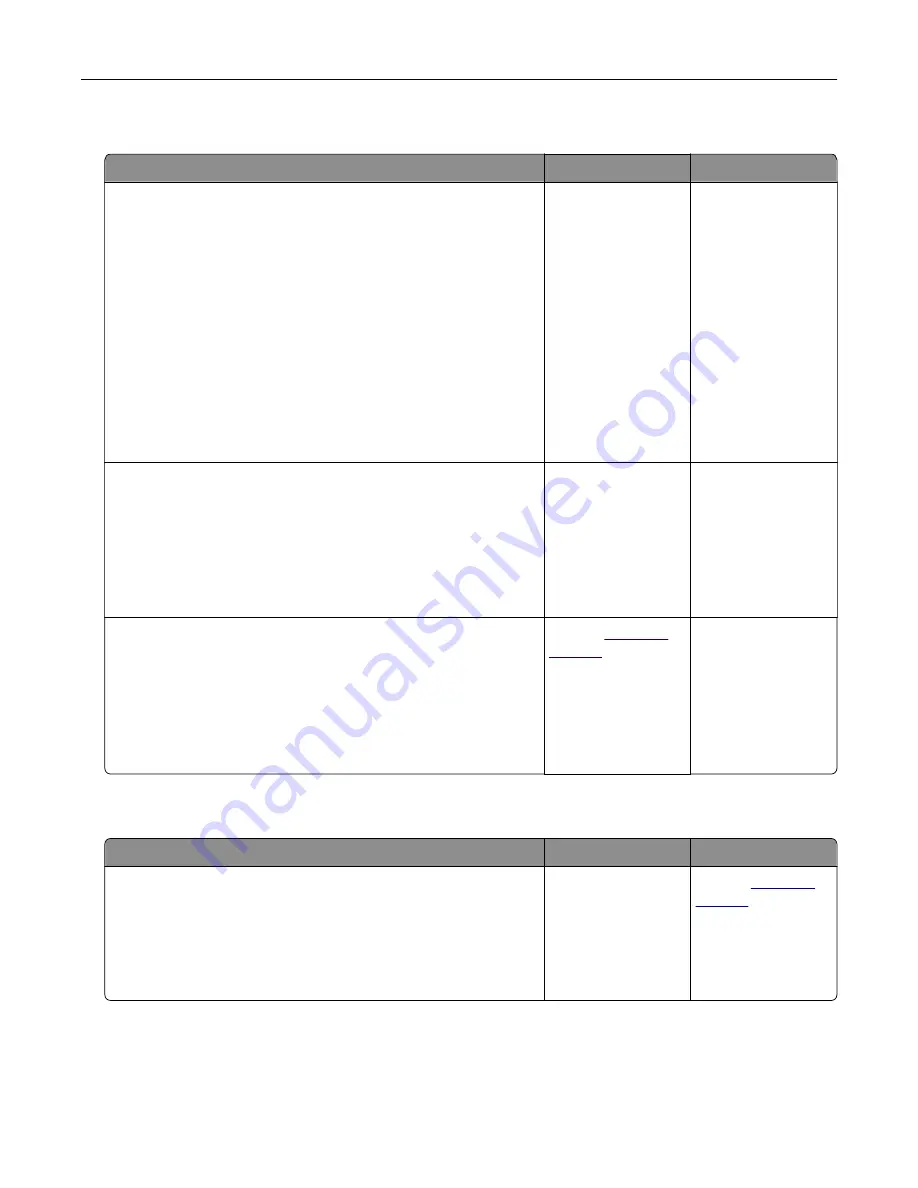
Paper frequently jams
Action
Yes
No
Step 1
a
Remove the tray.
b
Check if paper is loaded correctly.
Notes:
•
Make sure that the paper guides are positioned correctly.
•
Make sure that the stack height is below the maximum
paper fill indicator.
•
Make sure to print on recommended paper size and type.
c
Insert the tray.
d
Print the document.
Do paper jams occur frequently?
Go to step 2.
The problem is
solved.
Step 2
a
From the home screen, touch
Settings
>
Paper
>
Tray
Configuration
>
Paper Size/Type
.
b
Set the correct paper size and type.
c
Print the document.
Do paper jams occur frequently?
Go to step 3.
The problem is
solved.
Step 3
a
Load paper from a fresh package.
Note:
Paper absorbs moisture due to high humidity. Store
paper in its original wrapper until you are ready to use it.
b
Print the document.
Do paper jams occur frequently?
Contact
The problem is
solved.
Jammed pages are not reprinted
Action
Yes
No
a
From the home screen, touch
Settings
>
Device
>
Notifications
>
Jam Content Recovery
.
b
In the Jam Recovery menu, touch
On
or
Auto
.
c
Print the document.
Are the jammed pages reprinted?
The problem is
solved.
Contact
Troubleshoot a problem
310
Summary of Contents for XC4342
Page 64: ...3 Remove the fax cover 4 Remove the fax bracket Set up install and configure 64 ...
Page 65: ...5 Install the fax card to the bracket Set up install and configure 65 ...
Page 70: ...4 Install the ISP into its housing Set up install and configure 70 ...
Page 71: ...5 Attach the housing to the controller board shield Set up install and configure 71 ...
Page 76: ...Set up install and configure 76 ...
Page 84: ...Set up install and configure 84 ...
Page 85: ...3 Install the wireless module into its housing Set up install and configure 85 ...
Page 86: ...4 Attach the wireless module to the controller board shield Set up install and configure 86 ...
Page 88: ...6 Attach the controller board shield Set up install and configure 88 ...
Page 205: ...2 Remove the used toner cartridge 3 Unpack the new toner cartridge Maintain the printer 205 ...
Page 206: ...4 Insert the new toner cartridge 5 Close door B Maintain the printer 206 ...
Page 207: ...Replacing the black imaging unit 1 Open door B Maintain the printer 207 ...
Page 209: ...3 Remove the toner cartridges Maintain the printer 209 ...
Page 210: ...4 Disconnect the imaging kit cable Maintain the printer 210 ...
Page 214: ...9 Insert the imaging kit Maintain the printer 214 ...
Page 216: ...Replacing the color imaging kit 1 Open door B Maintain the printer 216 ...
Page 218: ...3 Remove the toner cartridges Maintain the printer 218 ...
Page 219: ...4 Disconnect the imaging kit cable Maintain the printer 219 ...
Page 220: ...5 Remove the used imaging kit Maintain the printer 220 ...
Page 222: ...8 Insert the black imaging unit into the new imaging kit Maintain the printer 222 ...
Page 223: ...9 Insert the new imaging kit Maintain the printer 223 ...
Page 225: ...Replacing the waste toner bottle 1 Open door B Maintain the printer 225 ...
Page 238: ...2 Remove the used ADF pick roller Maintain the printer 238 ...
Page 240: ...5 Insert the new ADF separator roller until it clicks into place Maintain the printer 240 ...
Page 250: ...2 Remove the ADF pick roller Maintain the printer 250 ...
Page 252: ...5 Insert the ADF separator roller until it clicks into place Maintain the printer 252 ...


