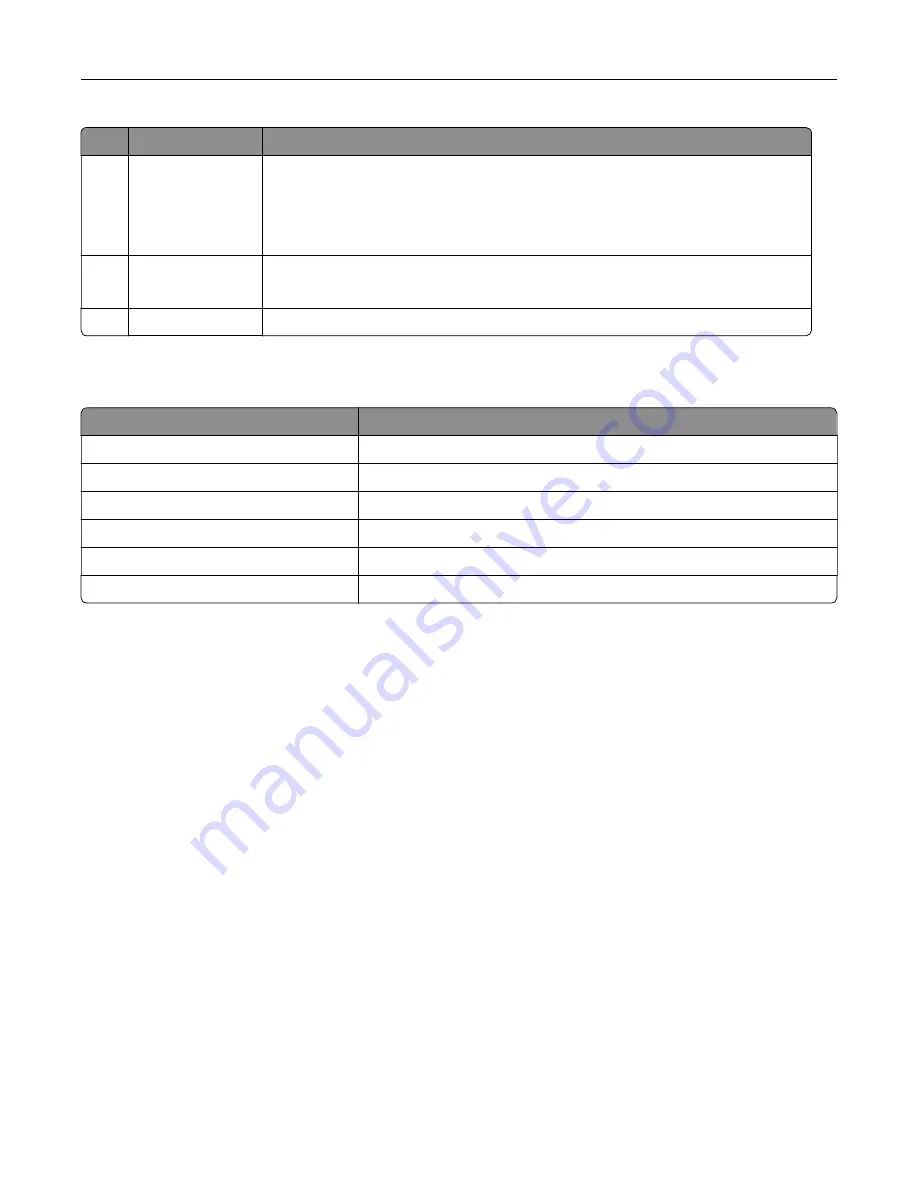
Control panel part Function
1
Power button
•
Turn on or turn off the printer.
Note:
To turn off the printer, press and hold the power button for five seconds.
•
Set the printer to Sleep mode.
•
Wake the printer from Sleep or Hibernate mode.
2
Display
•
View the printer messages and supply status.
•
Set up and operate the printer.
3
Indicator light
Check the status of the printer.
Understanding the status of the indicator light
Indicator light
Printer status
Off
The printer is off.
Solid blue
The printer is ready.
Blinking blue
The printer is printing or processing data.
Blinking red
The printer requires user intervention.
Solid amber
The printer is in Sleep mode.
Blinking amber
The printer is in Deep Sleep or Hibernate mode.
Selecting paper
Paper guidelines
Use the appropriate paper to prevent jams and help ensure trouble
‑
free printing.
•
Always use new, undamaged paper.
•
Before loading paper, know the recommended printable side of the paper. This information is usually
indicated on the paper package.
•
Do not use paper that has been cut or trimmed by hand.
•
Do not mix paper sizes, types, or weights in the same tray; mixing results in jams.
•
Do not use coated papers unless they are specifically designed for electrophotographic printing.
For more information, see the
Paper and Specialty Media Guide
.
Paper characteristics
The following paper characteristics affect print quality and reliability. Consider these factors before printing on
them.
Learn about the printer
12
Summary of Contents for XC4342
Page 64: ...3 Remove the fax cover 4 Remove the fax bracket Set up install and configure 64 ...
Page 65: ...5 Install the fax card to the bracket Set up install and configure 65 ...
Page 70: ...4 Install the ISP into its housing Set up install and configure 70 ...
Page 71: ...5 Attach the housing to the controller board shield Set up install and configure 71 ...
Page 76: ...Set up install and configure 76 ...
Page 84: ...Set up install and configure 84 ...
Page 85: ...3 Install the wireless module into its housing Set up install and configure 85 ...
Page 86: ...4 Attach the wireless module to the controller board shield Set up install and configure 86 ...
Page 88: ...6 Attach the controller board shield Set up install and configure 88 ...
Page 205: ...2 Remove the used toner cartridge 3 Unpack the new toner cartridge Maintain the printer 205 ...
Page 206: ...4 Insert the new toner cartridge 5 Close door B Maintain the printer 206 ...
Page 207: ...Replacing the black imaging unit 1 Open door B Maintain the printer 207 ...
Page 209: ...3 Remove the toner cartridges Maintain the printer 209 ...
Page 210: ...4 Disconnect the imaging kit cable Maintain the printer 210 ...
Page 214: ...9 Insert the imaging kit Maintain the printer 214 ...
Page 216: ...Replacing the color imaging kit 1 Open door B Maintain the printer 216 ...
Page 218: ...3 Remove the toner cartridges Maintain the printer 218 ...
Page 219: ...4 Disconnect the imaging kit cable Maintain the printer 219 ...
Page 220: ...5 Remove the used imaging kit Maintain the printer 220 ...
Page 222: ...8 Insert the black imaging unit into the new imaging kit Maintain the printer 222 ...
Page 223: ...9 Insert the new imaging kit Maintain the printer 223 ...
Page 225: ...Replacing the waste toner bottle 1 Open door B Maintain the printer 225 ...
Page 238: ...2 Remove the used ADF pick roller Maintain the printer 238 ...
Page 240: ...5 Insert the new ADF separator roller until it clicks into place Maintain the printer 240 ...
Page 250: ...2 Remove the ADF pick roller Maintain the printer 250 ...
Page 252: ...5 Insert the ADF separator roller until it clicks into place Maintain the printer 252 ...


