SERVICE MANUAL
2-16
9G9002 – 2011-08-15
[1]
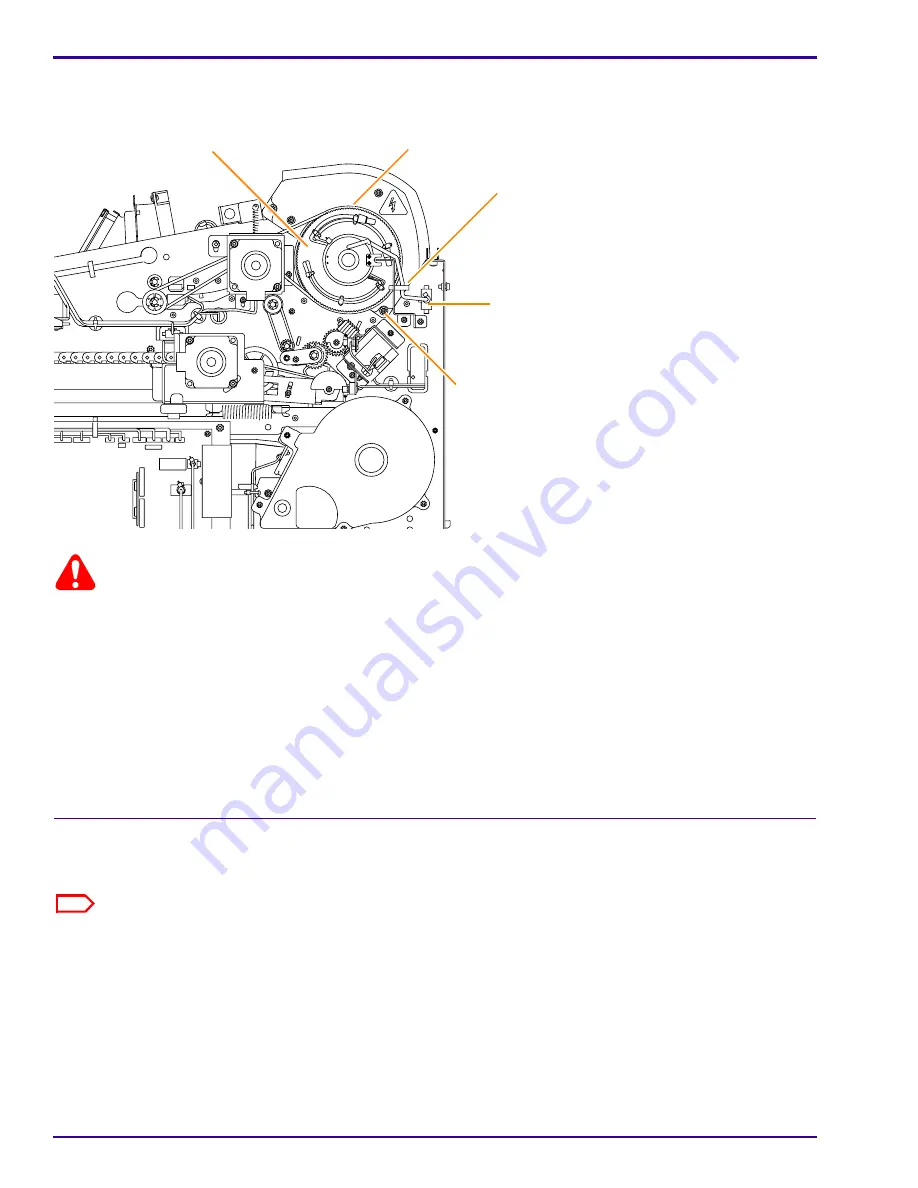
Remove the 2 rear screws and bushings from the drum cover, 1 set on each side of the cover.
Caution
• The surface of the processor drum is easily damaged by fingernails and jewelry. Handle the processor drum with
one hand on the drum pulley and the other hand on the opposite end.
• Do not touch the silicone surface of the processor drum.
• When removing the processor drum take care not to damage the connector.
[2]
Open the drum cover by pivoting it forward on its front screws.
[3]
Open the wire saddle that secures the connector to the partition near the DRE motherboard.
[4]
Disconnect the processor connector from the bulkhead.
[5]
Disengage the drum drive belt from the drum pulley.
[6]
Remove the processor drum and set it on a flat, stable surface.
Installation
Reverse the steps in the removal procedure. The C-shaped feature on the slip ring assembly of the drum must
straddle the bracket.
Note
Whenever a new processor drum is installed, you must adjust the processor temperature (see
“Processor—Drum
Temperature Adjustment”
).
Drum Cover Screw,
rear
Processor Drum
Wire Saddle
Processor Connector
Drum Drive Belt


