84 - Inepro Back Office Suite
Steps
Database and non-database text
§
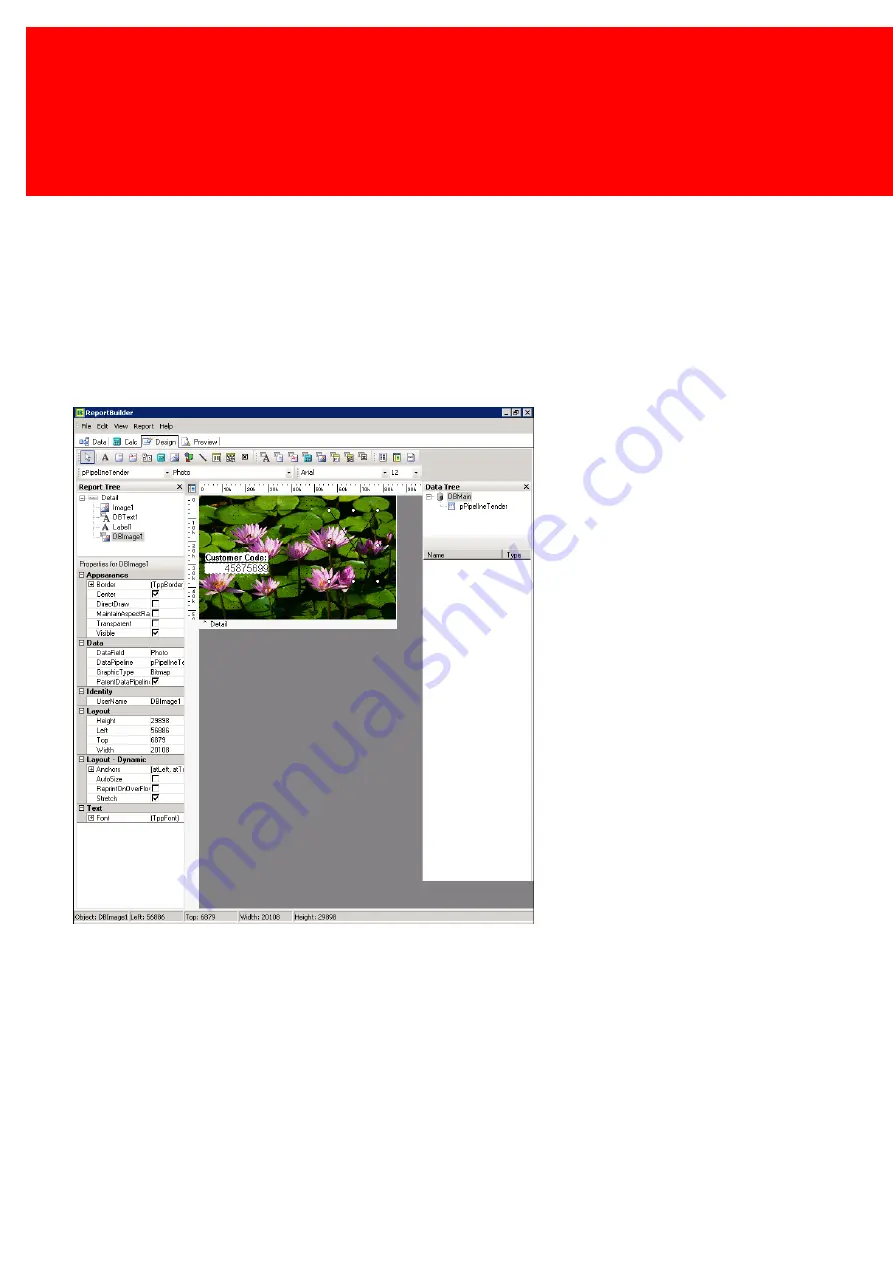
Now we will add the User Number on the card.
§
Select 'DBText', this is a database sensitive text.
§
Set the font to 'Arial' en font size to '12'.
§
Set 'Transparent' to 'enabled' to let the background show, and to 'disabled' to create a fixed colour backdrop. We will
disable this as the water lily image is too distracting.
§
On the lower right the properties of the object that is selected are shown.
§
Set the 'Datafield' to 'Customer Code' (remember each data component must be linked to the database like this (via data
field)).
§
Create a label. It now has the same font and size as the 'DBText' object. Set the label text to 'Customer code:' and place
it before de DBText.
Summary of Contents for Back Office Suite
Page 2: ......
Page 9: ...Introduction PartI ...
Page 11: ...3 Overview IBOS Overview IBOS ...
Page 12: ......
Page 13: ...Hardware Installation PartII ...
Page 20: ......
Page 21: ...Software installation PartIII ...
Page 38: ......
Page 39: ...Steps PartIV ...
Page 120: ...112 Inepro Back Office Suite Steps Image 1 Image 2 Image 3 ...
Page 149: ...Advanced Tasks PartV ...
Page 153: ...145 Replacing a server PayCon Server ...
Page 157: ...Terms Concepts PartVI ...
Page 159: ...Configuration PartVII ...
Page 177: ...169 Import Data If the installation was successful the final screen of the installer is shown ...
Page 179: ...171 Import Data The following screen will appear ...
Page 206: ......
Page 207: ...Change Interface Settings PartVIII ...
Page 209: ...USB Stick Procedure PartIX ...
Page 211: ...Balance Scheduler PartX ...
Page 214: ......
Page 215: ...Scheduled Tasks PartXI ...
Page 218: ......
Page 219: ...Troubleshooting PartXII ...
Page 234: ......
Page 235: ...Glossery PartXIII ...
Page 238: ......
Page 239: ...Appendices PartXIV ...
Page 244: ...236 Inepro Back Office Suite Appendices ...
Page 246: ......
Page 248: ......


