74 - Inepro Back Office Suite
Steps
Printer Pool(s)
Prerequisites:
§
Printer Rules (Only if used)
Where
§
Main Menu\Advanced\Printer Pools
Printer Pool(s)
A Printer Pool within the Inepro Back Office Suite is a collection of printers that can use follow-me. That is if one printer in
the pool is busy, broken or for any other reason not the first choice to print at, the job can be collected by another printer in
that pool.
While a printer pool can exist over more than one server on multiple sites, the follow-me functionality cannot. So it only
possible to print out the job at the printers in the printer pool at the local print server.
The printers in the pool are ideally all the same brand and type. But this is not required. It is best to use at least use
printers of the same brand with the same support for Postscript and / or PCL.
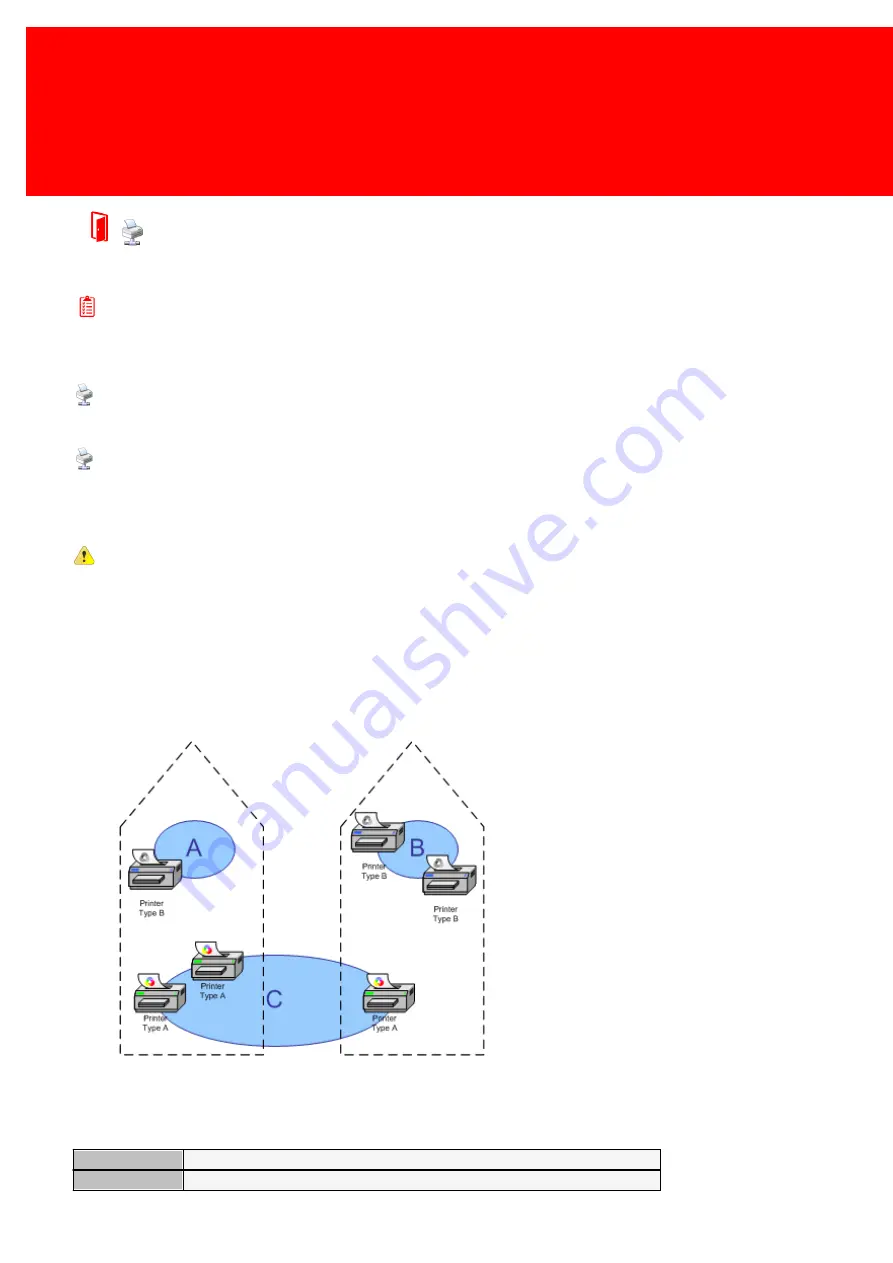
In order to manage the follow-me functionality organize the printers / Multi Functional Devices (MFD's) in follow-me or
printer pools. These pools can be freely defined, for example:
Printer pool A:
A black & white printer without follow-me
possibilities
Printer pool B:
2 black & white printers with follow-me enabled
Printer pool C:
3 colour printers with follow-me enabled
So a user printing to Printer Pool 'C' on the server on the site on the left side will only be able to print on the two printers in
the pool on the left side. And a user printing to Printer Pool 'C' on the server on the site on the right side will only be able to
print on the only printer available on the right side and will have no follow-me functionality.
The Printer Pool properties:
Name
The name of the printer pool
Printer Rule Set
The set of printer rules linked to this pool
Summary of Contents for Back Office Suite
Page 2: ......
Page 9: ...Introduction PartI ...
Page 11: ...3 Overview IBOS Overview IBOS ...
Page 12: ......
Page 13: ...Hardware Installation PartII ...
Page 20: ......
Page 21: ...Software installation PartIII ...
Page 38: ......
Page 39: ...Steps PartIV ...
Page 120: ...112 Inepro Back Office Suite Steps Image 1 Image 2 Image 3 ...
Page 149: ...Advanced Tasks PartV ...
Page 153: ...145 Replacing a server PayCon Server ...
Page 157: ...Terms Concepts PartVI ...
Page 159: ...Configuration PartVII ...
Page 177: ...169 Import Data If the installation was successful the final screen of the installer is shown ...
Page 179: ...171 Import Data The following screen will appear ...
Page 206: ......
Page 207: ...Change Interface Settings PartVIII ...
Page 209: ...USB Stick Procedure PartIX ...
Page 211: ...Balance Scheduler PartX ...
Page 214: ......
Page 215: ...Scheduled Tasks PartXI ...
Page 218: ......
Page 219: ...Troubleshooting PartXII ...
Page 234: ......
Page 235: ...Glossery PartXIII ...
Page 238: ......
Page 239: ...Appendices PartXIV ...
Page 244: ...236 Inepro Back Office Suite Appendices ...
Page 246: ......
Page 248: ......


