Working with Pictures and Videos
161
7
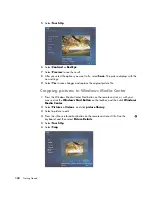
Use the mouse and keyboard to do one or more of the following:
Select the arrows under the picture to move the picture side to side, or up
or down.
Select the magnifying glass tools to move the cropping tool in or out.
Select the rotate tool to move the cropping tool to a vertical or horizontal position.
8
After you select the settings you want to fix, select
Save
. Once you save the picture,
you cannot revert to the original picture.
9
Select
Yes
to save changes and replace the original picture file.
Rotating pictures
If your picture appears horizontally or vertically, and you want to change the orientation,
you can change it in Windows Media Center:
1
Press the Windows Media Center Start Button on the remote control, or, with your
mouse, click the
Windows Start Button
on the taskbar, and then click
Windows
Media Center
.
2
Select
Pi Videos
, and click
picture library
.
3
Select the picture you want to rotate.
4
Right-click the picture, or press the
i
(More information) button on the remote
control, and then select
Rotate
. Rotation occurs in 90° increments.
Printing Pictures in Windows Media Center
1
Press the Windows Media Center Start button on the remote control, or, with your
mouse, click the
Windows Start Button
on the taskbar, and then click
Windows
Media Center
.
2
Select
Pi Videos
, and click
picture library
.
3
Select the picture you want to print.
4
Press the Print button on the remote control.
Or
Press Ctrl+D on the keyboard or the
i
(More information) button on the remote
control, and then select
Picture Details
. Select
, and then select
again.
5
Follow any onscreen instructions.
NOTE:
You must set up your printer before you try to print from Windows Media Center;
otherwise, by default, the file is saved to the Documents folder when you try to print the
picture.
Summary of Contents for A1710n - Pavilion - 1 GB RAM
Page 1: ...Getting Started ...
Page 10: ...x Getting Started ...
Page 26: ...16 Getting Started ...
Page 66: ...56 Getting Started ...
Page 74: ...64 Getting Started ...
Page 84: ...74 Getting Started ...
Page 102: ...92 Getting Started ...
Page 108: ...98 Getting Started ...
Page 134: ...124 Getting Started ...
Page 156: ...146 Getting Started ...
Page 188: ...178 Getting Started ...
Page 194: ...Part Number 5991 6837 ...

